Introduction
In the realm of homemade beverages, fermented drinks often steal the spotlight due to their unique flavors and health benefits. While many associate fermentation with the production of alcohol, there are numerous non-alcoholic options that can be equally delightful and nutritious. One such example is fermented mulberry syrup infused with rock sugar. This sweet, tangy syrup not only captures the essence of ripe mulberries but also enhances their natural sweetness through the gentle process of fermentation, all without the addition of any alcoholic content.
Mulberries (Morus nigra, Morus alba, or Morus rubra) are rich in antioxidants, vitamins, and minerals, making them a valuable addition to any diet. Their slightly tart, yet sweet flavor pairs beautifully with the crystalline sweetness of rock sugar, creating a syrup that can be enjoyed on its own, used as a topping for desserts, or mixed into beverages for an extra touch of flavor.
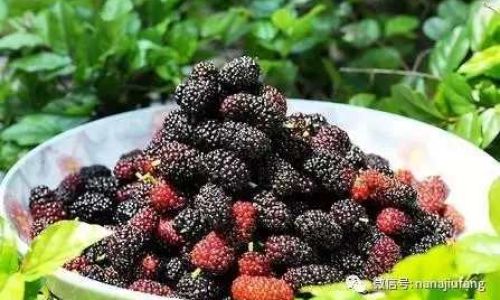
In this article, we will delve into the step-by-step process of crafting a non-alcoholic fermented mulberry syrup using mulberries and rock sugar. This recipe promises to deliver a naturally sweetened, tangy syrup that retains the nutritional benefits of mulberries while adding a delightful twist to your culinary repertoire.
Materials Needed
Before diving into the recipe, ensure you have the following materials on hand:
- Fresh mulberries (preferably organic and pesticide-free)
- Rock sugar (also known as crystal sugar or sugar cane crystals)
- A large, clean glass jar with a tight-fitting lid
- A wooden or silicone spoon (to avoid scratching the jar’s surface)
- A fine-mesh strainer or cheesecloth
- A clean, dry bowl and funnel (for bottling the syrup)
- Clean, airtight glass bottles for storing the finished syrup
- A kitchen scale (optional, but helpful for accurate measurements)
- Distilled water (optional, if you prefer a thinner consistency)
Step-by-Step Recipe
Step 1: Preparation and Cleaning
Begin by inspecting your mulberries carefully. Remove any stems, leaves, or damaged berries. Rinse the mulberries gently under cold running water. It’s crucial not to soak them as this could wash away some of their natural flavors and nutrients. Pat them dry using a clean kitchen towel or let them air-dry on a paper towel-lined tray.
Step 2: Measuring and Mixing
Once the mulberries are dry, weigh them out. For this recipe, aim for approximately 2 kilograms (4.4 pounds) of mulberries. Place the mulberries in your large, clean glass jar.
Next, measure out the rock sugar. The general ratio for this recipe is 1 part mulberries to 0.5 parts rock sugar (by weight). Therefore, you will need around 1 kilogram (2.2 pounds) of rock sugar. Add the sugar evenly over the mulberries in the jar, ensuring it’s distributed throughout.
Step 3: Gentle Mixing
Using your wooden or silicone spoon, gently stir the mulberries and sugar together. The goal here is to coat each mulberry with sugar without crushing them. Be delicate with your mixing to preserve the berries’ integrity.
Step 4: Sealing and Fermentation
Once the mulberries and sugar are well combined, cover the jar with its tight-fitting lid. Place the jar in a cool, dark place where temperatures remain consistent, ideally between 68°F to 77°F (20°C to 25°C). This environment is optimal for the natural yeasts and bacteria present on the mulberries to initiate fermentation without the risk of contamination.
Step 5: Observing and Stirring
Over the next few days, you may notice bubbles forming on the surface of the mixture and a slight fizz when you open the jar. This is a sign that fermentation has begun. Every 2-3 days, gently stir the mixture with your spoon to redistribute the sugars and ensure even fermentation.
Step 6: Taste Testing and Straining
After approximately 7-10 days of fermentation (the exact time may vary depending on temperature and the activity of the natural yeasts), start taste-testing the syrup. You’re looking for a balance between sweetness and tanginess. Once you’re satisfied with the flavor, it’s time to strain out the mulberries.
Set up your fine-mesh strainer or cheesecloth over a large bowl. Carefully pour the fermented mixture through the strainer, allowing the syrup to drip through while retaining the mulberry solids. Press gently on the solids with the back of the spoon to extract as much syrup as possible, but avoid forcing the pulp through as this can cloud the syrup.
Step 7: Bottling and Storing
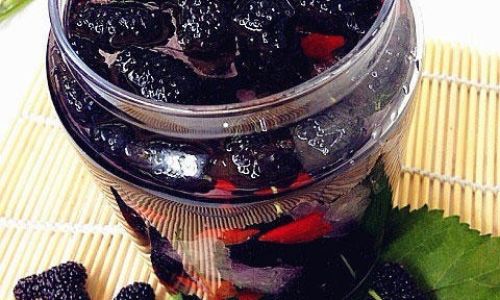
Once all the syrup has been strained, discard the mulberry solids or use them for composting. Clean your glass bottles and funnel, then pour the syrup into the bottles using the funnel. Seal the bottles tightly and store them in a cool, dark place.
Step 8: Enjoying Your Syrup
Your non-alcoholic fermented mulberry syrup is now ready to enjoy! It can be served chilled over ice, mixed into smoothies, drizzled over yogurt or ice cream, or used as a sweetener in teas and coffees. The syrup will continue to develop in flavor over time, so feel free to experiment with different uses and enjoy its evolving taste.
Troubleshooting Tips
- Mold Formation: If you notice mold forming on the surface of your fermentation, discard the entire batch immediately. This indicates contamination, likely due to improper sanitation or exposure to airborne yeasts and molds.
- Too Sweet or Tangy: If your syrup is too sweet, you can add a bit of lemon juice to balance it out. Conversely, if it’s too tangy, you can mix in a small amount of additional rock sugar to sweeten it.
- Consistency Adjustment: If you prefer a thinner syrup, you can gently heat a portion of it with a small amount of distilled water until it reaches your desired consistency, then let it cool before bottling.
Conclusion
Making non-alcoholic fermented mulberry syrup with rock sugar is a rewarding culinary endeavor that combines the art of fermentation with the natural sweetness of mulberries. This syrup not only adds a unique flavor dimension to your meals and drinks but also offers a range of health benefits associated with mulberries. By following the steps outlined in this recipe, you can create a delicious, nutritious syrup that is perfect for everyday use or as a thoughtful gift for friends and family.
Remember, the beauty of homemade ferments lies in their adaptability. Feel free to experiment with different ratios of mulberries to sugar, fermentation times, and even add-ins like spices or citrus zest to create your own signature syrup. Enjoy the process and savor the fruits of your fermentation labor!





0 comments