Introduction
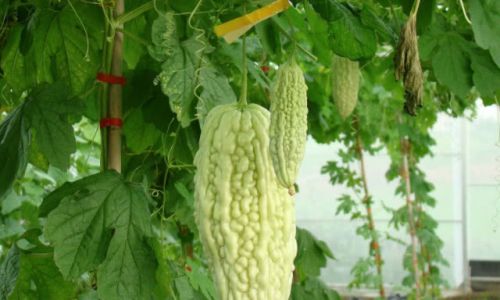
In the realm of culinary herbs and vegetables, bitter gourd (Momordica charantia), also known as balsam pear or bitter melon, holds a unique place. Its distinctively bitter flavor, which can range from subtly refreshing to intensely pungent, is both a polarizing trait and a source of its medicinal and nutritional value. Native to tropical Asia, bitter gourd has spread across the globe, becoming a staple in various cuisines, particularly in Asia, Africa, and the Caribbean. Its health benefits, attributed to vitamins, minerals, antioxidants, and hypoglycemic properties, make it a cherished ingredient for those seeking to incorporate more nutritious foods into their diets.

One effective way to preserve the nutritional integrity and unique flavor of bitter gourd is through sun-drying. This ancient preservation technique not only extends the shelf life of the vegetable but also intensifies its flavor, making it a versatile ingredient for soups, stews, and teas. Sun-dried bitter gourd can be stored for months, ready to be rehydrated and used whenever needed. This article delves into the comprehensive process of how to sun-dry fresh bitter gourd, from preparation to storage, ensuring optimal preservation and quality.
Section 1: Understanding the Basics of Sun-Drying
Before diving into the specifics of sun-drying bitter gourd, it’s crucial to grasp the fundamentals of this preservation method. Sun-drying involves exposing food to direct sunlight to evaporate moisture, thereby inhibiting the growth of microorganisms that cause spoilage. The process requires patience, as it can take several days depending on weather conditions, the thickness of the slices, and the initial moisture content of the produce.
Key considerations for successful sun-drying include:
- Weather Conditions: Ideal weather for sun-drying is sunny with moderate winds, as this accelerates the drying process while preventing mold growth. Humidity should be low to ensure effective moisture removal.
- Cleanliness: Ensuring that all surfaces and tools used in the process are clean is vital to prevent contamination.
- Thickness of Slices: Thinner slices dry faster and more uniformly than thicker ones. However, overly thin slices might dry too quickly, leading to a loss of flavor and texture.
- Sun Exposure: Direct sunlight is crucial. Placing the slices on a rack or tray that allows for maximum exposure to sunlight is optimal.
Section 2: Preparing the Bitter Gourd for Sun-Drying
Step 1: Selection and Harvesting
Choose bitter gourds that are firm, have a vibrant green or yellow color (depending on ripeness preference), and are free from blemishes, soft spots, or signs of decay. Harvest the gourds when they are fully mature but still tender. Overripe gourds may have seeds that are too hard and bitter, affecting the final product.
Step 2: Washing and Cleaning
Thoroughly wash the gourds under running water to remove dirt, pesticides, and other contaminants. Use a vegetable brush if necessary to scrub off any stubborn dirt. Pat them dry using a clean cloth or paper towels to avoid introducing additional moisture during the drying process.
Step 3: Seeding and Slicing
Cut the gourds lengthwise into halves or quarters, depending on their size. Scoop out the seeds and the spongy, white pulp using a spoon. The seeds can be discarded or saved for planting, while some recipes call for roasting and using them as a seasoning.
Slice the deseeded gourds into uniform pieces, typically around 1/4 to 1/2 inch thick. Uniform thickness ensures consistent drying times and a more appealing final appearance.
Step 4: Pretreatment (Optional)
While not strictly necessary, some people prefer to blanch or soak the slices in saltwater before drying to enhance flavor retention and color. Blanching involves immersing the slices in boiling water for a brief period (usually 2-3 minutes), then plunging them into ice water to stop the cooking process. Soaking in a saltwater solution (about 1 tablespoon of salt per quart of water) for an hour can also help draw out excess moisture and intensify flavors.
Section 3: The Sun-Drying Process
Step 1: Laying Out the Slices
Spread the prepared bitter gourd slices in a single layer on clean, dry racks or trays. Ensure there is ample space between slices to allow for even drying. Avoid overcrowding, as this can slow down the process and increase the risk of mold.

Step 2: Positioning for Optimal Sun Exposure
Place the racks or trays in a sunny, open area where they will receive direct sunlight for most of the day. An outdoor patio, rooftop, or any open space that gets ample sunlight is ideal. Rotate the slices periodically to ensure even drying on all sides.
Step 3: Monitoring and Turning
Check the slices daily, turning them over to expose the other side to the sun. This helps achieve uniform drying and prevents one side from becoming overly dry while the other remains moist. Depending on the weather and thickness of the slices, the drying process can take anywhere from 2 to 7 days.
Step 4: Completing the Drying Process
Once the slices are fully dried, they should be brittle, dark in color, and have a concentrated aroma. To test for dryness, break a slice in half; it should snap cleanly without bending. If there’s still moisture inside, continue drying for another day or two.
Section 4: Storing Sun-Dried Bitter Gourd
Step 1: Cooling and Packaging
Allow the dried slices to cool completely before storing. This prevents condensation, which can lead to mold growth. Store them in airtight containers, preferably glass or stainless steel, to avoid any chemical reactions with plastic.
Step 2: Labeling and Placement
Label the containers with the date and contents for easy identification. Store the sun-dried bitter gourd in a cool, dark place, such as a pantry or cupboard. Properly stored, sun-dried bitter gourd can last for several months to a year.
Step 3: Rehydrating for Use
When ready to use, rehydrate the slices by soaking them in water for about 30 minutes to an hour, depending on the desired texture. They can then be incorporated into various dishes, from stir-fries and soups to teas and smoothies.
Conclusion
Sun-drying fresh bitter gourd is a rewarding endeavor that not only preserves the vegetable’s nutritional value and flavor but also adds a unique twist to culinary creations. By following the steps outlined in this guide, from careful selection and preparation to meticulous drying and storage, you can enjoy the versatility and longevity of sun-dried bitter gourd throughout the year. This ancient preservation technique not only honors the tradition of harnessing nature’s bounty but also empowers you to create delicious and healthy meals that celebrate the essence of bitter gourd. Happy drying!


0 comments