Table of content
Rendering pork fat, or lard, is a traditional culinary practice that has been around for centuries. Lard, known for its rich flavor and versatility, is a staple in many kitchens, especially those that cherish home-cooked meals and traditional recipes. From frying foods to baking, lard adds a unique depth of flavor that is hard to replicate with other oils. In this comprehensive guide, we will walk you through the process of rendering pork fat from scratch, ensuring you end up with a high-quality, delicious product.
Understanding Pork Fat
Before diving into the rendering process, it’s essential to understand the types of pork fat you can use. The most common sources are fresh pork fat trimmings, pork belly (with its layer of fat), and even bacon, though the latter will yield a smokier flavor due to its preservation process. Fresh, unsalted pork fat is preferred for a neutral, clean taste.
Preparation and Safety
Rendering pork fat involves heating the fat to a point where it melts and separates from the solid tissue. This process can produce high temperatures and splattering, so safety should be your top priority. Here are some essential safety tips:
- Work in a Well-Ventilated Area: Rendering can produce strong odors and steam. Ensure your kitchen is well-ventilated to avoid discomfort.
- Use a Heavy-Bottomed Pot: This prevents hot spots and uneven heating, which can cause the fat to burn.
- Wear Protective Gear: Consider wearing an apron, oven mitts, and protective eyewear to shield yourself from splatters and steam.
- Keep Children and Pets Away: The process can be hazardous, so it’s best to keep them out of the kitchen during rendering.
Equipment and Ingredients
To render pork fat successfully, you’ll need:
- Fresh pork fat (about 2-3 pounds for a starter batch)
- A heavy-bottomed pot or Dutch oven
- A fine-mesh skimmer or spoon for removing impurities
- A heatproof container for storing the rendered lard
- Cheesecloth or a fine sieve for filtering
- A thermometer (optional, but helpful for monitoring temperatures)
- Salt (optional, for seasoning the lard after rendering)
Step-by-Step Rendering Process
Step 1: Prepare the Pork Fat
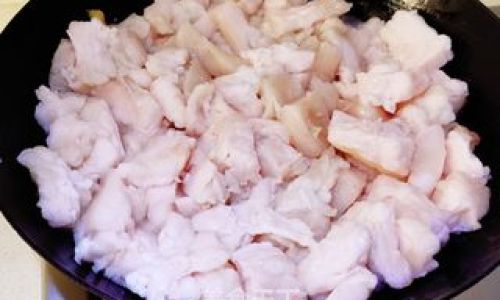
- Trim and Clean: If using pork belly or other cuts with fat, trim off any meat, skin, or sinew. You want a clean batch of fat only.
- Chop into Small Pieces: Cutting the fat into smaller chunks will speed up the rendering process. Aim for pieces around 1-2 inches in size.
Step 2: Start the Rendering
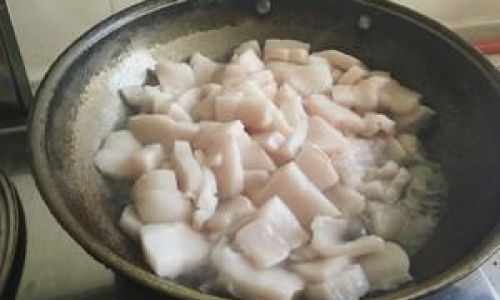
- Place Fat in Pot: Add the chopped pork fat to your heavy-bottomed pot. Do not add any water or oil; the fat contains enough moisture to start the rendering process.
- Heat Gently: Set the pot over medium-low heat. The goal is to melt the fat slowly and evenly, avoiding scorching.
Step 3: Monitor and Stir
- Stir Occasionally: As the fat begins to melt, stir gently to ensure even heating. This also helps to separate the fat from any solid impurities.
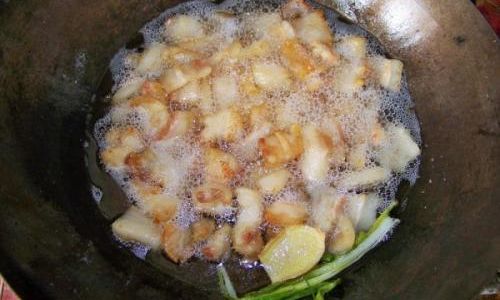
- Watch for Bubbles: As the temperature rises, you’ll see bubbles forming and the fat turning clear. This is a good sign that the rendering is progressing smoothly.
Step 4: Skim Impurities
- Use a Skimmer: Once the fat starts to render, impurities like protein particles and membrane fragments will rise to the surface. Use a fine-mesh skimmer to remove these as they appear.
- Be Patient: Skimming is a crucial step for obtaining clear, pure lard. Take your time and remove as many impurities as possible.
Step 5: Continue Rendering
- Adjust Heat if Necessary: As the fat continues to render, you may need to adjust the heat to maintain a gentle simmer. Avoid letting the pot boil vigorously, which can cause the fat to splatter and burn.
- Monitor Temperature: If using a thermometer, aim to keep the temperature around 250-275°F (121-135°C). This range ensures the fat renders efficiently without burning.
Step 6: Strain and Cool
- Remove Solids: Once most of the fat has rendered and the remaining solids (cracklings) are golden brown and crispy, remove the pot from heat. Let it cool slightly.
- Strain the Fat: Line a heatproof container with cheesecloth or a fine sieve and pour the rendered fat through it. This will catch any remaining impurities.
- Discard Solids: The cracklings can be saved for snacks or discarded. They are high in protein and can be quite tasty.
Step 7: Store the Lard
- Let it Cool Completely: Place the strained fat in a cool, dark place to solidify. Lard will solidify at room temperature, forming a white or pale yellow block.
- Transfer to Airtight Container: Once solid, transfer the lard to an airtight container. Label it with the date and store it in a cool, dark cupboard or refrigerator.
Seasoning and Usage
While some prefer their lard unsalted, you can add a pinch of salt before storing if you like. Seasoned lard adds an extra layer of flavor to your cooking.
Lard is incredibly versatile. Use it for frying, baking, or even as a spread on bread. Its high saturation makes it ideal for high-heat cooking, providing a crispy exterior and moist interior to fried foods.
Conclusion
Rendering pork fat may seem like a simple task, but achieving perfect lard requires patience, attention to detail, and a bit of culinary finesse. By following this guide, you’ll be able to produce high-quality, delicious lard that enhances the flavor of your dishes and brings a touch of tradition to your kitchen. Remember, safety first, and enjoy the satisfying process of transforming simple pork fat into a culinary treasure.
0 comments