Table of content
Introduction
Morels, scientifically known as Morchella species, are highly esteemed mushrooms renowned for their unique flavor, texture, and nutritional benefits. These fungi are a culinary delight, often featured in gourmet dishes worldwide. However, their seasonal availability and perishable nature can be challenging for enthusiasts who wish to enjoy them year-round. This comprehensive guide aims to provide detailed insights on how to preserve morels effectively, ensuring their freshness, flavor, and nutritional integrity are retained for extended periods.
Understanding Morels
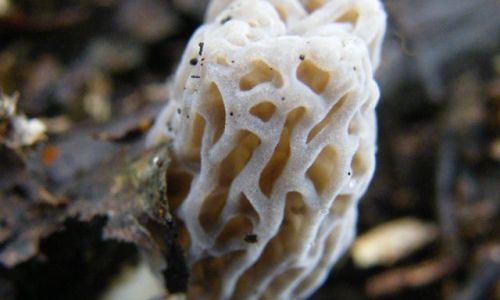
Before diving into preservation techniques, it’s crucial to understand the basic characteristics of morels. These mushrooms have a honeycomb-like cap with a hollow interior and a sturdy stem. They are typically found in spring, growing in association with certain trees, particularly in deciduous forests. Morels come in various colors, including gray, brown, yellow, and black, each variety offering a slightly different taste profile.
Their flavor is earthy and umami-rich, making them an excellent addition to soups, risottos, and grilled dishes. Nutritionally, morels are a rich source of protein, fiber, vitamins, and minerals, including potassium, iron, and antioxidants. Their unique texture and taste make them a sought-after ingredient, but their fleeting availability necessitates proper preservation methods.

Initial Handling: Cleaning and Drying
Proper initial handling is the cornerstone of successful morel preservation. Freshly picked or purchased morels should be inspected carefully for dirt, insects, or debris. Here’s a step-by-step guide to cleaning and drying them:
-
Inspection and Sorting: Begin by sorting through the morels, discarding any that are damaged, moldy, or have an off odor.
-
Gentle Cleaning: Morels absorb water easily, so avoid soaking them. Instead, use a soft brush or a damp cloth to gently remove any surface dirt. The stems can be trimmed if they are too tough or dirty.
-
Drying: After cleaning, pat the morels dry with a clean kitchen towel or paper towels. Air-drying them on a clean kitchen towel for a few hours can further reduce moisture content.
Freezing Morels
Freezing is one of the most effective methods for preserving morels, allowing you to enjoy their fresh taste throughout the year. Here’s how to freeze them properly:
Preparation for Freezing
-
Blanching: Blanching helps to inactivate enzymes that could cause spoilage and retain the mushrooms’ color and texture. To blanch morels, submerge them in boiling water for 2-3 minutes. Use a slotted spoon to transfer them to an ice bath immediately after blanching to stop the cooking process.
-
Pat Drying: Once cooled, remove the morels from the ice bath and pat them dry with paper towels. Excess moisture can lead to freezer burn.
Freezing Techniques
-
Individually Quick Frozen (IQF): For best results, use an IQF method, where morels are frozen individually on a tray before being transferred to freezer bags. This prevents clumping and makes it easier to portion out frozen morels later.
- Spread the dried, blanched morels in a single layer on a baking sheet lined with parchment paper.
- Place the sheet in the freezer until the morels are completely frozen, which can take several hours to a day depending on your freezer’s efficiency.
- Once frozen, transfer the morels to airtight freezer bags, removing as much air as possible before sealing. Label the bags with the date and contents.
-
Freezer Bags: If an IQF setup isn’t available, you can still freeze morels in freezer bags. However, be prepared to break them apart when you need to use them.
- Place the dried, blanched morels in freezer bags, leaving some headspace to allow for expansion during freezing.
- Seal the bags, removing as much air as possible. Label and date them before placing them in the freezer.
Storage and Usage
- Storage: Keep the freezer bags in the coldest part of your freezer, ideally at 0°F (-18°C).
- Usage: When ready to use, thaw the frozen morels in the refrigerator overnight or under cold running water. They can also be cooked directly from frozen, although cooking time may need to be adjusted slightly.
Drying Morels
Drying is another excellent preservation method that concentrates the mushrooms’ flavor and extends their shelf life. Here’s how to dry morels effectively:
Preparation for Drying
-
Cleaning and Slicing: Clean the morels as described earlier. For even drying, you can slice larger morels into thinner pieces.
-
Pre-Drying: Pat the cleaned morels dry thoroughly to remove any excess moisture. Air-drying them on a clean kitchen towel for a few hours can help.
Drying Techniques
-
Sun-Drying: Sun-drying is a traditional method that relies on natural heat and airflow. Lay the morels in a single layer on clean, mesh screens or trays in a sunny, well-ventilated area. Cover them with cheesecloth or a fine-mesh net to protect from insects and debris. Turn the morels occasionally to ensure even drying. This method can take several days depending on the weather.
-
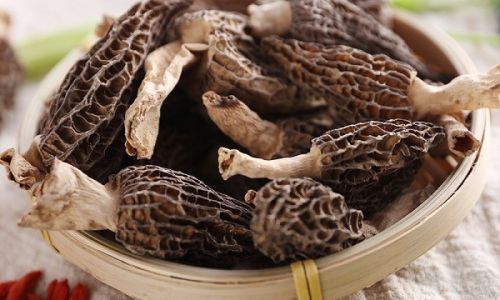
Dehydrator: Using a food dehydrator is a faster and more controlled way to dry morels. Preheat the dehydrator to a temperature between 125°F (52°C) and 135°F (57°C). Spread the morels in a single layer on the dehydrator trays. Dry them until they are brittle and slightly curved, which can take 6-12 hours depending on the size and thickness.
-
Oven-Drying: If you don’t have a dehydrator, you can use your oven’s lowest setting (typically around 150°F or 65°C) with the door slightly ajar to allow moisture to escape. Spread the morels in a single layer on baking sheets lined with parchment paper. Oven-drying can take 4-8 hours, depending on the oven’s efficiency and the size of the morels.
Storage and Usage
- Storage: Once fully dried, store the morels in airtight containers or glass jars in a cool, dark place. Properly dried morels can last for up to a year.
- Usage: Rehydrate dried morels by soaking them in hot water for about 20-30 minutes or until they are tender. The soaking liquid can be used to enhance the flavor of dishes. Dried morels can be added to soups, stews, risottos, and other dishes where their concentrated flavor will be appreciated.
Canning Morels
Canning is another viable option for preserving morels, especially if you prefer having them ready-to-use in cooked form. Here’s how to can morels:
Preparation for Canning
-
Cleaning and Preparation: Clean the morels as described earlier. You can leave them whole or slice them according to your preference.
-
Blanching: Blanch the morels in boiling water for 2-3 minutes to inactivate enzymes and retain color. Plunge them into an ice bath immediately after blanching.
Canning Process
-
Jar Preparation: Sterilize the jars and lids by boiling them for at least 10 minutes. Keep them hot until ready to use.
-
Packing: Pack the blanched, cooled morels into the hot, sterile jars. You can add a light brine (saltwater solution) or cooking liquid if desired, leaving headspace as specified in your canning guide.
-
Processing: Place the filled jars in a pressure canner, ensuring they are submerged in at least 2 inches of water. Follow the manufacturer’s instructions for processing times, which typically range from 75-90 minutes at 10-15 psi for quart jars.
-
Cooling: After processing, remove the jars from the canner and let them cool on a wire rack. Check for seals by pressing the center of each lid; it should not flex up or down when pressed.
Storage and Usage
- Storage: Store canned morels in a cool, dark place. Properly canned morels can last for up to a year or more.
- Usage: Open the jars as needed. Canned morels can be used directly in cooking, added to soups, stews, or casseroles, or enjoyed on their own.
Pickling Morels
Pickling is a preservation method that not only extends the shelf life of morels but also adds a tangy, acidic flavor that complements their earthy taste. Here’s how to pickle morels:
Preparation for Pickling
-
Cleaning and Preparation: Clean the morels as described earlier. You can leave them whole or slice them into bite-sized pieces.
-
Blanching (Optional): While blanching is not strictly necessary for pickling, it can help to soften the morels slightly and prepare them for pickling brine. Blanch them for 1-2


0 comments