Introduction
Pickling fresh tender garlic sprouts is a delightful way to preserve their fresh flavor and enjoy them throughout the year. Garlic sprouts, also known as garlic scapes or garlic shoots, are the tender, curly stalks that grow from garlic bulbs before the bulbs themselves mature. These sprouts are a culinary treasure trove, offering a mild garlic flavor with a hint of sweetness and a crisp texture. Pickling them not only extends their shelf life but also enhances their taste, making them a versatile ingredient for salads, sandwiches, and various dishes.
In this article, we will explore the step-by-step process of pickling fresh tender garlic sprouts, ensuring they retain their deliciousness and crunch. We’ll cover everything from selecting the best garlic sprouts to creating the perfect pickling brine, storing the pickled sprouts, and incorporating them into your favorite recipes. By the end, you’ll be equipped with the knowledge and skills to make your own delicious pickled garlic sprouts at home.
Section 1: Selecting the Best Fresh Tender Garlic Sprouts
The first step in pickling garlic sprouts is selecting the freshest, tenderest ones available. Here are some tips to help you choose the best garlic sprouts:
-
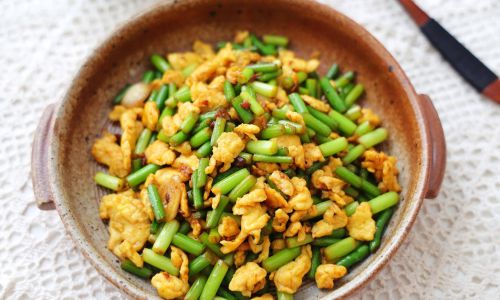
Appearance: Look for garlic sprouts that are bright green with a slight curl. They should be firm and not wilted. Avoid sprouts with yellowing or browning leaves as they may be past their prime.
-
Texture: Feel the sprouts to ensure they are crisp and not limp. Fresh sprouts should snap cleanly when bent.
-
Smell: Fresh garlic sprouts should have a mild garlic aroma. If they smell overly strong or have an off-putting odor, they may not be suitable for pickling.
-
Seasonality: Garlic sprouts are typically available in the spring, when garlic plants are actively growing. Try to buy them during this season to ensure freshness.
-
Source: If possible, buy garlic sprouts from a local farmer’s market or a reputable grocery store that sources them freshly. This way, you can be sure they haven’t been sitting in storage for too long.
Once you’ve selected your garlic sprouts, it’s important to prepare them properly before pickling. This involves washing them thoroughly to remove any dirt or debris.
Section 2: Preparing the Garlic Sprouts for Pickling
-
Washing: Rinse the garlic sprouts under cold running water. Use your fingers to gently scrub away any dirt or residue. Be careful not to bruise the sprouts, as this can cause them to soften.
-
Trimming: Cut off the woody ends of the sprouts using a sharp knife. These ends can be tough and unpleasant to eat, so it’s best to remove them.
-
Drying: Pat the sprouts dry with a clean kitchen towel or use a salad spinner to remove excess water. Moisture can cause mold during the pickling process, so it’s crucial to ensure they are as dry as possible.
-
Blanching (Optional): Some recipes recommend blanching the sprouts before pickling to help them retain their color and texture. To blanch, bring a large pot of salted water to a boil. Add the sprouts and cook for about 30 seconds to 1 minute, then immediately transfer them to an ice water bath to stop the cooking process. Drain and pat dry before pickling.
Section 3: Creating the Perfect Pickling Brine
The pickling brine is the key to flavorful, crunchy pickled garlic sprouts. Here’s a basic recipe for a delicious brine:
Ingredients:
- 1 cup distilled white vinegar (or apple cider vinegar for a milder flavor)
- 1 cup water
- 2 tablespoons sugar
- 2 tablespoons kosher salt
- 1 teaspoon whole black peppercorns
- 1 teaspoon whole mustard seeds
- 1 small red onion, thinly sliced (optional for added flavor)
- 1-2 fresh bay leaves
- 1 clove garlic, thinly sliced (optional, but adds a nice garlic aroma)
Instructions:
-
Combine Ingredients: In a medium saucepan, combine the vinegar, water, sugar, and salt. Stir until the sugar and salt are fully dissolved.
-
Add Aromatics: Add the peppercorns, mustard seeds, red onion slices, bay leaves, and sliced garlic to the saucepan. Bring the mixture to a simmer over medium heat.
-
Simmer: Let the brine simmer for about 5-10 minutes to allow the flavors to meld together. Do not let it boil vigorously, as this can reduce the liquid and intensify the flavors too much.
-
Cool: Remove the saucepan from the heat and let the brine cool to room temperature. You can also refrigerate it until it’s completely cold if you prefer.
Section 4: Pickling the Garlic Sprouts
Now that you have your prepared garlic sprouts and your brine ready, it’s time to start pickling.
Instructions:
-
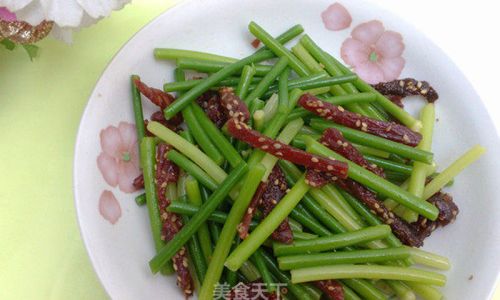
Pack the Sprouts: Pack the dried garlic sprouts tightly into a clean, sterile glass jar. Make sure the jar is large enough to hold the sprouts and enough brine to fully submerge them.
-
Pour in the Brine: Carefully pour the cooled brine over the sprouts, ensuring they are completely submerged. If necessary, use a clean, non-reactive weight (like a small glass jar filled with water) to keep the sprouts under the brine.
-
Seal the Jar: Secure the lid of the jar tightly and shake gently to distribute the brine evenly.
-
Store: Place the jar in the refrigerator. The pickling process will begin immediately, but it’s best to let the sprouts sit in the brine for at least a week before tasting. This allows the flavors to fully develop.
Section 5: Storing and Using Pickled Garlic Sprouts
Proper storage is crucial for maintaining the quality and flavor of your pickled garlic sprouts. Here are some tips:
-
Refrigeration: Always store pickled garlic sprouts in the refrigerator. The cold temperature will slow the fermentation process and help preserve the sprouts’ crunch and flavor.
-
Use Clean Utensils: When removing sprouts from the jar, use clean, non-reactive utensils to avoid introducing contaminants that could cause spoilage.
-
Check for Bubbles: Occasionally, you may notice bubbles forming in the jar. This is a natural part of the fermentation process and is nothing to worry about. However, if you notice an unpleasant odor or mold growing on the surface of the brine, discard the sprouts and start the pickling process again.
-
Duration: Pickled garlic sprouts can be stored in the refrigerator for several months, depending on the acidity of the brine and the tightness of the jar’s seal. However, it’s best to use them within a few months to ensure optimal flavor and texture.
Section 6: Incorporating Pickled Garlic Sprouts into Recipes

Pickled garlic sprouts are incredibly versatile and can be used in a variety of dishes. Here are some ideas to inspire you:
-
Salads: Add a tangy crunch to your salads by tossing in a handful of pickled garlic sprouts. They pair especially well with leafy greens, cheese, and nuts.
-
Sandwiches: Use pickled garlic sprouts as a flavorful topping for sandwiches, wraps, and burgers. Their tangy flavor complements meats, vegetables, and spreads like mayonnaise or mustard.
-
Appetizers: Serve pickled garlic sprouts as a refreshing appetizer with toothpicks or as a garnish for dips and spreads.
-
Pasta Dishes: Incorporate them into pasta salads or cooked pasta dishes for an unexpected burst of flavor and texture.
-
Soups and Stews: Add a handful of pickled garlic sprouts to your favorite soups and stews for an extra layer of complexity and crunch.
-
Grilled Dishes: Use them as a garnish for grilled meats, vegetables, and seafood to add a bright, tangy note.
Conclusion
Pickling fresh tender garlic sprouts is a simple yet rewarding way to preserve their deliciousness and enjoy them year-round. By following the steps outlined in this article, you can create your own batch of crunchy, flavorful pickled garlic sprouts that will enhance your cooking and add a unique twist to your favorite dishes. Whether you’re a seasoned pickler or new to the art of preservation, pickling garlic sprouts is a fun and fulfilling project that will leave you with a delicious treat to enjoy whenever you like. So, why wait? Gather your ingredients, roll up your sleeves, and start pickling!






0 comments