Introduction
Chili sauce is a versatile condiment that can elevate the flavor of almost any dish. Whether you enjoy it with noodles, pizzas, burgers, or simply as a dipping sauce, the fiery, tangy, and slightly sweet taste of homemade chili sauce can be incredibly satisfying. While store-bought versions are convenient, making your own chili sauce allows you to customize the ingredients to your liking, ensuring a unique and personalized flavor profile. In this comprehensive guide, we will walk you through the process of making your own chili sauce from scratch, covering everything from selecting the right peppers to storing your finished product.
Section 1: Understanding the Basics

Before diving into the recipe, it’s essential to understand the basics of chili sauce making. This includes selecting the appropriate peppers, understanding the role of each ingredient, and familiarizing yourself with the equipment you’ll need.
1 Choosing the Right Peppers
The type of peppers you use will significantly impact the flavor and heat level of your chili sauce. Here are some popular options:
- Jalapeños: These peppers offer a mild to medium heat with a slightly fruity flavor.
- Serranos: Similar to jalapeños but slightly hotter and with a more intense flavor.
- Habaneros: Known for their extreme heat and unique, tropical fruitiness.
- Bell Peppers: These add sweetness and color without much heat, making them ideal for balancing out hotter peppers.
- Cayenne Peppers: These are very hot and have a strong, distinct flavor.
- Chipotle Peppers: Smoky and moderately hot, these peppers add depth to your sauce.
When choosing peppers, consider your preferred heat level and flavor profile. You can mix and match different types to create a balanced chili sauce.
2 Ingredients Overview
In addition to peppers, here are some essential ingredients you’ll need:
- Onions and Garlic: These form the base of your sauce, adding depth and complexity.
- Tomatoes: Fresh or canned tomatoes provide acidity and natural sweetness.
- Vinegar or Citrus Juice: These help preserve the sauce and balance the flavors.
- Sugar or Honey: A touch of sweetness can help round out the heat and acidity.
- Salt and Spices: Salt enhances flavor, while spices like cumin, paprika, and oregano can add additional layers of complexity.
- Oil: A neutral oil like vegetable or canola oil is used for cooking the vegetables.
3 Equipment
Here’s a list of essential equipment for making chili sauce:
- Blender or Food Processor: For pureeing the sauce to your desired consistency.
- Large Pot: For cooking the vegetables and peppers.
- Strainer: For removing seeds and skin if desired.
- Measuring Cups and Spoons: For accurately measuring ingredients.
- Jars or Bottles: For storing your finished sauce.
- Funnel: For easily pouring the sauce into jars.
- Rubber Gloves: To protect your hands from the heat of the peppers.
Section 2: Preparing the Ingredients
Before starting the cooking process, it’s important to prepare your ingredients properly. This includes washing, chopping, and roasting the peppers and vegetables.
1 Washing and Chopping
Begin by washing all your peppers and vegetables thoroughly. Remove the stems and seeds from the peppers. If you prefer a less spicy sauce, wear rubber gloves to avoid getting pepper oils on your skin, which can cause burning.
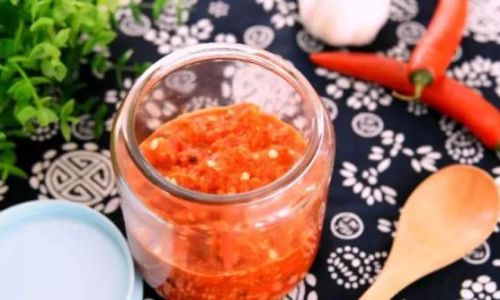
Chop the peppers, onions, and tomatoes into small pieces. This will make it easier to blend them into a smooth sauce later.
2 Roasting the Peppers
Roasting peppers can bring out their natural sweetness and deepen their flavor. Preheat your oven to 400°F (200°C). Place the peppers on a baking sheet and roast them until their skins are blistered and blackened, turning them occasionally. This should take about 15-20 minutes.
Once roasted, place the peppers in a paper bag or cover them with a kitchen towel and let them steam for about 10 minutes. This will loosen the skin, making it easier to remove. Peel off the skin, remove any remaining seeds, and chop the peppers.
Section 3: Cooking the Chili Sauce
Now that your ingredients are prepared, it’s time to start cooking.
1 Sautéing the Vegetables
Heat a large pot over medium heat and add a few tablespoons of oil. Add the chopped onions and cook until they are translucent, about 5-7 minutes. Stir in the minced garlic and cook for another minute until fragrant.
2 Adding the Peppers and Tomatoes
Add the chopped peppers, tomatoes, and any additional spices or herbs you’re using (like cumin, paprika, and oregano). Stir to combine and cook for about 15-20 minutes, stirring occasionally, until the vegetables are soft and the sauce has thickened slightly.
3 Simmering
Reduce the heat to low and let the mixture simmer for another 30-45 minutes. This will allow the flavors to meld together and the sauce to thicken further. If the sauce becomes too thick, you can add a little water or tomato juice to reach your desired consistency.
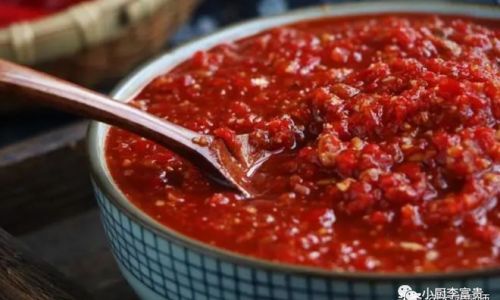
4 Seasoning
Taste the sauce and adjust the seasoning with salt, sugar, or vinegar as needed. Remember, the flavors will continue to develop as the sauce cools, so err on the side of caution when seasoning.
Section 4: Blending the Sauce
Once the sauce has cooked and the flavors have developed, it’s time to blend it to your desired consistency.
1 Pureeing
Transfer the sauce to a blender or food processor and blend until smooth. If you prefer a chunkier sauce, blend it for a shorter time or use an immersion blender to partially puree the sauce.
2 Straining (Optional)
For a smoother sauce, you can strain it through a fine-mesh strainer to remove any remaining skin or seeds. This step is optional and depends on your personal preference.
Section 5: Preserving and Storing Your Chili Sauce
Now that your chili sauce is ready, it’s important to store it properly to ensure it stays fresh and flavorful.
1 Bottling
Clean and sterilize your jars or bottles by boiling them in water for about 10 minutes. Use a funnel to pour the sauce into the jars, leaving about half an inch of headspace to allow for expansion.
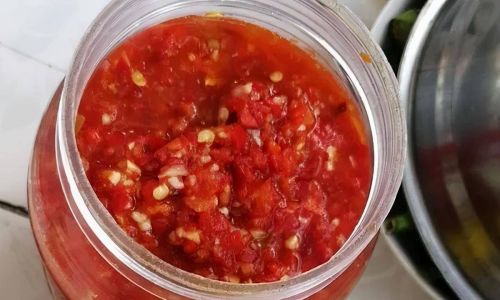
2 Sealing
Seal the jars tightly with lids and let the sauce cool to room temperature. Once cooled, you can label the jars with the date and any other relevant information.
3 Refrigeration
Store your chili sauce in the refrigerator for up to 2-3 months. If you plan to keep it for longer, consider canning it using a water-bath canning method, which will extend its shelf life to up to a year.
Section 6: Customizing Your Chili Sauce
The beauty of making your own chili sauce is that you can customize it to your liking. Here are some ideas for adding variety to your sauce:
- Fruit Additions: Incorporate fruits like apples, peaches, or mangoes for a sweet and tangy twist.
- Nuts and Seeds: Add roasted peanuts, cashews, or pumpkin seeds for added texture and protein.
- Spicy Kick: Increase the heat with additional hot peppers or a splash of hot sauce.
- Herbs and Spices: Experiment with different herbs and spices like cilantro, thyme, or smoked paprika.
- Liquids: Use different types of vinegar, beer, or even fruit juices to create unique flavors.
Conclusion
Making your own chili sauce is a rewarding culinary endeavor that allows you to create a personalized condiment tailored to your taste preferences. By understanding the basics, preparing your ingredients properly, and following a simple cooking and blending process, you can produce a delicious, fiery, and versatile chili sauce that will elevate the flavor of your favorite dishes. With endless customization options, you can enjoy a new and exciting chili sauce every time you make it. So, why wait? Gather your ingredients, roll up your sleeves, and start making your own chili sauce today!


0 comments