Introduction
White vinegar-infused garlic, also known as pickled garlic, is a versatile and flavorful ingredient that combines the pungent kick of garlic with the tangy acidity of vinegar. This culinary preparation not only enhances the shelf life of garlic but also mellows its sharpness, creating a delicate balance of flavors. Whether used as a condiment, a marinade ingredient, or a flavor enhancer in salads, soups, or stir-fries, white vinegar-infused garlic adds a unique twist to dishes. Beyond its culinary applications, this infusion is also celebrated for its potential health benefits, such as aiding digestion and boosting immunity. This article will guide you through the process of making white vinegar-infused garlic at home, from selecting the finest ingredients to troubleshooting common issues. By the end, you’ll have a jar of golden, tangy garlic cloves ready to elevate your meals.
Why White Vinegar?
White vinegar, with its clear appearance and sharp, clean taste, is an ideal medium for infusing garlic. Unlike apple cider vinegar or balsamic vinegar, which have distinct flavors of their own, white vinegar allows the garlic’s natural essence to shine while imparting a crisp acidity. Additionally, white vinegar’s high acidity level (typically 5%) creates an inhospitable environment for harmful bacteria, ensuring the garlic remains safe for consumption over months.
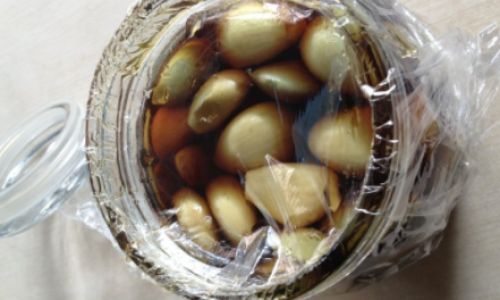
Ingredients and Tools You’ll Need
Before diving into the process, gather the following:
- Fresh garlic bulbs: Opt for firm, plump bulbs with tight, unbroken skins. Avoid sprouting or soft cloves, as they may spoil during fermentation.
- White vinegar: Use distilled white vinegar for the best results. Avoid vinegar with added flavors or colors.
- A clean glass jar: A mason jar or any airtight glass container with a lid works well. Ensure it’s large enough to hold the garlic cloves comfortably.
- A sharp knife and cutting board: For peeling and trimming the garlic.
- Optional add-ins: Dried herbs (e.g., rosemary, thyme), red pepper flakes, black peppercorns, or a bay leaf for added complexity.
Step 1: Preparing the Garlic
-
Peel the cloves:
- Separate the garlic bulbs into individual cloves.
- To peel, gently crush each clove with the flat side of a knife. The skin should loosen, making it easy to remove.
- Alternatively, soak the cloves in warm water for 10 minutes to soften the skins.
-
Trim the cloves:
- Remove any green sprouts or brown spots from the cloves. While not harmful, these can impart bitterness.
- Leave the cloves whole or slice them in half if you prefer smaller pieces.
Step 2: Sterilizing the Jar
A sterile jar is crucial to prevent unwanted bacteria from spoiling the garlic.
- Wash the jar with hot, soapy water.
- Boil it in a large pot for 10 minutes, ensuring it’s fully submerged.
- Dry it thoroughly using a clean towel or by placing it upside-down in a warm oven (150°F/65°C) for 15 minutes.
Step 3: Assembling the Jar
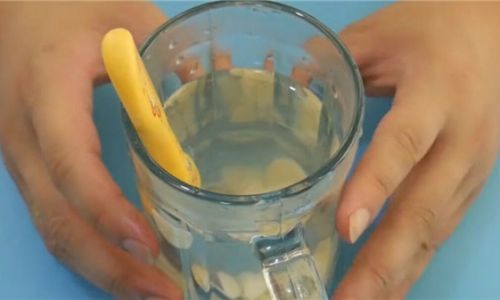
- Place the garlic cloves into the jar, filling it about three-quarters full. Avoid overcrowding, as the vinegar needs to circulate freely.
- Add optional flavorings: Toss in a teaspoon of red pepper flakes, a few peppercorns, or a sprig of rosemary for depth.
Step 4: Pouring the Vinegar
- Fill the jar with white vinegar until the garlic is fully submerged. Leave about ½ inch (1.25 cm) of headspace to prevent overflow during fermentation.
- Secure the lid tightly. If using a metal lid, place a piece of parchment paper between the lid and the jar to avoid corrosion from the vinegar.
Step 5: Infusing and Storing
- Store the jar in a cool, dark place (like a pantry) away from direct sunlight. Light can degrade the vinegar’s quality over time.
- Let it sit for at least 4–6 weeks. The garlic will gradually mellow, and the vinegar will absorb its flavor.
- Shake the jar gently every few days to redistribute the flavors.
Step 6: Checking for Doneness
After 4 weeks, taste a clove. It should be tender with a tangy, slightly sour taste. If the flavor is too mild, let it infuse for another week or two. Once satisfied, refrigerate the jar to halt fermentation.
Tips for Customization
- Sweeten the infusion: Add a tablespoon of honey or sugar to the vinegar for a caramelized undertone.
- Spice it up: Include sliced jalapeños or ginger for heat.
- Experiment with herbs: Try dill, oregano, or even lemon zest for a citrusy twist.
Storage and Shelf Life
Properly stored in the refrigerator, white vinegar-infused garlic can last up to 6 months. Check for signs of spoilage, such as mold, off-putting odors, or bubbling (a sign of fermentation).
Culinary Uses
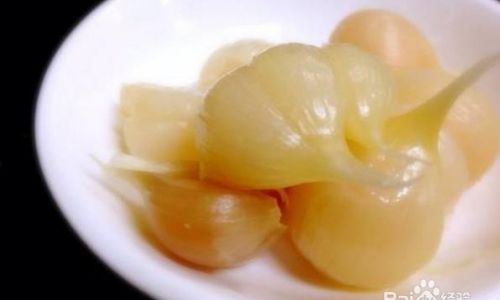
- Salads and dressings: Finely chop the garlic and mix it into vinaigrettes or creamy dressings.
- Marinades: Use the vinegar as a base for marinating meats, tofu, or vegetables.
- Stir-fries: Sauté the garlic cloves with vegetables for a zesty kick.
- Soups and stews: Add a clove or two to broths for depth.
- As a condiment: Serve whole cloves alongside grilled dishes or as part of an antipasto platter.
Health Benefits
While white vinegar-infused garlic isn’t a cure-all, it offers several potential perks:
- Antioxidant-rich: Both garlic and vinegar contain compounds that combat oxidative stress.
- Digestive aid: Vinegar may help break down foods, while garlic has prebiotic properties.
- Immune support: Garlic’s allicin content is linked to antimicrobial effects.
Troubleshooting Common Issues
- Cloudy vinegar: This is normal and caused by garlic starches dissolving.
- Mold: Discard the batch immediately, as it indicates contamination.
- Bitter taste: Use fresh garlic and ensure it’s fully submerged in vinegar.
Conclusion
Making white vinegar-infused garlic is a rewarding process that transforms a humble ingredient into a culinary powerhouse. With patience and minimal effort, you’ll have a jar of tangy, aromatic garlic cloves ready to elevate your cooking. Experiment with flavors, store it properly, and enjoy the harmony of garlic’s earthiness and vinegar’s zing. Whether drizzled over a salad or simmered in a stew, this infusion is sure to become a pantry staple. Happy pickling!
0 comments