Introduction
Sun-dried shrimp, a culinary delight enjoyed across various cultures, offers a unique blend of flavors and textures that can elevate any dish. Whether you’re a seafood enthusiast, a chef looking to incorporate new ingredients into your recipes, or simply someone who appreciates the art of preserving food, learning how to make sun-dried shrimp is a rewarding endeavor. This traditional method of preservation not only extends the shelf life of shrimp but also intensifies its taste, making it an excellent addition to salads, pasta, soups, and more.

In this comprehensive guide, we’ll walk you through the entire process of making sun-dried shrimp, from selecting the right shrimp to storing the final product. We’ll cover everything you need to know, ensuring that you can create delicious, high-quality sun-dried shrimp at home.
Section 1: Choosing the Right Shrimp
The first step in making sun-dried shrimp is selecting the right type of shrimp. Here are some key considerations:
-
Species and Size: While various shrimp species can be used, larger shrimp (such as tiger shrimp or king prawn) are generally preferred for sun-drying because they yield more meat and are easier to handle. Avoid using very small shrimp, as they can dry out too quickly and become overly chewy.
-
Freshness: Freshness is crucial. Use shrimp that have been recently caught or purchased from a reliable source. Look for shrimp with firm, translucent flesh and a mild, fresh scent. Avoid shrimp with a strong, fishy odor or slimy texture, as these are signs of spoilage.
-
Shell and Head Removal: For sun-drying, it’s best to remove the shells and heads. This allows for more even drying and ensures that the shrimp will be easier to rehydrate and use in cooking later. You can also devein the shrimp if desired, but this step is optional.

Section 2: Preparation for Drying
Once you’ve selected your shrimp, it’s time to prepare them for drying. Here’s how:
-
Cleaning: Rinse the shrimp under cold running water to remove any dirt or debris. Pat them dry using paper towels or a clean cloth.
-
Brining (Optional): Brining shrimp before drying can help to enhance flavor and preserve moisture. To make a brine, combine 1 cup of water, 1/4 cup of salt, and 1 tablespoon of sugar in a bowl and stir until the salt and sugar are fully dissolved. Submerge the shrimp in the brine for about 30 minutes, then rinse them thoroughly and pat them dry.
-
Marinating (Optional): If you want to add extra flavor to your sun-dried shrimp, consider marinating them in a mixture of herbs, spices, and olive oil. Popular choices include garlic, lemon zest, black pepper, and red pepper flakes. Marinate the shrimp for at least an hour, preferably in the refrigerator, then pat them dry before proceeding to the next step.
Section 3: The Drying Process

Now, it’s time to dry your shrimp. Sun-drying is a straightforward process, but it requires patience and attention to detail.
-
Choosing a Location: Find a spot that receives direct sunlight for most of the day and has good air circulation. Avoid areas where dust or debris can easily settle on the shrimp. A clean, outdoor patio or balcony is ideal.
-
Laying Out the Shrimp: Spread the shrimp in a single layer on a clean, wire mesh rack or tray. Ensure they are not overcrowded, as this will prevent proper drying. You can also use clean, fine-mesh screens or even string them up on fishing lines if you prefer.
-
Protecting from Pests: To prevent insects and birds from feasting on your shrimp, cover them with a fine-mesh insect screen or cheesecloth. Secure the covering with pins or clips to keep it in place.
-
Monitoring the Drying Process: The length of time required for drying depends on factors such as the size of the shrimp, the intensity of the sunlight, and humidity levels. In general, it can take anywhere from 2 to 4 days. It’s important to monitor the shrimp daily, turning them over occasionally to ensure even drying.
- Day 1-2: The shrimp will start to lose their moisture and turn a lighter shade. They may still feel slightly damp to the touch.
- Day 3: By the third day, the shrimp should be significantly drier and more firm. They should have a darker, more concentrated color.
- Day 4: On the final day, the shrimp should be completely dry, with a tough, leathery texture. They should snap when bent, indicating that they are fully dried.
-
Testing for Dryness: To test if the shrimp are fully dried, take one and bend it gently. It should snap cleanly in half without bending back. If it feels flexible or damp, continue drying for another day.

Section 4: Storing Your Sun-Dried Shrimp
Proper storage is essential to maintain the quality and flavor of your sun-dried shrimp. Here’s how to store them:
-
Cool, Dry Place: Store the dried shrimp in an airtight container in a cool, dry place. Avoid exposing them to direct sunlight or high humidity, as this can cause them to degrade.
-
Refrigeration or Freezing: For longer-term storage, you can place the container in the refrigerator or freezer. In the refrigerator, sun-dried shrimp will keep for several months. For even longer storage, freeze them in an airtight container or freezer bag for up to a year.
-
Rehydrating Before Use: Before using your sun-dried shrimp in recipes, you may need to rehydrate them. Soak them in cold water for about 10-15 minutes, or until they reach your desired texture. Drain well before using.
Section 5: Incorporating Sun-Dried Shrimp into Recipes

Sun-dried shrimp can be used in a variety of dishes, adding a rich, savory flavor. Here are some ideas to inspire you:
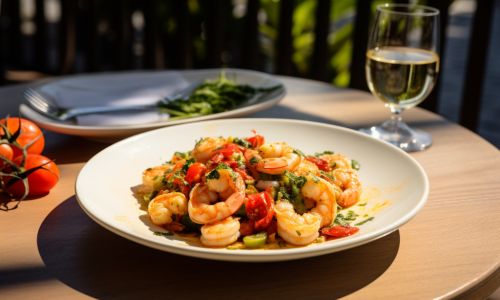
- Pasta Dishes: Toss rehydrated shrimp with cooked pasta, olive oil, garlic, and fresh parsley for a simple yet elegant meal.
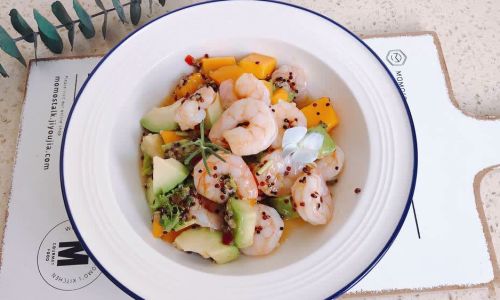
- Salads: Add chopped sun-dried shrimp to seafood salads or green salads for an extra layer of flavor.
- Soups and Stews: Incorporate them into fish soups, seafood stews, or even vegetable broths to boost their umami profile.
- Appetizers: Use them as a topping for bruschetta or crostini, paired with tomatoes, basil, and a drizzle of balsamic glaze.
- Rice and Grain Dishes: Mix rehydrated shrimp into risotto, paella, or quinoa salads for a seafood twist.
Conclusion
Making sun-dried shrimp is a rewarding culinary project that allows you to preserve and enhance the flavor of this versatile seafood. By following the steps outlined in this guide, from selecting the right shrimp to storing the final product, you can create delicious, high-quality sun-dried shrimp that will elevate your cooking and impress your guests. Whether you’re a seasoned chef or a home cook looking to try something new, sun-dried shrimp offer a unique and delicious way to enjoy seafood. Happy drying!


0 comments