Introduction
Steamed cake, a traditional delicacy enjoyed across various cultures, offers a moist, fluffy, and often sweet treat that is both comforting and nutritious. Whether you’re looking for a healthier alternative to baked goods or simply want to explore new culinary traditions, learning how to make steamed cake can be a rewarding experience. This comprehensive guide will walk you through the process step-by-step, ensuring you achieve perfect results every time. From selecting the right ingredients to mastering the steaming technique, we’ll cover everything you need to know to make delicious steamed cakes at home.
Chapter 1: Understanding the Basics
Before diving into recipes, it’s essential to understand the fundamentals of making steamed cake. Steamed cakes differ from baked cakes primarily in their cooking method, which uses steam instead of oven heat. This results in a moist texture and a unique flavor profile that many find appealing.
1 Ingredients Overview
The ingredients for steamed cakes can vary widely depending on the recipe and regional preferences. However, some common staples include:
- Flour: All-purpose flour is commonly used, but you can also experiment with gluten-free flours, rice flour, or almond flour for different textures and flavors.
- Sugar: Granulated sugar is standard, but you can use brown sugar, honey, or maple syrup for a richer, more natural sweetness.
- Leavening Agents: Baking powder or baking soda is crucial for achieving a fluffy texture.
- Dairy Products: Milk, butter, or yogurt can be used to add moisture and richness. For vegan options, plant-based milk and margarine work well.
- Eggs: They provide structure and richness. For vegan cakes, flax or chia egg replacements can be used.
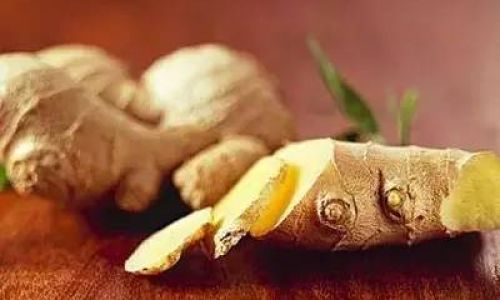
- Flavorings: Extracts like vanilla, almond, or citrus can elevate the taste. Spices like cinnamon or ginger can also add complexity.
- Fillings and Toppings: Options such as fruit, nuts, chocolate, or jam can be incorporated into the batter or used as toppings.
2 Equipment Needed
To make steamed cakes, you’ll need:
- Steamer: A traditional bamboo steamer, electric steamer, or even a large pot with a steaming rack can be used.
- Mixing Bowls: For preparing and mixing the batter.
- Whisk and Spatula: For mixing and folding ingredients.
- Measuring Cups and Spoons: To ensure accuracy in ingredient quantities.
- Cake Mold or Steaming Dish: A heatproof container with a lid or a mold specifically designed for steaming cakes.
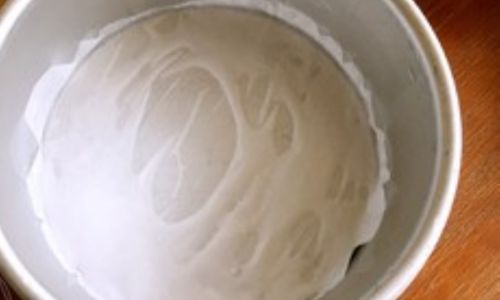
- Parchment Paper: To line the mold, preventing sticking and making cleanup easier.
- Cooling Rack: For letting the cake cool after steaming.
Chapter 2: Preparing the Batter
The key to a successful steamed cake lies in a well-mixed batter. Here’s a detailed breakdown of the mixing process:
1 Dry Ingredients
Begin by sifting together your dry ingredients—flour, baking powder, and a pinch of salt—in a large mixing bowl. Sifting helps to remove any lumps and ensures an even distribution of the leavening agent.
2 Wet Ingredients
In a separate bowl, whisk together your wet ingredients—eggs, sugar, milk, melted butter, and any flavorings. Make sure the eggs are at room temperature, as this helps them to mix more evenly and creates a better texture.
3 Combining Ingredients
Gradually add the dry ingredients to the wet ingredients, mixing until just combined. Be careful not to overmix, as this can result in a denser cake. If you’re incorporating any fillings or mix-ins, gently fold them into the batter at this stage.
4 Consistency Check
The batter should be thick but pourable. If it’s too thick, you can add a little more milk. If it’s too thin, add a bit more flour. The exact consistency may vary depending on the recipe and your personal preference.
Chapter 3: Preparing for Steaming
Once your batter is ready, it’s time to prepare for steaming.
1 Greasing and Lining the Mold
Lightly grease your steaming mold or dish with butter or oil, then line it with parchment paper. This will prevent the cake from sticking to the sides and make it easier to remove once cooked.
2 Pouring the Batter
Pour the batter into the prepared mold, filling it to about three-quarters full. This allows for expansion during steaming. Tap the mold gently on the counter to remove any air bubbles.
3 Covering the Mold
If your mold doesn’t have a lid, cover it with aluminum foil or parchment paper, making sure it’s securely sealed to prevent steam from escaping. Poke a few small holes in the top to allow steam to penetrate the batter evenly.
Chapter 4: The Steaming Process
Now it’s time to steam your cake. Follow these steps to ensure success:
1 Boiling the Water
Fill the bottom of your steamer or pot with water and bring it to a rolling boil. Make sure you have enough water to last the entire steaming time without running dry.
2 Placing the Mold
Carefully place your filled and covered mold into the steamer basket or on the steaming rack. If using a pot, make sure the water level doesn’t touch the bottom of the mold.
3 Steaming Time
The steaming time will vary depending on the size and thickness of your cake. Generally, small cakes take around 20-30 minutes, while larger ones may need up to an hour or more. Start checking for doneness around the midpoint of the estimated steaming time.
4 Checking for Doneness
To check if the cake is done, insert a toothpick or bamboo skewer into the center. It should come out clean or with just a few moist crumbs attached. If the batter still sticks to the skewer, steam for a few more minutes and check again.
Chapter 5: Cooling and Serving
Once your cake is done, it’s important to let it cool properly before handling.
1 Removing from the Steamer
Carefully remove the mold from the steamer and let it cool on a wire rack for about 10-15 minutes. This helps the cake to set and prevents it from collapsing.
2 Unmolding
Once cooled slightly, run a knife around the edges of the mold to loosen the cake. Invert the mold onto a plate or cooling rack and gently tap it to release the cake. Peel off the parchment paper.
3 Final Cooling
Allow the cake to cool completely before slicing or serving. This ensures it holds its shape and has the best texture.
Chapter 6: Troubleshooting and Tips
Even with the best intentions, things can go wrong in the kitchen. Here are some common issues and how to troubleshoot them:
1 Dense or Heavy Cake
- Solution: Ensure you don’t overmix the batter. Overmixing can develop gluten, making the cake dense. Also, check that your baking powder or soda is fresh and hasn’t expired.
2 Cake Sticks to the Mold
- Solution: Always grease and line your mold properly. Using parchment paper can make a significant difference.
3 Uneven Cooking
- Solution: Make sure your steamer is large enough to allow for even steam circulation. If using a pot, avoid overcrowding the steaming rack.
4 Wet or Soggy Bottom
- Solution: Ensure the water level in the steamer doesn’t touch the bottom of the mold. Also, avoid opening the steamer lid frequently during cooking, as this can release steam and affect the cooking process.
Chapter 7: Variations and Creative Ideas
Steamed cakes offer endless possibilities for customization. Here are some ideas to inspire your culinary creativity:
1 Flavor Combinations
- Matcha Green Tea: Add matcha powder to the batter for a delicate, earthy flavor.
- Lavender Honey: Infuse honey with dried lavender and use it in the batter for a floral twist.
- Chocolate Banana: Mix melted chocolate and mashed bananas into the batter for a rich, tropical treat.
2 Toppings and Garnishes
- Fresh Fruit: Top your cake with strawberries, blueberries, or mango slices for a burst of freshness.
- Nut Butter Drizzle: Drizzle a little almond or peanut butter over the top for added creaminess.
- Whipped Cream or Yogurt: Serve with a dollop of whipped cream or a scoop of Greek yogurt for a luxurious finish.
3 Layered Cakes
- Experiment with making multiple layers and filling them with jam, nut butter, or chocolate ganache for a more complex dessert experience.
Conclusion
Making steamed cakes may seem like a daunting task at first, but with the right ingredients, equipment, and techniques




0 comments