Table of content
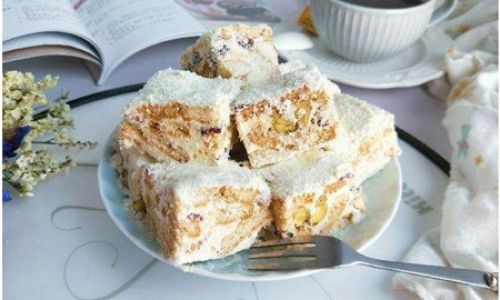
Creating delicious treats at home can be an incredibly rewarding experience, especially when you infuse traditional recipes with a twist of creativity. One such delightful confection that combines the crunch of cookies, the creaminess of butter, and the subtle sweetness of condensed milk is the Snowflake Biscuit, also known as Snowflake Candy or Snowflake Puff in some regions. This delightful snack gets its name from its appearance, often resembling delicate snowflakes due to the light, airy texture and the occasional sprinkling of fine sugar or edible glitter on top. While traditional methods might involve stove-top cooking, making Snowflake Biscuit in the oven offers a more controlled and perhaps less intimidating approach for home bakers. In this comprehensive guide, we’ll walk you through how to make Snowflake Biscuit in the oven, ensuring every step is clear and accessible.
Ingredients:
Before diving into the process, let’s gather all the necessary ingredients:
- Unsalted Butter: 200 grams (softened)
- Powdered Sugar: 150 grams
- Salt: A pinch
- Vanilla Extract: 1 teaspoon
- All-Purpose Flour: 300 grams
- Rice Krispies (or any puffed rice cereal): 150 grams
- Baking Powder: 1 teaspoon
- Condensed Milk (sweetened): 1 can (400 grams)
- Chopped Nuts (optional, such as almonds, walnuts, or pecans): 100 grams
- White Chocolate Chips: 200 grams
- Sprinkles or Edible Glitter (optional, for decoration)
Equipment:
- Mixing Bowls
- Electric Mixer or Stand Mixer
- Baking Sheets
- Parchment Paper
- Spatula
- Oven
- Cooling Rack
Step-by-Step Instructions:
Step 1: Preparation and Mixing the Dry Ingredients
Begin by preheating your oven to 160°C (320°F). This temperature is crucial as it helps in achieving the perfect balance between baking and melting the ingredients without burning them. Line your baking sheets with parchment paper to prevent sticking and set them aside.
In a large mixing bowl, combine the softened unsalted butter, powdered sugar, and a pinch of salt. Use an electric mixer or stand mixer fitted with the paddle attachment to cream these ingredients together until they are light and fluffy. This process should take about 3-4 minutes on medium speed. Once the mixture is well combined, add the vanilla extract and mix for an additional 30 seconds.
Step 2: Incorporating the Dry Ingredients
In a separate bowl, whisk together the all-purpose flour, baking powder, and the puffed rice cereal (Rice Krispies). Gradually add this dry mixture to the wet mixture, mixing on low speed until just combined. Be careful not to overmix, as this can lead to a denser texture. If you’re adding chopped nuts, fold them in at this stage using a spatula to ensure they are evenly distributed throughout the dough.
Step 3: Forming the Dough and Baking
Transfer the dough onto a lightly floured surface. The dough might be slightly sticky, so you might need to dust your hands with a bit of flour to handle it easily. Divide the dough into two equal portions. Roll each portion into a log about 1.5 inches (4 cm) in diameter. Use a sharp knife to cut the logs into small, bite-sized pieces, each about 1 inch (2.5 cm) in length. Arrange these pieces on the prepared baking sheets, spacing them slightly apart to allow for even baking.
Flatten each piece slightly with your palm or the back of a fork. This will help the Snowflake Biscuit spread out evenly during baking and create a slightly crispier exterior.
Place the baking sheets in the preheated oven and bake for about 12-15 minutes, or until the edges are just starting to turn golden brown. Keep a close eye on them to avoid overbaking, as the goal is to have a soft, chewy center with a slightly crispy exterior.
Step 4: Preparing the Condensed Milk Mixture
While the dough pieces are baking, prepare the condensed milk mixture. In a microwave-safe bowl, melt the white chocolate chips and the entire can of sweetened condensed milk together. Microwave in 30-second intervals, stirring after each interval, until the mixture is smooth and fully melted. Be cautious not to overheat, as this can cause the chocolate to seize.
Step 5: Combining and Cooling
Once the dough pieces are done baking, remove them from the oven and let them cool on the baking sheets for about 5 minutes. This will make them firm enough to handle without falling apart.
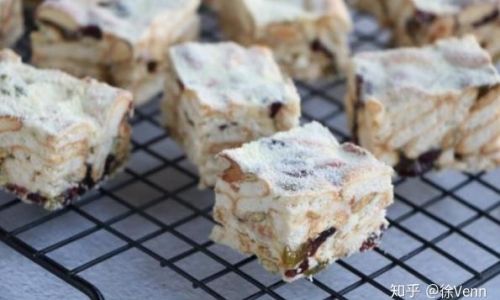
Working quickly, dip each baked piece into the melted condensed milk and white chocolate mixture, ensuring it is fully coated. You can use two forks to do this, one to lift the piece out of the mixture and the other to help scrape off any excess, creating a smooth coating. Place the coated pieces back onto the parchment-lined baking sheets, spacing them apart to prevent sticking.
Step 6: Decorating and Final Cooling
If desired, immediately sprinkle the coated pieces with sprinkles or edible glitter while the chocolate is still warm. This will help the decorations adhere better.
Allow the Snowflake Biscuits to cool completely at room temperature. This is crucial as it allows the chocolate coating to set properly. You can transfer them to a cooling rack to speed up the process and ensure the bottoms don’t stick to the parchment paper.

Serving and Storage:
Once fully cooled, your Snowflake Biscuits are ready to be enjoyed! These treats can be stored in an airtight container at room temperature for up to a week. If you prefer, you can also refrigerate them for longer storage, but let them come to room temperature before serving to enjoy their best texture.
Conclusion:
Making Snowflake Biscuit in the oven is a delightful way to combine the art of baking with the joy of creating beautiful, delicious treats. By following these steps, you’ll be able to craft a snack that looks as stunning as it tastes, perfect for sharing with family and friends or simply enjoying on your own. The combination of crispy edges, chewy centers, and creamy chocolate coating makes each bite a delightful experience. Happy baking!





0 comments