Introduction
Salt-baked chicken, a culinary delight hailing from China’s Fujian province, is a dish that combines the simplicity of ingredients with the complexity of flavors. This traditional cooking method encapsulates the essence of the chicken within a crust of coarse sea salt, allowing the meat to steam and bake to perfection. The result is a moist, juicy, and incredibly flavorful bird that is sure to impress even the most discerning palate.
In this comprehensive guide, we will walk you through the entire process of making salt-baked chicken, from selecting the right ingredients to achieving the perfect texture and taste. Whether you’re a seasoned chef or a home cook eager to try something new, this recipe promises to deliver an unforgettable dining experience.

Section 1: Ingredients and Equipment
Before diving into the steps, let’s first outline the ingredients and equipment you’ll need to make salt-baked chicken.
Ingredients:
-
Whole Chicken (1, approximately 3-4 pounds): Choose a fresh, free-range chicken for the best flavor and texture. Ensure it is thoroughly cleaned and patted dry.
-
Coarse Sea Salt (about 4-5 pounds): The cornerstone of this dish, coarse sea salt creates the crust that bakes and steams the chicken. Avoid using fine table salt, as it will not form a sturdy enough crust.
-
Paper Towels or Clean Kitchen Towels: For drying the chicken thoroughly to ensure the salt adheres properly.
-
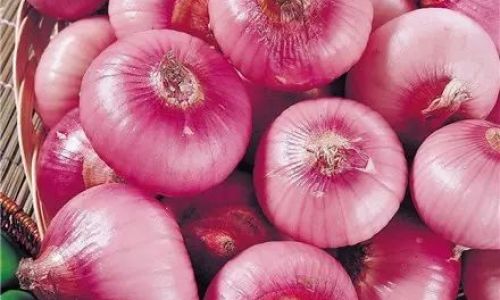
Herbs and Spices: While traditional salt-baked chicken relies solely on salt, you can enhance the flavor by adding a blend of herbs and spices inside the cavity. Popular choices include garlic, ginger, green onions, and Sichuan peppercorns.
-
Aluminum Foil or Baking Paper: To line the baking dish and prevent the salt from sticking.
Equipment:
-
Large Mixing Bowl: For mixing the salt and any additional herbs or spices.
-
Sharp Knife and Kitchen Shears: For preparing the chicken and cutting any excess fat or sinew.
-
Baking Dish (Large Enough to Fit the Chicken): A heavy-duty baking dish that can withstand high temperatures without cracking.

-
Oven Mitts and Oven Rack: For safely handling the hot baking dish and adjusting the oven rack.
-
Hammer or Rolling Pin: To crush the coarse sea salt if it’s not already in fine enough pieces.
-
Food-Safe Brush or Spoon: For packing the salt around the chicken.
Section 2: Preparing the Chicken
The first step in making salt-baked chicken is to prepare the chicken itself. This involves cleaning, drying, and seasoning the bird.
Step 1: Clean the Chicken
Begin by rinsing the chicken thoroughly under cold running water. Remove any visible fat, feathers, or internal organs. Pay special attention to the cavity and neck area, ensuring they are clean and free of debris. Pat the chicken dry with paper towels or a clean kitchen towel. It’s crucial to remove as much moisture as possible, as this will help the salt adhere to the skin.
Step 2: Season the Chicken (Optional)
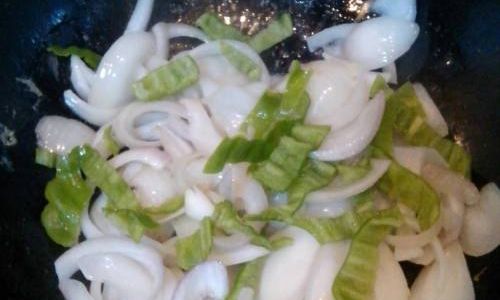
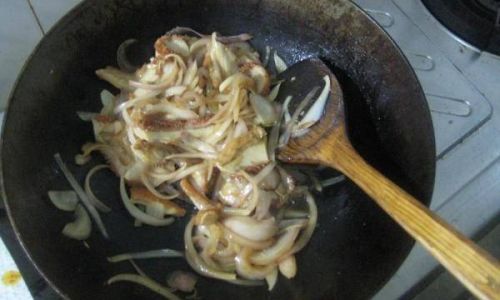
While traditional salt-baked chicken relies solely on the salt crust for flavor, you can add an extra layer of seasoning inside the cavity if desired. Create a blend of finely chopped garlic, ginger, green onions, and Sichuan peppercorns. Loosen the skin of the chicken (without detaching it) and rub the seasoning mixture between the skin and the meat. Also, stuff some of the mixture into the cavity.
Step 3: Truss the Chicken
Trussing, or tying up, the chicken helps it maintain its shape during cooking. Use kitchen twine to tie the legs together and tuck the wingtips under the body. This will ensure even cooking and a more presentable final appearance.
Section 3: Preparing the Salt Crust

The salt crust is the heart of salt-baked chicken. It creates a steam oven effect, cooking the chicken gently and evenly.
Step 1: Crush the Salt
If your coarse sea salt is not already finely crushed, place it in a large mixing bowl and use a hammer or rolling pin to break it down into smaller pieces. The goal is to have a mixture of fine and coarse grains, which will help form a sturdy yet permeable crust.
Step 2: Mix in Herbs and Spices (Optional)
If you wish to infuse the salt crust with additional flavors, mix in a handful of finely chopped herbs such as rosemary, thyme, or sage. You can also add a pinch of black pepper or other spices of your choice.
Section 4: Assembling the Salt-Baked Chicken
Now it’s time to assemble the chicken and its salt crust.
Step 1: Line the Baking Dish
Preheat your oven to 400°F (200°C). Line a large baking dish with aluminum foil or baking paper to prevent the salt from sticking and make cleanup easier.
Step 2: Pack the Salt Around the Chicken
Place the prepared chicken in the center of the baking dish. Begin packing the crushed salt around and over the chicken, ensuring it is completely covered. The salt should form a thick, even layer, with no gaps or exposed skin. Use your hands or a food-safe brush to press the salt firmly into place. The crust should be at least 1 inch (2.5 cm) thick to ensure proper insulation and steaming.
Step 3: Seal the Crust

To create a seal and prevent moisture from escaping, carefully wrap the entire baking dish, including the top of the salt crust, with aluminum foil. Make sure the foil is tight and secure, with no gaps.
Section 5: Baking the Chicken
Baking the chicken is a straightforward process, but it requires patience and attention to detail.
Step 1: Bake in the Oven
Place the sealed baking dish on the middle rack of the preheated oven. Bake for 1 hour and 30 minutes to 2 hours, depending on the size of the chicken. A larger bird will require more time to cook through.
Step 2: Check for Doneness
After the initial baking time, carefully remove the baking dish from the oven using oven mitts. Carefully unwrap the foil (be cautious of steam) and inspect the salt crust. It should be golden brown and firm to the touch. To check for doneness, insert an instant-read thermometer into the thickest part of the chicken (between the leg and the thigh). The internal temperature should reach 165°F (75°C).
Section 6: Cracking and Serving the Chicken
Once the chicken is cooked, it’s time to crack open the salt crust and reveal your masterpiece.
Step 1: Crack the Crust
Using a hammer or the back of a large spoon, gently tap and crack the salt crust all over. Be careful not to pierce the skin of the chicken underneath. Once the crust is sufficiently cracked, use your hands or a spoon to peel it away from the chicken.
Step 2: Remove the Chicken

Carefully lift the chicken out of the baking dish, brushing off any excess salt. The skin should be golden and crispy, while the meat should be moist and flavorful.
Step 3: Carve and Serve
Let the chicken rest for a few minutes before carving. This allows the juices to redistribute, ensuring each bite is juicy and tender. Serve the chicken with your favorite sides, such as steamed vegetables, rice, or a fresh salad.
Conclusion
Making salt-baked chicken may seem like a daunting task, but with the right ingredients and careful attention to detail, it can be a rewarding and delicious culinary adventure. The combination of a crispy salt crust and moist, flavorful chicken is a testament to the simplicity and brilliance of traditional Chinese cooking methods.
Whether you’re hosting a dinner party, preparing a special family meal, or simply looking to try something new in the kitchen, salt-baked chicken is a dish that is sure to impress. Its unique cooking process and resulting flavor make it a standout choice for any occasion.
Remember, the key to success is patience and precision. Take your time to prepare the chicken, form the salt crust, and bake it to perfection. With a little practice, you’ll soon be able to create your own version of this timeless culinary delight.
Happy cooking!


0 comments