Introduction
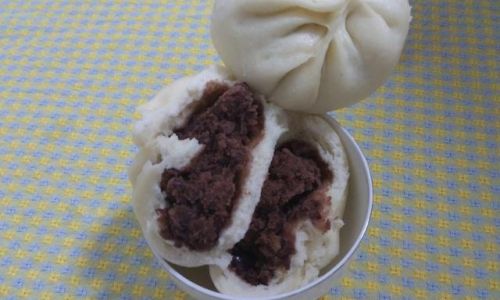
Red bean paste buns, also known as “anko” in Japanese or “hongdoubao” in Mandarin (though we’ll stick to English throughout this article), are a delightful treat enjoyed across Asia. These sweet, soft buns filled with a rich, velvety red bean paste offer a perfect balance of flavors and textures. Whether you’re a seasoned baker or just starting your culinary journey, making red bean paste buns at home can be a rewarding experience. In this comprehensive guide, we’ll walk you through every step of the process, from preparing the red bean paste to shaping and baking the buns. By the end, you’ll have a batch of delicious, homemade red bean paste buns that are sure to impress your friends and family.
Section 1: Understanding the Ingredients
Before diving into the recipe, let’s familiarize ourselves with the key ingredients you’ll need to make red bean paste buns.
Red Beans (Azuki Beans)
Azuki beans are the star of the show. These small, dark red beans have a sweet, earthy flavor and a creamy texture when cooked. They are essential for making the red bean paste that fills the buns.
Sugar
Sugar sweetens the red bean paste, balancing the natural earthiness of the beans. You can adjust the amount to taste, but remember that the sweetness should complement the beans rather than overpower them.
Water
Water is used to cook the beans and achieve the desired consistency for the paste. Too much water will result in a runny paste, while too little will make it too dry and crumbly.
Bread Flour
Bread flour has a higher protein content than all-purpose flour, which helps create a strong dough that can hold its shape during baking. This is crucial for making soft, fluffy buns.
Dry Active Yeast
Yeast is what makes the dough rise, giving the buns their signature softness and airy texture. Make sure your yeast is fresh and active for the best results.
Warm Water
Warm water activates the yeast, speeding up the fermentation process. Be careful not to use hot water, as it will kill the yeast.
Sugar (for the Dough)
A small amount of sugar in the dough helps feed the yeast and enhances the overall flavor of the buns.
Salt
Salt enhances the flavor of the dough and helps control the fermentation process.
Vegetable Oil or Shortening
Oil or shortening tenderizes the dough, making the buns softer and more moist.
Milk (Optional)
Adding a splash of milk to the dough can make the buns even more tender and flavorful.
Section 2: Making the Red Bean Paste
Let’s start with the filling – the red bean paste. This is a multi-step process, but it’s well worth the effort.
Step 1: Preparing the Beans
-
Rinse and Soak: Rinse the azuki beans under cold running water to remove any dirt or debris. Then, soak them in enough water to cover by at least 2 inches for at least 8 hours or overnight. Soaking helps soften the beans and缩短 cooking time.
-
Drain and Rinse: Drain the soaked beans and rinse them again under cold water.
Step 2: Cooking the Beans
-
Boil: Place the soaked beans in a large pot with enough water to cover by about 1 inch. Bring to a boil over medium-high heat, then reduce the heat to low and simmer, uncovered, for about 1 to 1.5 hours, or until the beans are tender and the water has mostly been absorbed. You may need to add more water during cooking to keep the beans from drying out.
-
Check for Doneness: The beans should be tender but not mushy. Test for doneness by tasting a few beans. If they are still too firm, continue cooking until they reach the desired texture.
Step 3: Mashing the Beans
-
Mash: Once the beans are cooked, remove them from the heat and let them cool slightly. Use a potato masher or a fork to mash the beans until they form a coarse paste. For a smoother paste, you can use a food processor or blender.
-
Adjust Consistency: If the paste is too thick, you can add a little water or milk to reach your desired consistency. If it’s too thin, cook it over low heat for a few minutes to evaporate some of the liquid.
Step 4: Sweetening the Paste
-
Add Sugar: Transfer the mashed beans to a saucepan and add sugar to taste. Start with about 1/4 cup of sugar per cup of mashed beans and adjust as needed.
-
Cook: Cook over medium-low heat, stirring constantly, until the sugar is fully dissolved and the paste has thickened slightly. Be careful not to let it burn.
-
Taste and Adjust: Taste the paste and add more sugar if needed. Remember that the sweetness should complement the beans, not overpower them.
Step 5: Cooling the Paste
- Cool: Let the sweetened paste cool to room temperature before using it to fill the buns. You can store it in an airtight container in the refrigerator for up to a week or in the freezer for longer storage.
Section 3: Making the Dough
Now that you have your red bean paste ready, let’s move on to making the dough.
Step 1: Activating the Yeast
-
Warm Water and Sugar: In a small bowl, combine warm water (about 110°F or 45°C) and a pinch of sugar. Stir until the sugar is dissolved.
-
Add Yeast: Sprinkle the dry active yeast over the water and let it sit for about 5-10 minutes, or until it becomes frothy and bubbly. This indicates that the yeast is active and ready to use.
Step 2: Mixing the Dough Ingredients
-
Combine Dry Ingredients: In a large mixing bowl, whisk together the bread flour, sugar, and salt.
-
Add Oil and Yeast Mixture: Make a well in the center of the dry ingredients and pour in the vegetable oil or shortening and the yeast mixture.
-
Mix: Use a wooden spoon or dough hook attachment on a stand mixer to mix the ingredients until they come together into a shaggy dough.
Step 3: Kneading the Dough
-
Turn Out Dough: Turn the dough out onto a lightly floured surface and knead for about 8-10 minutes, or until it becomes smooth and elastic. If the dough is too sticky, add a little more flour. If it’s too dry, add a little more water.
-
First Rise: Place the kneaded dough in a lightly oiled bowl, cover with a clean kitchen towel or plastic wrap, and let it rise in a warm, draft-free place for about 1-2 hours, or until it has doubled in size.
Step 4: Shaping the Dough
-
Punch Down: Once the dough has risen, punch it down to release any air bubbles.
-
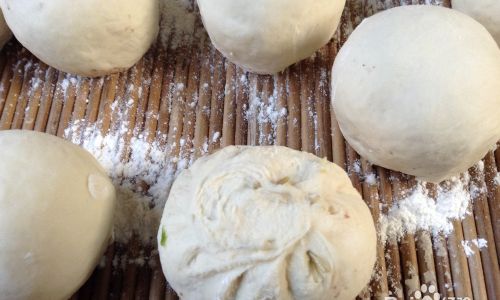
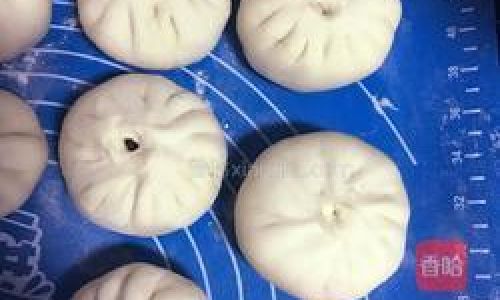
Divide and Shape: Divide the dough into equal portions (usually about 2-3 ounces or 55-85 grams each, depending on the size of the buns you want). Shape each portion into a smooth ball by cupping your hands around it and gently rotating it on the work surface.
Section 4: Filling and Shaping the Buns
Now it’s time to fill and shape the buns.
Step 1: Preparing the Filling
- Scoop Paste: Use a spoon or small scoop to portion out the red bean paste. You’ll need about 1-2 teaspoons of paste per bun, depending on how generous you want the filling to be.
Step 2: Filling the Dough
-
Flatten Dough: Flatten each dough ball slightly with your palm.
-
Add Paste: Place a scoop of red bean paste in the center of the flattened dough.
-
Seal: Bring the edges of the dough together and pinch them to seal the paste inside. Gently roll the dough ball between your hands to smooth out any seams.
Step 3: Shaping the Buns
-
Round Shape: For traditional round buns, simply reshape the dough ball, ensuring that the seam is sealed and the paste is evenly distributed inside.
-
Alternative Shapes: You can also shape the buns into other forms, such as crescents, ovals, or even animals, if you’re feeling adventurous.
Section 5: Second Rise and Baking
The final steps involve letting the buns rise again before baking them.
Step 1: Second Rise





0 comments