Introduction
Preserved pork, commonly known as bacon in many Western cultures and various other names across Asia and Europe, is a culinary staple that has been enjoyed for centuries. This delicious and versatile meat product is characterized by its rich flavor, firm texture, and long shelf life. Whether you’re a seasoned chef or a home cook eager to explore traditional food preservation techniques, learning how to make preserved pork can add a new dimension to your culinary repertoire. This guide will walk you through the entire process, from selecting the right meat to storing the finished product, ensuring you end up with a batch of preserved pork that is both safe to eat and bursting with flavor.
Section 1: Choosing the Right Meat
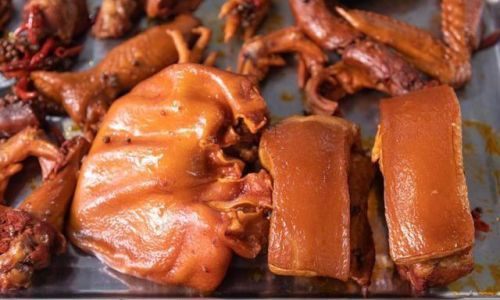
The first step in making preserved pork is selecting the appropriate cut of meat. Traditionally, pork belly is the most popular choice due to its high fat content, which aids in preservation and adds to the final product’s flavor and texture. However, other cuts like pork shoulder or pork butt can also be used, though they may require slight adjustments in the preservation process.
When choosing pork belly, look for a piece that is well-marbled with fat but not overly fatty. The ideal ratio of fat to lean meat is generally around 50-50, but this can vary based on personal preference. Ensure the meat is fresh, with no signs of discoloration or off odors. If possible, source your pork from a reputable farm or butcher to guarantee quality and safety.

Section 2: Preparing the Meat
Once you’ve selected your meat, it’s time to prepare it for preservation. Begin by trimming off any excess fat or silver skin that may be present on the surface. This not only improves the appearance of your final product but also ensures a more consistent texture.
Next, you’ll need to decide whether to cure your pork with salt alone or use a combination of salt, sugar, and spices. Traditional salt-curing methods rely solely on salt to draw out moisture and inhibit bacterial growth, while modern recipes often incorporate sugar and spices to enhance flavor.
For a basic salt cure, mix together equal parts of kosher or sea salt and a small amount of black pepper. If using a more complex cure, you might include brown sugar, garlic powder, paprika, and other spices to taste. The exact proportions will depend on your personal preferences and the type of preserved pork you’re aiming to create.
Section 3: Applying the Cure
Apply the cure evenly to all surfaces of the meat, ensuring that every part is well-coated. This can be done by hand, using a rubber spatula, or by placing the meat in a large plastic or glass container and pouring the cure over it. Massage the cure into the meat to help it penetrate deeper.
Once the meat is coated, cover it and refrigerate for several days. The length of time will depend on the thickness of the meat and your desired level of preservation. For pork belly, a curing period of 5-7 days is typical. During this time, the salt will draw out moisture, firm up the texture, and begin the preservation process.
Section 4: Rinsing and Drying
After the curing period, remove the meat from the refrigerator and rinse it thoroughly under cold running water to remove any excess salt and spices. Pat the meat dry with paper towels or a clean cloth.
At this point, you have the option of air-drying the meat or using a food dehydrator to speed up the process. Air-drying involves hanging the meat in a well-ventilated area at a cool temperature (around 55-60°F or 13-16°C) for several days to a week. A food dehydrator can achieve similar results in a fraction of the time, typically 12-24 hours, depending on the settings and thickness of the meat.
Section 5: Smoking (Optional)
Smoking is an optional step in making preserved pork, but it adds a depth of flavor that many people find irresistible. If you have a smoker, you can use it to infuse your meat with the smoky aroma of wood chips or pellets. Oak, hickory, and applewood are popular choices for their distinct flavors.

Preheat your smoker to a temperature between 180-200°F (82-93°C) and place the dried meat on the racks. Smoke the meat for several hours, preferably until it reaches an internal temperature of 150°F (66°C). Keep in mind that smoking is more for flavor than preservation, so it’s important to follow the previous steps correctly to ensure safety.
Section 6: Cooking and Cooling
Once smoking is complete (if you’ve chosen to do it), the final step is to cook the meat to an internal temperature of 160°F (71°C). This can be done in an oven, on a grill, or even in a slow cooker. Cooking the meat further drives out moisture, firms up the texture, and ensures that any remaining bacteria are destroyed.
After cooking, allow the meat to cool to room temperature before handling. This helps the fats to solidify and the flavors to meld together. Once cool, you can slice your preserved pork into strips or chunks, depending on how you plan to use it.
Section 7: Storing Your Preserved Pork
Proper storage is crucial for maintaining the quality and safety of your preserved pork. Wrap the slices or chunks tightly in plastic wrap or vacuum-seal them to prevent air exposure. Store the wrapped meat in an airtight container or heavy-duty freezer bags in the refrigerator for up to 2 months or in the freezer for up to 6 months.
When ready to use, thaw the preserved pork in the refrigerator overnight or under cold running water. It can be sliced thinly for sandwiches, diced for cooking, or used whole in recipes that call for slow cooking or braising.
Conclusion
Making preserved pork is a rewarding culinary endeavor that combines tradition, patience, and creativity. By following the steps outlined in this guide, you’ll be able to create a delicious and long-lasting staple that can be enjoyed in countless dishes. Whether you’re preserving meat for future meals or simply looking to add a unique twist to your culinary repertoire, the process of making preserved pork is sure to become a cherished kitchen tradition.
Remember, the key to successful preservation lies in attention to detail, from selecting the right meat to storing the finished product correctly. With practice and a love for cooking, you’ll soon be crafting batches of preserved pork that are the envy of friends and family. Happy preserving!


0 comments