Table of content
Making pork floss, or dried shredded pork, is a culinary art that dates back centuries in various Asian cultures, particularly in China and Taiwan. This savory, sweet, and slightly chewy snack is beloved for its versatility—it can be enjoyed on its own, used as a topping for buns, mixed into rice porridge, or even incorporated into desserts for a unique flavor twist. While commercial pork floss is widely available, making it at home allows you to customize the seasoning and ensure the freshest, highest-quality ingredients. In this comprehensive guide, we’ll walk you through the process of creating delicious homemade pork floss, from selecting the right meat to achieving the perfect texture and flavor.
Understanding Pork Floss Basics
Before diving into the recipe, it’s essential to understand what pork floss is and what makes it special. Pork floss is essentially lean pork meat that has been cooked, shredded, and dried to a fluffy consistency. The key to its appeal lies in its ability to balance sweetness with savory notes, often enhanced with seasonings like soy sauce, sugar, five-spice powder, and sesame oil. The drying process浓缩了flavors and gives the meat a light, airy texture that melts in your mouth.
Ingredients and Equipment
Ingredients:
- 1 kg (2.2 lbs) of lean pork shoulder or pork belly (without too much fat)
- 3-4 tablespoons of soy sauce
- 3-4 tablespoons of sugar (adjust to taste preference)
- 1-2 teaspoons of five-spice powder
- 1 teaspoon of sesame oil
- 1/2 teaspoon of white pepper (optional)
- 1/4 cup of water or chicken/pork broth (for cooking)
- A pinch of salt (optional, depending on soy sauce saltiness)
Equipment:
- A large pot or pressure cooker
- A meat shredder or forks for shredding
- A large skillet or wok
- A wooden spoon or spatula for stirring
- A food dryer (optional, but useful for achieving a consistent dry texture)
- An oven with a rack and baking sheet (if using the oven-drying method)
- Airtight containers for storage
Step-by-Step Instructions
Step 1: Preparing the Pork
-
Cleaning and Cutting: Begin by thoroughly washing the pork under cold running water. Pat it dry with paper towels. Cut the pork into small, manageable pieces, about 2-3 inches in size. This will make it easier to cook evenly.
-
Cooking the Pork: Place the pork pieces in a large pot or pressure cooker. Add enough water or broth to cover the meat by about an inch. Add a pinch of salt if using. Bring to a boil, then reduce the heat to a simmer. Cook until the pork is tender and can be easily shredded with a fork, about 1-1.5 hours in a pot or 45 minutes under pressure in a pressure cooker.
Step 2: Shredding the Pork
- Shredding: Once the pork is cooked, remove it from the pot using a slotted spoon and let it cool slightly. Place the meat in a large bowl and use a meat shredder, two forks, or your hands to shred it into fine strands. Aim for a consistency that resembles cotton candy but with more substance.
Step 3: Seasoning and Cooking the Floss
-
Seasoning: In the same pot or a large skillet, combine the shredded pork with soy sauce, sugar, five-spice powder, sesame oil, and white pepper. Mix well to ensure all strands are evenly coated with the seasoning.
-
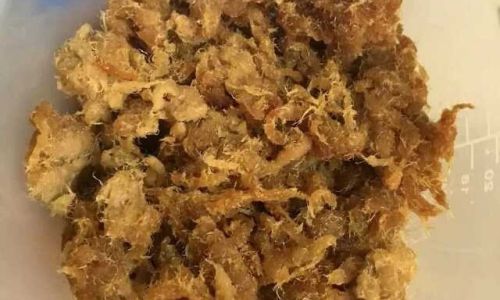
Cooking Down: Place the skillet over medium-low heat and cook the pork, stirring frequently, until the mixture begins to darken slightly and the liquid has mostly evaporated, about 20-30 minutes. This step is crucial for developing the caramelized flavor and texture of the pork floss. Be patient and avoid raising the heat too high, which could burn the meat.
Step 4: Drying the Pork Floss
-
Oven Method: Preheat your oven to its lowest setting, typically around 150°F (65°C). Spread the seasoned pork evenly on a baking sheet lined with parchment paper. Bake for 1-2 hours, stirring occasionally to prevent sticking and ensure even drying. The pork should be dry to the touch but still slightly moist inside.
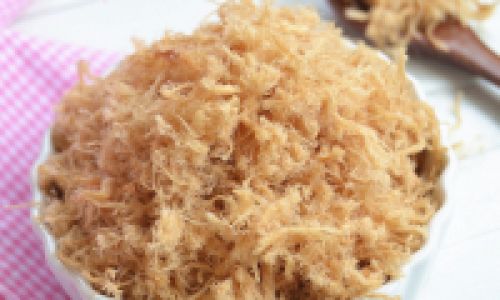
Food Dryer Method: If you have a food dryer, spread the pork floss evenly on the trays and follow the manufacturer’s instructions for drying at a low temperature, usually around 120-130°F (49-54°C), for several hours or until the desired texture is achieved.
Natural Air-Drying: In warm, dry climates, you can also air-dry the pork floss on a clean, wire rack placed in a well-ventilated area away from direct sunlight. This method can take several days, so patience is key.

Step 5: Cooling and Storing
-
Cooling: Once dried, remove the pork floss from the oven, dryer, or air-drying rack and let it cool completely. This helps to firm up the texture and makes it easier to handle.
-
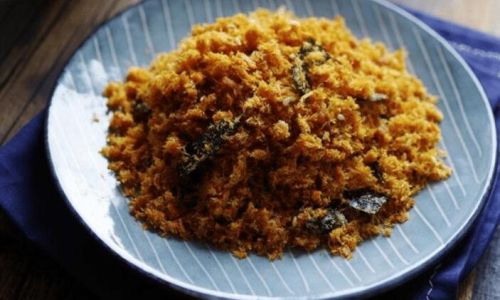
Storing: Transfer the cooled pork floss to airtight containers. It can be stored at room temperature for up to a month in a cool, dry place. For longer storage, refrigerate or freeze, and thaw before use.
Tips for Perfect Pork Floss
- Meat Selection: Using lean pork ensures that your floss isn’t too greasy. However, a small amount of fat can add flavor, so avoid overly lean cuts like pork tenderloin.
- Seasoning Adjustments: Taste the seasoning mixture before adding it to the shredded pork. Adjust sweetness and saltiness according to your preference.
- Patience is Key: The cooking and drying processes require time and patience. Rushing them can result in burnt or undercooked pork floss.
- Experimentation: Don’t be afraid to experiment with different seasonings and flavors. Adding a touch of honey, garlic powder, or even a hint of chili flakes can elevate your pork floss to new heights.
Conclusion
Making pork floss at home is a rewarding culinary endeavor that not only saves you money but also allows you to tailor the flavors to your liking. From the initial preparation of the pork to the final drying stage, each step contributes to the creation of a delicious, texturally satisfying snack. With this guide, you’ll be able to enjoy homemade pork floss that rivals any store-bought variety, perfect for satisfying your snack cravings or impressing guests at your next gathering. Happy cooking!



0 comments