Table of content
Pickled sweet garlic, a delightful and tangy condiment often found in Asian cuisines, is a delightful blend of sweet, sour, and savory flavors. This preserved garlic not only enhances the taste of various dishes but also offers a range of health benefits due to its rich nutritional content. If you’re eager to learn how to craft this delicious preserve at home, follow this comprehensive guide that covers everything from selecting the right ingredients to storing your finished product.
Understanding Pickled Sweet Garlic
Pickled sweet garlic, also known as candied garlic or sweet pickled garlic, is a traditional preservation method that transforms fresh garlic bulbs into a sweet, tangy, and slightly acidic treat. The process involves peeling and soaking the garlic cloves in a syrupy mixture of sugar, vinegar, water, and sometimes spices. Over time, the garlic absorbs the flavors of the brine, resulting in a mellow, sweet-and-sour taste that pairs wonderfully with a variety of foods.
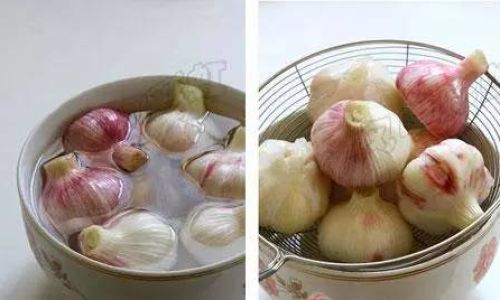
Ingredients and Equipment
Before diving into the recipe, ensure you have all the necessary ingredients and equipment ready:
Ingredients:
- Fresh garlic bulbs (preferably large and firm)
- Granulated sugar (white or brown sugar can be used, with brown sugar adding a slight caramel flavor)
- Distilled white vinegar or apple cider vinegar (white vinegar provides a cleaner taste, while apple cider vinegar adds a hint of fruitiness)
- Water
- Optional spices and herbs (such as bay leaves, peppercorns, or a pinch of salt for added depth)
Equipment:
- A large, non-reactive pot (stainless steel or enamel-coated)
- A sharp knife for peeling and slicing (if desired)
- A clean, glass jar with a tight-fitting lid (ensure it’s large enough to hold all the garlic and the brine)
- A ladle or spoon for stirring and transferring the garlic
- A funnel (optional but helpful for pouring the brine into the jar without spills)
- Clean cloth or paper towels for wiping the jar rim
Step-by-Step Recipe
Preparing the Garlic
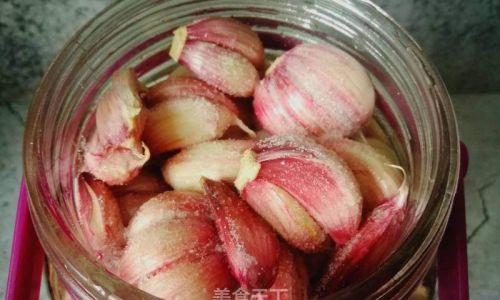
Start by selecting fresh garlic bulbs. Look for firm, tightly closed cloves with no signs of mold or softening. Peel the garlic cloves carefully. This can be done by gently pressing each clove with the flat side of a knife to loosen it from the bulb, then peeling away the outer skin. If you prefer, you can also slice the garlic cloves thinly for a quicker pickling process, but whole cloves will retain more texture.
Making the Pickling Syrup
In your large pot, combine the sugar, vinegar, and water in a ratio that suits your taste preference. A common ratio is 1 cup of sugar to 2 cups of vinegar to 1 cup of water, but feel free to adjust this according to your desired sweetness and tanginess. For a more complex flavor profile, add a few bay leaves, a teaspoon of peppercorns, or a pinch of salt.
Place the pot over medium heat and stir occasionally until the sugar completely dissolves and the mixture comes to a gentle boil. Reduce the heat to low and let it simmer for about 5 minutes to allow the flavors to meld together.
Preparing the Jar
While the syrup is simmering, prepare your glass jar by washing it thoroughly with hot, soapy water and rinsing it well. Dry the jar completely to prevent any contamination. You can also sterilize the jar by immersing it in boiling water for a few minutes and then letting it air dry.
Packing the Garlic
Once the syrup has finished simmering, carefully pack the peeled garlic cloves into the prepared jar. If you’re using sliced garlic, pack the slices tightly but not so tightly that they become compressed.
Pouring the Syrup
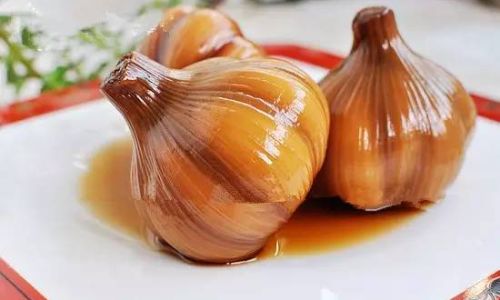
Using a ladle, carefully pour the hot pickling syrup over the garlic cloves in the jar, ensuring all the cloves are fully submerged. If necessary, use a clean spoon to press down on the garlic gently to eliminate any air bubbles and ensure everything is well-covered.
Sealing and Storing
Wipe the rim of the jar clean with a cloth or paper towel to remove any syrup residue. Securely tighten the lid and let the jar cool to room temperature. Once cooled, you can either store the jar in a cool, dark place or refrigerate it, depending on your preference. Refrigeration will slow down the pickling process and extend the shelf life.
Waiting for the Magic
The pickling process can take anywhere from a few days to a few weeks, depending on the temperature and your personal taste preference. The longer the garlic sits in the syrup, the more it will absorb the flavors and soften in texture. Generally, allowing it to sit for at least a week will give you a good balance of sweetness and tanginess.
Tips for Perfect Pickled Sweet Garlic
- Quality Ingredients: Always use fresh, high-quality garlic and ingredients for the best flavor.
- Adjust the Syrup: Taste the syrup before pouring it over the garlic. It should be slightly sweeter than you want the final product to be, as the garlic will absorb some of the vinegar’s tanginess.
- Experiment with Flavors: Feel free to add other spices or herbs to the syrup, such as cinnamon sticks, star anise, or even a splash of soy sauce, to create unique flavor variations.
- Storage: For long-term storage, refrigerate the pickled garlic once it has reached your desired flavor. This will help preserve its quality and extend its shelf life.
- Serving Suggestions: Pickled sweet garlic can be enjoyed on its own as a snack, used as a garnish for salads or grilled meats, or incorporated into marinades and sauces.
Conclusion
Making pickled sweet garlic at home is not only a rewarding culinary endeavor but also a way to preserve the flavors of the season. With just a few simple ingredients and a bit of patience, you can create a delicious, versatile condiment that will enhance your cooking and snacking experiences. Whether you enjoy it straight from the jar or incorporate it into your favorite recipes, pickled sweet garlic is sure to become a staple in your kitchen. Happy pickling!

0 comments