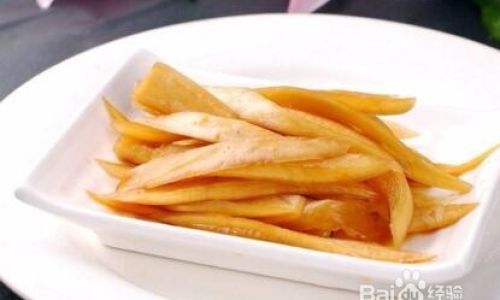
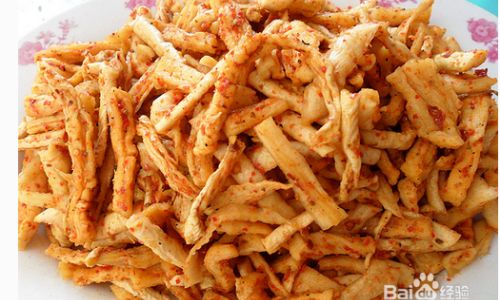
Pickling vegetables is a time-honored tradition that not only preserves the bounty of the harvest but also enhances their flavor, creating a delightful array of condiments and side dishes. Among the myriad of pickled delights, pickled radish strips stand out for their crisp texture, tangy taste, and versatility. Whether enjoyed as a refreshing appetizer, a crunchy addition to salads, or a zesty accompaniment to meals, pickled radish strips offer a burst of flavor that can elevate any dish. In this article, we will delve into the art of making pickled radish strips, from selecting the perfect radishes to the final preservation process, ensuring you end up with a jar of delicious, homemade pickles.
Understanding the Ingredients
Before diving into the recipe, it’s crucial to understand the role each ingredient plays in the pickling process. Radishes, of course, are the stars of the show. Look for fresh, firm radishes with smooth, unblemished skin. They should be crisp when gently pressed and have a vibrant color. For pickling, daikon radishes (a large, white variety) are particularly popular due to their mild flavor and ability to hold their shape well after pickling.

Vinegar is the key ingredient that provides the tangy, acidic flavor essential for pickling. White vinegar, apple cider vinegar, or rice vinegar can be used, each imparting a slightly different flavor profile. Sugar balances out the acidity and adds a touch of sweetness, while salt helps draw out moisture from the radishes, aiding in the preservation process and enhancing flavor. Water dilutes the vinegar, making it less harsh while still preserving the radishes. Spices and herbs, such as garlic, chili flakes, and dill, add complexity and depth to the pickles.
Equipment and Preparation
To make pickled radish strips, you’ll need a few basic pieces of equipment: a sharp knife for slicing, a large mixing bowl for combining ingredients, a clean glass jar or other non-reactive container for storing the pickles, and a spoon or ladle for mixing and pouring.
Start by preparing the radishes. Wash them thoroughly under running water to remove any dirt or debris. Pat them dry using a clean kitchen towel or paper towels. Remove the tops and tails, then slice the radishes into thin, even strips. The thickness of the strips is a matter of personal preference, but thinner strips will pickle more quickly and have a crisper texture.
The Pickling Process
-
Making the Pickling Brine:
In a large mixing bowl, combine the vinegar, water, sugar, and salt. Stir until the sugar and salt are fully dissolved. This mixture, known as the brine, will be the bath in which the radish strips will pickle. Adjust the sweetness and saltiness to your taste by adding more sugar or salt as needed. Remember, the flavors will intensify as the radishes pickle, so err on the side of slightly less seasoning if you’re unsure. -
Adding Flavor:
Now is the time to incorporate any additional flavors you wish to include. Garlic cloves, sliced thinly, add a subtle, aromatic note. A pinch of red pepper flakes or dried chili peppers can introduce a hint of heat. Fresh herbs like dill, parsley, or cilantro can be tied into a bundle and added to the brine, infusing the pickles with their fresh, herbal aroma.
-
Packing the Jar:
Once the brine is ready, pack the radish strips tightly into the clean glass jar. Make sure to press them down gently to eliminate any air pockets. Pour the brine over the radish strips, ensuring they are fully submerged. If there are any radish strips sticking out above the brine, they may not pickle properly and could become moldy. -
Sealing and Storing:
Secure the lid of the jar tightly and shake gently to distribute the spices and herbs evenly throughout the brine. Label the jar with the date and contents, then store it in a cool, dark place. The pickling process can take anywhere from a few days to a week, depending on the desired level of tanginess and the temperature of the storage area. Colder temperatures slow down the pickling process, while warmer temperatures accelerate it.
Tips for Success
-
Sterilization: To prevent contamination and ensure the safety of your pickles, sterilize the jar and any utensils used in the pickling process before use. This can be done by boiling them in water for a few minutes or running them through the dishwasher on the hottest setting.
-
Taste Testing: Periodically taste a radish strip to monitor the pickling progress. Once they reach your desired level of tanginess and crispness, they are ready to enjoy.
-
Storage: Once opened, store the jar of pickled radish strips in the refrigerator to slow down further fermentation and maintain freshness.

Enjoying Your Pickled Radish Strips
Pickled radish strips are incredibly versatile and can be enjoyed in numerous ways. They make a fantastic addition to sandwiches, wraps, and tacos, adding a crunchy, tangy contrast to softer ingredients. They’re also delightful atop salads, mixed into grain bowls, or served as a side dish alongside grilled meats or fish. For a quick snack, enjoy them straight from the jar as a refreshing, healthy treat.
In conclusion, making pickled radish strips is a rewarding culinary endeavor that combines the art of preservation with the joy of creating delicious, homemade condiments. With just a few simple ingredients and a bit of time, you can transform fresh radishes into a tangy, crunchy delight that will enhance your meals and delight your taste buds. So, why wait? Gather your ingredients, roll up your sleeves, and start pickling!


0 comments