Introduction
Pickled Jerusalem artichoke, often referred to as pickled鬼子姜 in some cultural contexts, is a delightful and tangy treat that combines the crisp texture of the artichoke with the tangy, sour flavor of pickling. Jerusalem artichokes, also known as sunchokes or sunroots, are not actually related to artichokes but belong to the sunflower family. They have a nutty, slightly sweet flavor and a crisp texture that makes them ideal for pickling.
In this comprehensive guide, we will walk you through the entire process of making pickled Jerusalem artichokes, from selecting the right artichokes to storing the finished pickles. We’ll cover everything you need to know, including tips for successful pickling, troubleshooting common issues, and even some creative variations to suit your taste preferences.
Section 1: Understanding Jerusalem Artichokes
Before we dive into the pickling process, let’s take a closer look at Jerusalem artichokes. These tuberous roots are native to North America and have been cultivated for centuries for their edible qualities. They are a good source of dietary fiber, vitamins, and minerals, making them a nutritious addition to your diet.
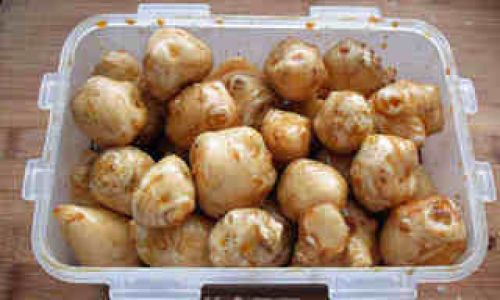
1 Identifying Jerusalem Artichokes
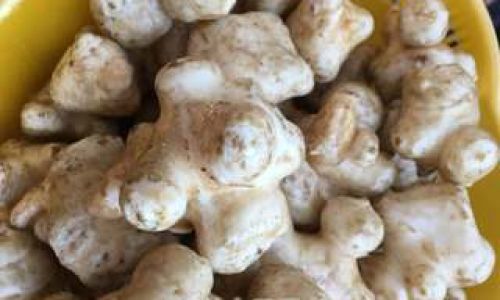
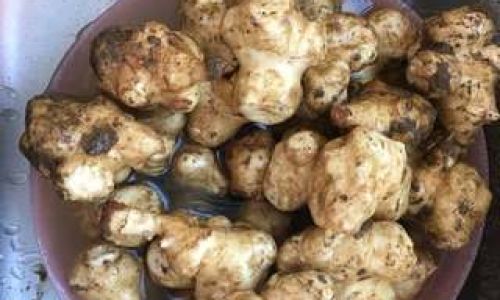
Jerusalem artichokes have a knobby, irregular shape and can vary in size from small bulbs to larger, elongated tubers. The skin is typically brown or tan, with a rough texture. When cut, the flesh is white and may have a slight purple hue.
2 Harvesting and Storing
Jerusalem artichokes are ready for harvest in the fall, after the plants have died back. Use a garden fork or shovel to carefully dig up the tubers, taking care not to damage them. Once harvested, they can be stored in a cool, dark place for several months. If you plan to pickle them, it’s best to use fresh, firm tubers.
Section 2: Preparing for Pickling
Before you start pickling, there are a few essential steps you need to take to ensure success. This includes selecting the right artichokes, cleaning them thoroughly, and preparing your pickling brine.
1 Selecting the Right Artichokes
Choose firm, unblemished tubers with no signs of rot or mold. Avoid artichokes that are too small or too large, as they may not pickle well. The ideal size is medium, allowing for even pickling and a pleasant eating experience.
2 Cleaning the Artichokes
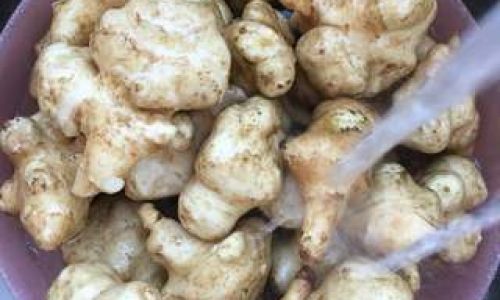
Thoroughly wash the artichokes under running water to remove any dirt or debris. Use a vegetable brush if necessary to scrub away any stubborn soil. Once cleaned, pat the artichokes dry with a clean towel.
3 Preparing the Pickling Brine
The pickling brine is the key to successful pickling. It provides the tangy, sour flavor and helps to preserve the artichokes. There are many different brine recipes, but a basic one includes vinegar, water, sugar, and salt. Here’s a simple recipe to get you started:
- 2 cups vinegar (white or apple cider vinegar works well)
- 2 cups water
- 1/4 cup sugar
- 2 tablespoons salt
Combine all ingredients in a saucepan and bring to a boil, stirring until the sugar and salt are fully dissolved. Reduce the heat and let the brine simmer for a few minutes before removing it from the heat and allowing it to cool to room temperature.
Section 3: Pickling the Artichokes
Now that you have your brine ready, it’s time to start pickling the artichokes. This section will guide you through the process, step-by-step.
1 Preparing the Artichokes for Pickling
Depending on your preference, you can pickle the artichokes whole, sliced, or diced. If pickling them whole, make sure they are small enough to fit comfortably in your pickling jar. If slicing or dicing, use a sharp knife to ensure clean cuts.
2 Packing the Jars
Start by sterilizing your pickling jars and lids. This can be done by boiling them in water for a few minutes or running them through the dishwasher on the sanitize setting. Once sterile, pack the jars with the prepared artichokes, making sure they are tightly packed but not crushed.
3 Pouring in the Brine
Carefully pour the cooled brine over the artichokes, ensuring they are fully submerged. If necessary, use a weight, such as a small glass or a clean stone, to keep the artichokes from floating to the top. This is important, as exposure to air can cause spoilage.
4 Sealing and Storing
Wipe the rims of the jars clean with a damp cloth to remove any brine residue. Secure the lids tightly and label the jars with the date and contents. Store the pickled artichokes in a cool, dark place, such as a pantry or cellar. They should be ready to eat after about a week, but the flavor will continue to develop over time.
Section 4: Troubleshooting Common Issues
Even with the best intentions, things can sometimes go wrong during the pickling process. Here are some common issues and how to troubleshoot them.
1 Cloudy Brine
Cloudy brine is often caused by bacteria or yeast growth. If the brine is cloudy but doesn’t have a bad smell, you can try skimming off the surface layer and adding a bit more vinegar to the jars. However, if the brine smells bad or has a slimy texture, it’s best to discard the pickles and start again.
2 Soft or Mushy Artichokes
Soft or mushy artichokes can be caused by overcooking or improper storage. Make sure the artichokes are firm and fresh before pickling, and avoid exposing them to high temperatures during the pickling process. Store the jars in a cool, dark place to prevent spoilage.
3 Off-Flavors
Off-flavors can be caused by a variety of factors, including using old vinegar, improper proportions of ingredients, or contamination. If your pickles have an off-flavor, try adjusting the recipe or starting with fresh ingredients. It’s also important to use clean, sterile jars and utensils to prevent contamination.
Section 5: Creative Variations
Pickled Jerusalem artichokes can be customized to suit your taste preferences. Here are a few creative variations to try:
1 Spicy Pickles
Add a kick of heat to your pickles by incorporating spicy ingredients such as red pepper flakes, fresh chili peppers, or a splash of hot sauce to the brine.
2 Garlic and Herb Pickles
For a more savory flavor, add a few cloves of garlic and a handful of fresh herbs, such as dill or parsley, to the jars before pouring in the brine.
3 Sweet and Sour Pickles
Increase the sugar content in the brine for a sweeter, more tangy flavor. You can also add a splash of fruit juice, such as apple or grape, to the brine for an extra layer of flavor.
4 Pickled Artichoke Relish
For a chunky relish, finely chop the artichokes and combine them with diced onions, bell peppers, and celery. Add the brine ingredients and cook until the vegetables are tender. Pack the relish into sterile jars and process in a water bath canner for added preservation.
Conclusion
Pickled Jerusalem artichokes are a delicious and versatile treat that can be enjoyed on their own or used as an ingredient in various dishes. By following the steps outlined in this guide, you can make your own pickled artichokes at home, customizing them to suit your taste preferences. With a bit of practice and experimentation, you’ll soon be a pickling expert, creating tangy, delicious treats that will delight your friends and family.
Remember, the key to successful pickling is attention to detail and patience. Take your time to prepare the artichokes, make the brine, and store the jars properly. With a little effort, you’ll be rewarded with crisp, tangy pickles that will last for months.
So, why wait? Gather your ingredients, sterilize your jars, and start pickling your own Jerusalem artichokes today. Enjoy the process and the delicious results!



0 comments