Introduction
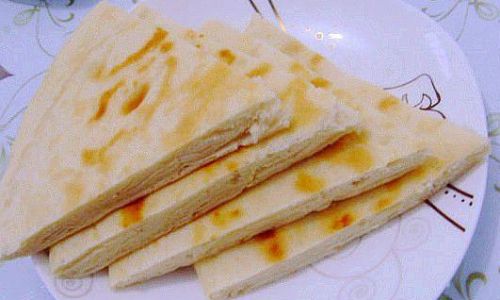
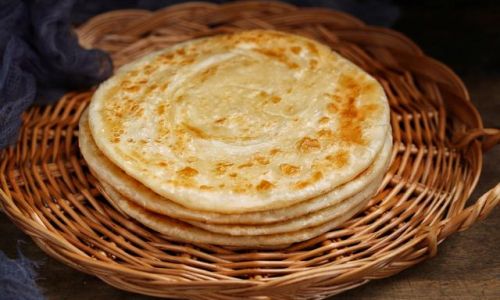
Pan-fried oil cakes, also known as youbing in Chinese cuisine, are a staple in many households across China. These savory, fluffy, and slightly crispy flatbreads are perfect for breakfast, lunch, dinner, or even as a snack. They can be enjoyed plain, with a spread of butter or jam, dipped in soup, or filled with various meats, vegetables, and condiments. While the traditional recipe may vary slightly from region to region, the basic technique remains consistent. In this comprehensive guide, we will walk you through how to make pan-fried oil cakes from scratch, ensuring you achieve that perfect balance of fluffiness and crispiness every time.

Section 1: Understanding the Ingredients
Before diving into the recipe, it’s crucial to understand the role each ingredient plays in creating the perfect pan-fried oil cake.
-
Flour: The foundation of any baked good, flour provides structure and texture. For pan-fried oil cakes, all-purpose flour works well, but you can also use a combination of all-purpose and bread flour for added chewiness.
-
Water: Acts as a binding agent, helping to form the gluten network in the dough. The amount of water needed may vary depending on the humidity and the type of flour used.
-
Yeast: Essential for leavening, yeast ferments the dough, producing carbon dioxide bubbles that give the oil cakes their fluffy texture. Active dry yeast or instant yeast can be used interchangeably.
-
Sugar: Provides a touch of sweetness and helps feed the yeast, promoting faster fermentation.
-
Salt: Enhances flavor and controls the fermentation rate of the yeast.
-
Vegetable Oil: Used for both the dough and frying. A neutral-flavored oil like canola or grapeseed is ideal, as it won’t overpower the taste of the oil cakes.
-
Baking Powder (Optional): Adds an extra lift to the dough, ensuring the oil cakes rise evenly and have a light, airy texture.
-
Milk (Optional): Adds richness and a subtle dairy flavor to the dough. You can use whole milk, skim milk, or even a non-dairy alternative like almond milk.
Section 2: Preparing the Dough
Now that we’ve covered the ingredients, let’s move on to the dough preparation. This is a crucial step, as the quality of the dough directly impacts the final texture and flavor of the oil cakes.
-
Activate the Yeast: In a small bowl, combine warm water (about 110°F or 45°C), a pinch of sugar, and the yeast. Let it sit for about 5-10 minutes until frothy and bubbly. This indicates that the yeast is active and ready to use.
-
Mix the Dry Ingredients: In a large mixing bowl, whisk together the flour, sugar, salt, and baking powder (if using). Make a well in the center.
-
Combine Wet and Dry Ingredients: Pour the activated yeast mixture and the remaining water (if any) into the well. Add the vegetable oil and, if using, the milk. Gradually mix the wet ingredients into the dry ingredients until a shaggy dough forms.

-
Knead the Dough: Transfer the dough to a lightly floured surface and knead for about 8-10 minutes until it becomes smooth and elastic. If the dough is too sticky, add a little more flour. If it’s too dry, add a teaspoon of water.
-
First Rise: Place the dough in a lightly oiled bowl, cover with a clean kitchen towel or plastic wrap, and let it rise in a warm, draft-free place for about 1-2 hours, or until it has doubled in size.
Section 3: Shaping and Resting the Dough
Once the dough has risen, it’s time to shape it into individual oil cake pieces and let them rest before frying.
-
Punch Down the Dough: Gently press down on the risen dough to release any air bubbles.
-
Divide and Shape: Transfer the dough to a lightly floured surface and divide it into equal portions, depending on the size of oil cakes you prefer. Shape each portion into a smooth ball and then flatten it into a disc. You can use a rolling pin to roll out the discs to about 1/4-inch thickness for even frying.
-
Cover and Rest: Place the shaped dough pieces on a lightly floured surface, cover them with a clean kitchen towel, and let them rest for about 15-20 minutes. This resting period allows the gluten to relax, making the dough easier to stretch and less likely to tear during frying.
Section 4: Frying the Oil Cakes
The frying process is where the magic happens, transforming the dough into golden, crispy, and fluffy oil cakes.
-
Heat the Oil: Pour enough vegetable oil into a large, heavy-bottomed skillet or wok to cover the bottom by about 1/2 inch. Heat the oil over medium-high heat until it reaches about 350°F or 175°C. You can test the oil’s readiness by dropping a small piece of dough into it; it should sizzle immediately and float to the surface.
-
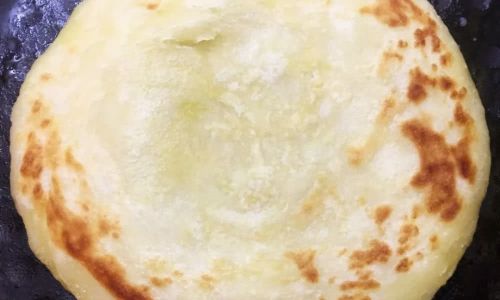
Fry the Oil Cakes: Carefully place a few dough pieces into the hot oil, being mindful not to overcrowd the pan. Fry for about 2-3 minutes on each side, or until they are golden brown and cooked through. Use a spatula or slotted spoon to flip them gently.
-
Drain and Cool: Once done, transfer the fried oil cakes to a plate lined with paper towels to drain excess oil. Let them cool slightly before serving.
Section 5: Tips and Tricks for Perfect Oil Cakes
Achieving perfect pan-fried oil cakes takes practice, but these tips and tricks will help you get closer to that elusive, fluffy, and crispy texture every time.
-
Temperature Control: Maintaining the correct oil temperature is crucial. Too hot, and the outside will burn before the inside is cooked. Too cold, and the oil cakes will absorb too much oil and be greasy. Use a thermometer to monitor the oil temperature and adjust the heat as needed.

-
Don’t Overcrowd the Pan: Frying too many oil cakes at once will lower the oil temperature and prevent even cooking. Fry in batches, ensuring there’s enough space around each piece for even browning.
-
Use a Splatter Screen: Frying can be messy, especially with hot oil. A splatter screen can help minimize oil splatters and keep your kitchen clean.
-
Storage: If you’re not planning to eat the oil cakes immediately, store them in an airtight container at room temperature for up to 2 days. To reheat, warm them in a toaster oven or microwave until crispy and warm.
-
Experiment with Fillings: While plain oil cakes are delicious, you can also experiment with various fillings such as shredded vegetables, meats, cheeses, or spices to create unique flavors and textures.
Section 6: Troubleshooting Common Issues
Even the most seasoned bakers encounter issues sometimes. Here are some common problems and how to solve them.
-
Dough is Too Sticky: If the dough is too sticky, add a little more flour, a tablespoon at a time, until it reaches the desired consistency.
-
Oil Cakes Are Dense and Heavy: This can happen if the dough isn’t kneaded enough or if the yeast is inactive. Make sure to knead the dough for at least 8-10 minutes and use fresh, active yeast.
-
Oil Cakes Absorb Too Much Oil: This usually happens if the oil temperature is too low or if the dough pieces are too thick. Increase the oil temperature and make sure the dough pieces are rolled out to about 1/4-inch thickness.
-
Yeast Doesn’t Activate: If the yeast doesn’t become frothy and bubbly after 10 minutes, it may be expired or the water was too hot or too cold. Check the expiration date on the yeast packet and use lukewarm water (about 110°F or 45°C).
Conclusion
Making pan-fried oil cakes may seem like a daunting task, but with the right ingredients, technique, and a bit of practice, you can achieve delicious, fluffy, and crispy results. Whether you’re enjoying them plain or with a variety of toppings and fillings, these oil cakes are sure to become a staple in your kitchen. So, gather your ingredients, roll up your sleeves, and start frying! With this guide, you’ll be a pan-fried oil cake master in no time.


0 comments