Introduction

Kiwi wine, also known as kiwifruit wine, is a delightful and unique alcoholic beverage made from the fleshy, nutritious fruit of the kiwi plant. With its vibrant green hue, tangy-sweet flavor, and numerous health benefits, kiwi wine has become a popular choice among wine enthusiasts and home brewers alike. The process of making kiwi wine, while seemingly intricate, is actually quite straightforward once you understand the basic steps and principles involved. In this comprehensive guide, we will walk you through every aspect of making kiwi wine, from selecting the right kiwis to bottling your final product. By the end, you should have a clear understanding of how to create your own batch of delicious, homemade kiwi wine.
Chapter 1: Understanding Kiwis and Their Suitability for Wine Making
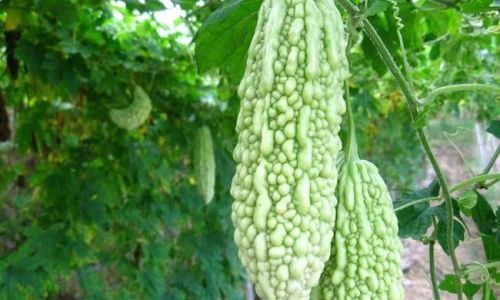
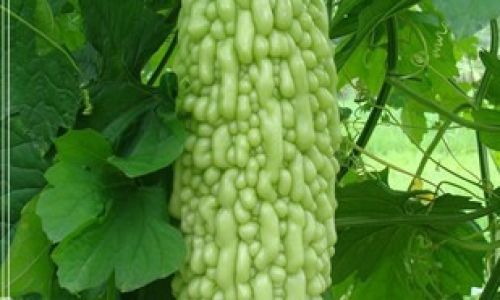
Before diving into the wine-making process, it’s essential to have a basic understanding of the kiwi fruit itself. Kiwis (Actinidia deliciosa and Actinidia chinensis are the most common varieties) are native to China and have since been cultivated worldwide. They are rich in vitamins C and E, fiber, and antioxidants, making them a highly nutritious addition to any diet.
When it comes to wine making, kiwis offer a unique combination of flavors that can range from tart to sweet, depending on the variety and ripeness. Their high acidity and natural sugars make them well-suited for fermentation, resulting in a wine that is both refreshing and complex.
Chapter 2: Selecting the Right Kiwis for Wine Making
The quality of your kiwis will directly impact the quality of your wine. Here are some tips for selecting the best kiwis for wine making:
-
Ripeness: Opt for fully ripe kiwis. They should be firm but yield slightly to pressure, with a uniform green (or brown, in the case of some varieties) skin. Overripe or underripe kiwis can lead to off-flavors in your wine.
-
Variety: Different kiwi varieties will have distinct flavors and textures. Experiment with a few to see which ones you prefer for wine making. Some varieties may be sweeter, while others may have a more tart profile.
-
Freshness: Use fresh, unblemished kiwis. Avoid fruits that have soft spots, bruises, or mold.
-
Organic vs. Conventional: While organic kiwis may be more expensive, they are often free from pesticides and other chemicals that could potentially affect the taste and healthfulness of your wine.
Chapter 3: Preparing Your Equipment and Ingredients
Before you begin the wine-making process, you’ll need to gather all the necessary equipment and ingredients. Here’s a list of what you’ll need:
Equipment:
- Large mixing bowls
- Food processor or blender
- Cheesecloth or fine-mesh strainer
- Fermentation vessel (e.g., glass carboy)
- Airlock and stopper
- Siphon tube for racking
- Bottles and corks or screw caps
- Funnel
- Hydrometer (optional, but recommended for measuring sugar content and alcohol potential)
- pH meter or strips (optional, but helpful for monitoring acidity)
- Cleaning supplies (e.g., vinegar, baking soda, and a brush for scrubbing)
- Sanitizing supplies (e.g., campden tablets or star-san)
Ingredients:
- Kiwis (about 4-5 pounds for a standard batch)
- Sugar (optional, to taste; about 2-3 pounds for a semi-sweet wine)
- Yeast (wine yeast such as EC-1118 or Montrachet is recommended)
- Yeast nutrient (optional, but recommended for healthier fermentation)
- Pectic enzyme (optional, but helps to clarify the wine)
- Water (if needed to adjust the volume of the must)
Chapter 4: Sanitizing and Preparing Your Equipment
Cleanliness is crucial in wine making to prevent contamination by bacteria, molds, or wild yeasts. Here’s how to sanitize your equipment:

-
Scrubbing: Use hot water and a mild detergent to scrub all surfaces of your equipment. Rinse thoroughly with hot water.
-
Sanitizing: Fill your fermentation vessel, bowls, and other containers with a sanitizing solution (such as a campden tablet dissolved in water or star-san). Let them soak for at least 15 minutes, then rinse thoroughly with clean water.
-
Airlock and Stopper: Soak the airlock and stopper in the sanitizing solution, then rinse and let them air dry.
Chapter 5: Preparing the Kiwis
Now it’s time to prepare the kiwis for fermentation. Here’s how to do it:
-
Peeling: Peel the kiwis using a vegetable peeler or sharp knife. Discard the peels.
-
Mashing: Cut the kiwis into small pieces and place them in a large mixing bowl. Use a potato masher or fork to mash them until they are mostly broken down. Alternatively, you can use a food processor or blender to puree the kiwis.
-
Measuring Sugar: If you plan to add sugar to your wine, measure it out now. The amount of sugar you add will depend on your personal taste preferences and the natural sugar content of the kiwis. As a general guideline, 2-3 pounds of sugar per 5 gallons of must will produce a semi-sweet wine.
Chapter 6: Mixing the Must and Adding Yeast
The must is the mixture of fruit, sugar, and water (if used) that will be fermented into wine. Here’s how to mix your must and add yeast:
-
Combining Ingredients: Add the mashed kiwis to your fermentation vessel. If you are adding sugar, sprinkle it over the fruit and stir to combine. If you are adjusting the volume of the must with water, add it now and stir well.
-
Taking a Hydrometer Reading (optional): Use a hydrometer to measure the specific gravity of your must. This will give you an estimate of the potential alcohol content of your wine.
-
Adding Yeast Nutrient and Pectic Enzyme (optional): If you are using yeast nutrient and pectic enzyme, add them to the must now. Stir well to distribute them evenly.
-
Activating Yeast: Follow the instructions on the yeast packet to activate the yeast. This usually involves sprinkling the yeast over a small amount of warm water (about 100-110°F) and letting it sit for about 10 minutes until it becomes frothy.
-
Pitching Yeast: Once the yeast is activated, pour it into the must and stir well to distribute it evenly.
Chapter 7: Fermentation

Now it’s time to let the magic happen. Here’s what you need to know about fermentation:
-
Installing Airlock: Attach the airlock and stopper to your fermentation vessel. The airlock allows carbon dioxide to escape while preventing oxygen and contaminants from entering.
-
Monitoring Fermentation: Keep an eye on your fermentation vessel. The must should start bubbling within a few hours to a day after pitching the yeast. This is a sign that fermentation is occurring. Continue to monitor the airlock for bubbling activity, which should continue for several days to a week.
-
Stirring Daily (optional): Some brewers like to stir their must daily during the first few days of fermentation to distribute the yeast evenly. However, this is not strictly necessary and can sometimes lead to more oxidation.
-
Taking Hydrometer Readings: Periodically take hydrometer readings to monitor the progress of fermentation. When the specific gravity stops dropping (or drops very slowly), it indicates that fermentation is nearly complete.
Chapter 8: Racking and Secondary Fermentation
Once primary fermentation is complete, it’s time to rack the wine and move it to a secondary fermentation vessel. Here’s how to do it:
-
Racking: Use a siphon tube to transfer the wine from the primary fermentation vessel to a clean, sanitized secondary vessel. Try to leave as much sediment (lees) behind as possible.
-
Adding Sulfur Dioxide (optional): To prevent oxidation and the growth of unwanted microorganisms, you can add a small amount of sulfur dioxide (campden tablets) to the wine at this stage. Follow the instructions on the package for the correct dosage.
-
Secondary Fermentation: While secondary fermentation is not always necessary for kiwi wine, it can help to clarify the wine and improve its flavor. If you choose to do a secondary fermentation, let the wine sit in the secondary vessel for another week or two, stirring occasionally if desired.
Chapter 9: Clarifying and Stabilizing the Wine
Before bottling, it’s important to clarify and stabilize the wine to remove any remaining sediment and prevent future fermentation. Here’s how to do it:
-
Clarifying: There are several methods for clarifying wine, including using bentonite, gelatin, or fining agents like Sparkolloid. Follow the instructions on the package for the method you choose.

0 comments