Table of content
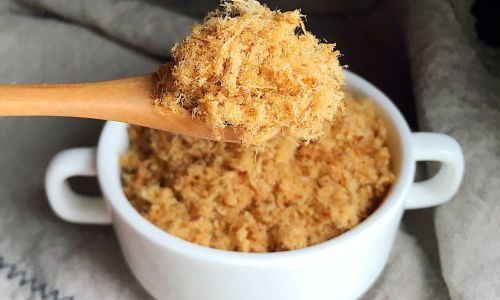
Making homemade pork floss, or “rou song” in Chinese, is a delightful culinary endeavor that not only allows you to enjoy a tasty snack but also gives you the satisfaction of crafting something delicious from scratch. Pork floss is a shredded, dried meat product that has a soft, fluffy texture and a savory, slightly sweet flavor. It’s often used as a topping for buns, sandwiches, or porridge, or simply enjoyed on its own as a snack. While you can easily buy pork floss at the store, making it at home allows you to control the ingredients, adjust the seasoning to your liking, and ensure freshness.
Understanding Pork Floss
Before diving into the recipe, it’s essential to understand what pork floss is and how it’s traditionally made. Pork floss is essentially cooked, shredded pork that has been dried to a fluffy consistency. The meat is usually slow-cooked until tender, then shredded by hand or with a fork, and finally dried and toasted to achieve the desired texture and flavor. The seasoning typically includes salt, sugar, soy sauce, and sometimes five-spice powder or sesame oil for added depth.
Ingredients and Equipment
To make homemade pork floss, you’ll need a few key ingredients and some basic kitchen equipment. Here’s a list of what you’ll need:
Ingredients:
- 1 lb (450g) pork shoulder or pork belly, cut into small cubes
- 3 tbsp soy sauce
- 2 tbsp oyster sauce
- 2 tbsp honey or maple syrup
- 2 tbsp sugar (adjust to taste)
- 1 tbsp Chinese rice wine or dry sherry (optional, for flavor)
- 1 tsp salt
- 1/2 tsp five-spice powder (optional, for added aroma)
- 1/4 tsp white pepper (optional, for a hint of spice)
- 1-2 tbsp vegetable oil (for frying)
Equipment:
- Large pot or Dutch oven
- Wooden spoon or silicone spatula
- Fork or meat shredder
- Baking sheet lined with parchment paper
- Oven (with convection setting if available)
- Food processor (optional, for a finer texture)
- Airtight container for storage
Step-by-Step Recipe
Step 1: Prepare the Pork
Start by cutting the pork shoulder or pork belly into small cubes, approximately 1-inch in size. This will help the meat cook evenly and make it easier to shred later. Pork shoulder and pork belly are both good choices because they have a good balance of fat and lean meat, which results in a flavorful and moist pork floss.
Step 2: Marinate the Pork
In a large bowl, combine the soy sauce, oyster sauce, honey or maple syrup, sugar, Chinese rice wine or dry sherry, salt, five-spice powder, and white pepper. Add the pork cubes to the marinade, ensuring they are well-coated. Cover the bowl with plastic wrap or transfer to a large, resealable plastic bag, and let the pork marinate in the refrigerator for at least 2 hours, preferably overnight. Marinating overnight will allow the flavors to penetrate the meat more deeply.
Step 3: Cook the Pork
Transfer the marinated pork and its marinade to a large pot or Dutch oven. Add enough water to cover the pork by about 1 inch. Bring the mixture to a boil over medium-high heat, then reduce the heat to low, cover, and let it simmer for about 1.5 to 2 hours, or until the pork is very tender and can be easily shredded with a fork. If there’s excess liquid in the pot after cooking, remove the lid and let it simmer for a few more minutes until the liquid has reduced.
Step 4: Shred the Pork
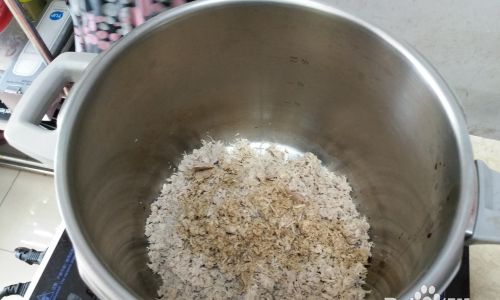
Once the pork is tender, transfer it to a large bowl using a slotted spoon or tongs, leaving behind any excess liquid. Use a fork or meat shredder to shred the pork into fine strands. The finer you shred the pork, the fluffier your pork floss will be. If you prefer a finer texture, you can also pulse the shredded pork in a food processor a few times, but be careful not to over-process it, as you want to retain some texture.
Step 5: Fry the Pork Floss
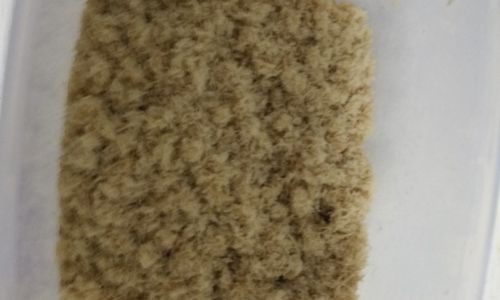
Heat 1-2 tbsp of vegetable oil in a large, non-stick skillet over medium-low heat. Add the shredded pork to the skillet, spreading it out in a single layer. Fry the pork, stirring occasionally, until it starts to turn a golden brown and becomes slightly crispy. This will take about 10-15 minutes, depending on the heat and the amount of pork you’re frying. Be patient and avoid raising the heat too high, as you want to toast the pork evenly without burning it.
Step 6: Season and Toast Further (Optional)
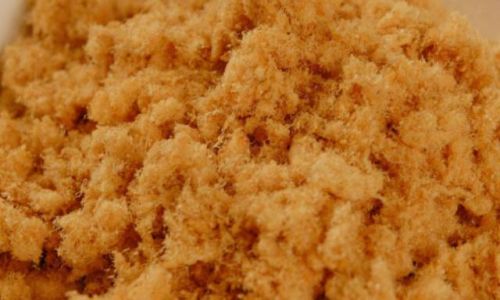
Once the pork has achieved a nice golden brown color, you can add a bit more seasoning if desired. Sprinkle a pinch of salt, a dash of five-spice powder, or a drizzle of honey over the pork and stir to combine. If you want an even fluffier texture, you can transfer the pork to a baking sheet lined with parchment paper and toast it in the oven at a low temperature (around 250°F or 120°C) with the convection setting on, if available, for about 10 minutes. This will help dry out the pork further and make it even more fluffy.
Step 7: Cool and Store
Let the pork floss cool completely on the baking sheet. Once cooled, transfer it to an airtight container. Pork floss can be stored in the refrigerator for up to 2 weeks or in the freezer for several months. To reheat, simply spread it out on a baking sheet and toast it in a preheated oven at a low temperature until warm and fluffy.
Tips for Perfect Pork Floss
- Marinate Longer: Marinating the pork overnight will yield a more flavorful result.
- Control the Heat: When frying or toasting the pork, use medium-low heat to avoid burning.
- Adjust Seasoning: Taste the pork as you cook and adjust the seasoning to your liking. If you prefer a sweeter pork floss, add more honey or maple syrup. For a saltier version, increase the amount of soy sauce.
- Use High-Quality Ingredients: The quality of your ingredients will directly affect the taste of your pork floss. Use good-quality soy sauce, honey, and pork for the best results.
- Store Properly: To keep your pork floss fresh, store it in an airtight container in the refrigerator. If you plan to keep it for longer, freezing is a good option.
Conclusion
Making homemade pork floss may seem like a time-consuming process, but the end result is well worth the effort. With this recipe, you can enjoy a delicious, fluffy, and customizable snack that’s free from preservatives and artificial flavors. Whether you’re topping a bun, adding it to a salad, or simply enjoying it on its own, homemade pork floss is a versatile and delicious addition to your culinary repertoire. So, why wait? Gather your ingredients, roll up your sleeves, and start making your own pork floss today!





0 comments