Table of content
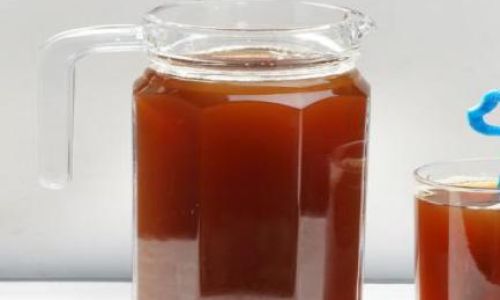
Making homemade plum juice, a refreshing and tangy beverage often enjoyed during hot summer days, is a delightful culinary endeavor that combines simplicity with a touch of tradition. Whether you’re looking to recreate the nostalgic taste of street-side stalls or simply wish to enjoy a healthier, homemade alternative to sugary drinks, learning how to make plum juice from scratch is both rewarding and straightforward. This comprehensive guide will walk you through the entire process, from selecting the perfect plums to bottling your finished product, ensuring you end up with a glass of delicious, homemade plum juice that hits the spot.
Understanding the Basics: What Are Plums?
Before diving into the recipe, it’s essential to understand the star ingredient: plums. Plums belong to the genus Prunus and are classified as stone fruits due to the presence of a single large seed or pit at their center. They come in various colors, including red, yellow, blue, and purple, each variety offering a slightly different flavor profile. For making plum juice, the most commonly used types are the European plum (Prunus domestica) and the Japanese plum (Prunus salicina), known for their juicy flesh and tart-sweet balance.
Ingredients and Equipment
Before starting, gather the following ingredients and equipment:
-
Ingredients:
- 2 pounds (about 900 grams) of fresh, ripe plums
- 1 cup (240 milliliters) of granulated sugar (adjust to taste)
- 6 cups (1.4 liters) of water
- A few slices of fresh ginger (optional, for an added zing)
- A pinch of salt (optional, to enhance flavors)
- A few drops of lemon juice (optional, to preserve color and freshness)
-
Equipment:
- A large pot or saucepan
- A wooden spoon or silicone spatula
- A fine-mesh strainer or cheesecloth
- A large bowl for straining
- A blender (optional, for smoother juice)
- Funnel and clean bottles or jars for storing
- A ladle or measuring cup for pouring
- A refrigerator (for chilling)
Step-by-Step Instructions
Preparation and Cleaning
Begin by thoroughly washing the plums under running water to remove any dirt, pesticides, or residue. Pat them dry using a clean kitchen towel or paper towels. Next, remove the stems and any bruises or imperfections. If using Japanese plums, which often have a fuzz on their skin, you may want to peel them for a smoother texture, though this step is optional and up to personal preference.
Pitting and Chopping
Using a sharp knife, carefully cut the plums into halves or quarters, depending on their size. Remove the pits and discard them. Chop the plum flesh into smaller pieces if desired, especially if you plan to blend the mixture later for a smoother juice.
Simmering the Plums
In your large pot or saucepan, combine the chopped plums, sugar, water, and ginger slices (if using). Stir well to ensure the sugar begins to dissolve. Place the pot over medium-high heat and bring the mixture to a boil. Once boiling, reduce the heat to low and let it simmer gently, uncovered, for about 30-45 minutes. Stir occasionally to prevent sticking and to help the plums break down and release their juices.
Blending (Optional)
For a smoother, less pulpy juice, you can blend the simmered plum mixture. Carefully transfer the hot contents to a blender, filling it only halfway to avoid overflow. Blend until smooth, then return the mixture to the pot. Alternatively, you can use a potato masher or immersion blender directly in the pot to achieve a chunkier yet still well-combined texture.
Straining
Set a fine-mesh strainer or cheesecloth over a large bowl. Carefully pour the blended or mashed plum mixture through the strainer, using the back of a spoon or a ladle to press down on the solids and extract as much juice as possible. Discard the pulp and solids left in the strainer.
Seasoning and Final Touches
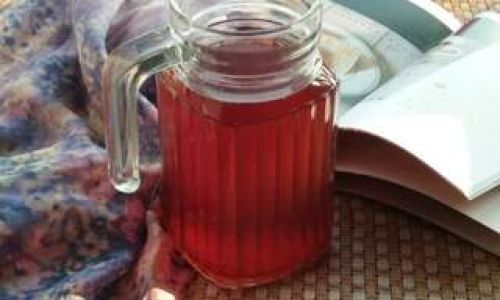
Taste the strained juice and adjust the sweetness by adding more sugar if needed. Stir in a pinch of salt to enhance the flavors and a few drops of lemon juice to preserve the color and add a hint of freshness. Let the juice cool slightly before proceeding to the next step.
Bottling and Storage
Once the juice has cooled to room temperature, funnel it into clean bottles or jars. Make sure to leave some headspace at the top to allow for expansion if freezing. Tightly seal the containers and refrigerate the plum juice for at least a few hours or overnight to allow the flavors to meld and the juice to chill.
Serving
When ready to serve, pour the chilled plum juice over ice cubes, garnish with a slice of lemon or lime, and enjoy! You can also add a splash of soda water for a fizzy twist or serve it with a shot of rum or vodka for an adult version.
Tips for Perfect Plum Juice
- Plum Selection: Choose plums that are ripe but not overly soft. A slight give when gently pressed indicates ripeness.
- Sugar Adjustment: The amount of sugar can be adjusted based on your taste preference. If you prefer a less sweet juice, start with less sugar and add more to taste later.
- Preservation: Homemade plum juice can be stored in the refrigerator for up to a week. For longer storage, consider freezing it in ice cube trays or freezer-safe containers.
- Experimentation: Feel free to experiment with additional flavors, such as adding cinnamon sticks, star anise, or a handful of fresh berries during simmering for unique variations.
Conclusion
Making homemade plum juice is a delightful way to enjoy the natural sweetness and tartness of plums in a refreshing beverage. By following this step-by-step guide, you’ll be able to craft a batch of delicious, preservative-free plum juice that’s perfect for sipping on its own or using as a base for cocktails and mocktails. Whether you’re looking to beat the heat, indulge in a nostalgic treat, or simply impress your friends with your culinary skills, homemade plum juice is a winner that’s sure to delight everyone’s taste buds. Happy juicing!


0 comments