Introduction
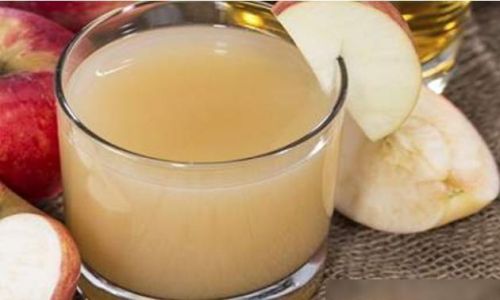
Homemade apple juice is a delightful and nutritious beverage that can be enjoyed by people of all ages. Unlike store-bought versions, homemade apple juice allows you to control the ingredients and the sweetness level, ensuring a fresh, pure taste without any added preservatives or artificial flavors. Making apple juice at home is not only rewarding but also a fun and engaging activity that can bring families together in the kitchen. In this comprehensive guide, we will walk you through the entire process of making homemade apple juice, from selecting the perfect apples to bottling and storing your finished product. By following these steps, you’ll be able to create a delicious, refreshing drink that rivals any commercial brand.
Chapter 1: Choosing the Right Apples
The first and most crucial step in making homemade apple juice is selecting the right apples. The type of apple you choose will significantly impact the flavor, texture, and color of your juice. Here are some key factors to consider when picking apples for juicing:
1 Varieties of Apples
There are numerous varieties of apples available, each with its unique taste profile. For juicing, it’s best to choose apples that are high in juice content and have a balanced sweetness and tartness. Some popular choices for juicing include:
- Red Delicious: Known for their sweet, juicy flesh and vibrant red color.
- Granny Smith: These apples are tart and crisp, adding a refreshing tang to your juice.
- Golden Delicious: Balanced sweetness and tartness with a creamy texture.
- Honeycrisp: Exceptionally juicy and crisp with a hint of honey-like sweetness.
2 Freshness and Ripeness
Always opt for fresh, ripe apples. Fresh apples have a higher juice content and better flavor. Ripe apples should be firm to the touch but yield slightly when pressed. Avoid apples with soft spots, bruises, or mold, as these can spoil the taste of your juice.
3 Organic vs. Conventionally Grown
If possible, choose organic apples to avoid pesticides and other chemicals. Organically grown apples are often healthier and provide a purer juice. However, if organic apples are not available, thoroughly wash conventionally grown apples under running water to remove any surface residues.
Chapter 2: Preparing the Apples
Once you’ve selected your apples, it’s time to prepare them for juicing. This involves washing, coring, and slicing the apples to ensure smooth juicing and a consistent texture.
1 Washing the Apples
Start by rinsing the apples under cold running water to remove dirt, debris, and any residual pesticides. You can also use a vegetable brush to gently scrub the surface of the apples. Pat them dry using a clean kitchen towel or paper towels.
2 Coring and Slicing
Remove the cores and stems from the apples. You can use an apple corer or a sharp knife for this task. Next, slice the apples into manageable pieces. Aim for uniform slices to ensure even juicing. If you have a high-powered juicer, you can even quarter the apples without removing the peel, as some models can handle the skin and seeds. However, for smoother juice, peeling the apples before slicing is recommended.
Chapter 3: Choosing the Right Juicer
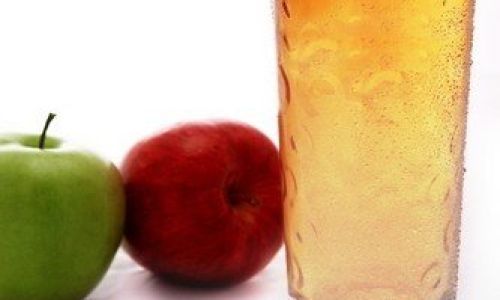
The type of juicer you use will greatly affect the quality and quantity of juice you produce. There are several types of juicers available, each with its own set of pros and cons.
1 Centrifugal Juicers
Centrifugal juicers are the most common and affordable type of juicer. They work by grinding the apples against a spinning mesh screen to separate the juice from the pulp. While they are fast and easy to use, centrifugal juicers can produce a bit of foam and may not extract as much juice as other types.
2 Masticating Juicers
Masticating juicers, also known as slow juicers, use a single auger to slowly crush and press the apples, extracting more juice with less foam. They are more expensive than centrifugal juicers but are quieter, produce less heat (which preserves nutrients), and are better at handling leafy greens and softer fruits.
3 Triturating Juicers
Triturating juicers are similar to masticating juicers but use two gears to grind and press the apples, extracting even more juice with minimal oxidation. These juicers are the most expensive but offer the highest juice yield and longest-lasting juice freshness.
Chapter 4: Juicing the Apples
Now that you have your apples prepared and your juicer chosen, it’s time to start juicing. Follow these steps to ensure a smooth and efficient juicing process.
1 Assembling the Juicer
Before you begin, make sure your juicer is properly assembled according to the manufacturer’s instructions. This includes attaching the juicing screen, pulp container, and juice collection jug.
2 Feeding the Apples
Turn on your juicer and start feeding the apple slices into the chute one by one. If your juicer has a large chute, you may be able to feed in several slices simultaneously. Push the apples down gently with the pusher provided to ensure they are fully processed.
3 Collecting the Juice
As the apples are processed, the juice will be separated from the pulp and collected in the juice jug. Continue feeding apples until you have used all of your prepared slices.
4 Cleaning the Juicer

Once you have finished juicing, turn off the juicer and unplug it. Allow it to cool for a few minutes before disassembling and cleaning the parts. Most juicer parts can be washed in hot, soapy water or placed in the dishwasher. Make sure to clean the juicing screen thoroughly to prevent clogging and maintain optimal performance.
Chapter 5: Sweetening and Flavoring (Optional)
While homemade apple juice is delicious on its own, you can enhance its flavor by adding a touch of sweetness or other ingredients.
1 Adding Sugar or Honey
If you prefer a sweeter juice, you can add a small amount of sugar or honey to taste. Start with a small quantity and taste the juice before adding more. Remember, the sweetness of the apples themselves will vary, so adjust accordingly.
2 Infusing with Herbs and Spices
For a unique twist, consider infusing your apple juice with herbs and spices such as cinnamon sticks, cloves, or a sprig of fresh mint. Simply add the desired ingredients to the juice and let it steep for a few minutes before serving. Strain out the herbs and spices before drinking.
Chapter 6: Bottling and Storing
Once you have your apple juice ready, it’s important to store it properly to maintain its freshness and flavor.
1 Bottling
Pour the juice into clean, airtight bottles or containers. Glass bottles are ideal as they do not leach chemicals into the juice, but plastic bottles with BPA-free labels are also acceptable. Fill the bottles to the top to minimize oxygen exposure, which can cause oxidation and spoilage.
2 Refrigeration
Store your homemade apple juice in the refrigerator. Properly stored, homemade apple juice can last for up to three days. If you want to extend its shelf life, you can freeze the juice in ice cube trays or freezer-safe containers. Just remember to thaw frozen juice in the refrigerator overnight before serving.
Conclusion
Making homemade apple juice is a rewarding and enjoyable process that allows you to create a delicious, nutritious beverage tailored to your taste preferences. By following the steps outlined in this guide, from selecting the right apples to bottling and storing your juice, you can enjoy fresh, pure apple juice that is free from preservatives and artificial flavors. Whether you’re looking for a refreshing drink to enjoy on a hot day or a nutritious snack for your children, homemade apple juice is a perfect choice. So, gather your ingredients, roll up your sleeves, and start juicing today!



0 comments