Making hawthorn cans at home is a delightful way to preserve the tangy, sweet flavor of hawthorn fruits for later enjoyment. Hawthorn (Crataegus species) is a shrub or small tree native to temperate regions, known for its vibrant red or orange berries that are rich in vitamins, antioxidants, and dietary fiber. These berries are not only delicious but also offer numerous health benefits, such as aiding digestion and improving heart health. By canning hawthorns, you can extend their shelf life and enjoy their unique taste throughout the year.
In this comprehensive guide, we’ll walk you through the entire process of making hawthorn cans from start to finish. We’ll cover everything from selecting the right hawthorn fruits, preparing your equipment and ingredients, to the actual canning process and ensuring the safety of your homemade preserves. Whether you’re a seasoned canner or a beginner, this guide will provide you with all the necessary information and tips to create delicious and safe hawthorn cans.
Selecting and Preparing the Hawthorn Fruits
Choosing the Right Hawthorn Berries
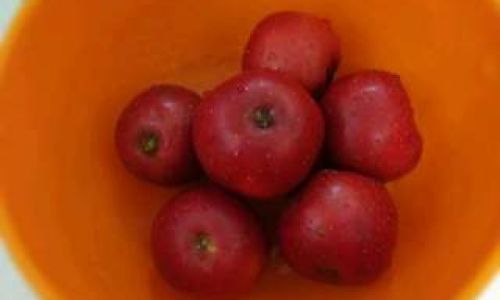
The first step in making hawthorn cans is selecting the right berries. Look for firm, fully ripe hawthorns that are deep red or orange in color. Avoid berries that are soft, moldy, or have insect damage. If you’re picking your own hawthorns, make sure to harvest them from a healthy tree that has not been sprayed with pesticides.
Cleaning the Berries
Once you have your hawthorns, it’s important to clean them thoroughly. Rinse the berries under cold running water to remove any dirt, debris, or pesticides. You can use a vegetable brush to gently scrub the surface of the berries if needed. After cleaning, pat the berries dry with a clean kitchen towel or let them air-dry on a paper towel-lined baking sheet.
Removing Seeds and Stems
Hawthorn berries contain small seeds and a central stem. While some recipes call for leaving the seeds in for added texture and nutrition, many people prefer to remove them for a smoother texture. To remove the seeds and stems, use a paring knife to slice the berries in half and scoop out the seeds with the tip of the knife or your fingers. Alternatively, you can use a food mill or blender to puree the berries, then pass the puree through a fine-mesh sieve to remove the seeds and stems.
Preparing Your Equipment and Ingredients
Essential Equipment
Before you begin the canning process, make sure you have all the necessary equipment. Here’s a list of what you’ll need:
- Large stainless steel or enamel-coated pots for boiling water and canning
- Canning jars with lids and rings (make sure they are clean and free of chips or cracks)
- Canning tongs or jar lifter
- Funnel (optional, but helpful for filling jars)
- Ladle or measuring cup for pouring
- Clean kitchen towels or paper towels
- Timer
- Jar rack or towel-lined surface for cooling jars
- Pressure canner (for low-acid foods like hawthorns) or a large pot with a rack for water bath canning (if you’ve added enough acid to make the mixture safe for water bath canning)
Ingredients
In addition to the hawthorn berries, you’ll need a few other ingredients to make your cans. Here’s a basic recipe:
- 4 cups of prepared hawthorn berries (seeded or unseeded, according to your preference)
- 3 cups of water or apple cider vinegar (for acidity, if using a water bath canner)
- 2-3 cups of sugar or an alternative sweetener (such as honey or maple syrup, to taste)
- A pinch of salt (optional, for enhancing flavor)
- Citrus zest or juice (optional, for added tanginess)
- Spices (optional, such as cinnamon sticks, cloves, or allspice for added flavor)
Making the Hawthorn Syrup
Combining Ingredients
In a large stainless steel or enamel-coated pot, combine the prepared hawthorn berries, water or vinegar, sugar or alternative sweetener, and any optional ingredients like salt, citrus zest, or spices. Stir well to combine.
Simmering the Mixture
Place the pot on the stove over medium-high heat and bring the mixture to a boil. Reduce the heat to low and let it simmer, stirring occasionally, until the berries break down and the mixture thickens to your desired consistency. This can take anywhere from 30 minutes to an hour, depending on the heat and how much liquid you started with.
Tasting and Adjusting
Once the mixture has thickened, taste it and adjust the sweetness and tanginess to your preference. If it’s too tangy, add a bit more sugar. If it’s too sweet, you can add a splash of vinegar or lemon juice. Keep in mind that the flavor will intensify as the cans sit, so err on the side of being a bit less sweet if you’re unsure.
Preparing the Jars and Canning
Sterilizing the Jars
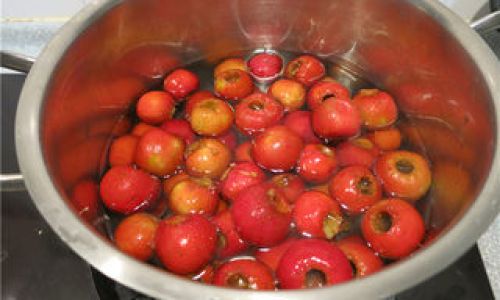
While the hawthorn syrup is simmering, sterilize your canning jars, lids, and rings. You can do this by placing them in a large pot of boiling water and letting them boil for at least 10 minutes. Use canning tongs or a jar lifter to carefully remove the jars from the water and place them on a clean kitchen towel or jar rack. Keep the lids and rings in the hot water until you’re ready to use them.
Filling the Jars
Once the hawthorn syrup has reached your desired consistency, use a ladle or measuring cup to pour it into the sterilized jars, leaving at least 1/2 inch of headspace at the top of each jar. Wipe the rim of each jar clean with a clean kitchen towel or paper towel to remove any syrup or debris that could prevent the lid from sealing properly.
Securing the Lids and Processing
Place the lids and rings on the jars and secure them tightly. If you’re using a pressure canner, follow the manufacturer’s instructions for processing low-acid foods. For hawthorn cans, you’ll typically need to process them at a pressure of 10-15 psi for 25-30 minutes, depending on your altitude and the size of the jars. If you’re using a water bath canner, make sure your syrup has enough acidity (by adding vinegar or lemon juice) to be safe for this method, and process the jars in boiling water for at least 30 minutes.
Cooling and Storing
Removing the Jars
Once the processing time is up, carefully remove the jars from the canner or pot using canning tongs or a jar lifter. Place them on a towel-lined surface and let them cool completely. As they cool, you should hear the lids pop, indicating that they have sealed properly.
Checking the Seals
Once the jars have cooled, press down on the center of each lid to check for a proper seal. If the lid does not move up and down, it has sealed correctly. If it does move, the jar has not sealed and should be refrigerated and used immediately.
Storing the Cans
Properly sealed jars of hawthorn cans can be stored in a cool, dark place for up to a year. Make sure to label the jars with the date and contents for easy identification.
Serving Your Hawthorn Cans
When you’re ready to enjoy your hawthorn cans, simply open a jar and serve the syrup over ice cream, yogurt, or pancakes. You can also use it as a glaze for meats or a topping for oatmeal or granola. The possibilities are endless!
Conclusion
Making hawthorn cans at home is a rewarding way to preserve the delicious flavor of these healthy berries. By following this step-by-step guide, you can create delicious, safe, and long-lasting preserves that you can enjoy throughout the year. Whether you’re a seasoned canner or a beginner, with the right equipment, ingredients, and techniques, you’ll be able to make hawthorn cans that are sure to impress your friends and family. So, why wait? Gather your ingredients and equipment, and start making your own hawthorn cans today!

0 comments