Introduction
In the realm of healthy snacks, fruit and vegetable crisps have emerged as a delightful and nutritious alternative to traditional junk food. These crunchy treats not only satisfy your urge for something savory or sweet but also provide essential vitamins, minerals, and antioxidants. Making your own fruit and vegetable crisps at home allows you to control the ingredients, ensuring they are free from unhealthy additives and preservatives. Moreover, the process can be both fun and rewarding, offering a creative outlet in the kitchen.
This comprehensive guide will walk you through the step-by-step process of making fruit and vegetable crisps, highlighting various techniques, tips, and tricks to ensure perfect results. Whether you’re a seasoned chef or a novice in the kitchen, you’ll find valuable information to help you craft delicious, homemade crisps that your entire family will enjoy.
Section 1: Understanding the Basics
Before diving into the specifics of making fruit and vegetable crisps, it’s crucial to understand the fundamental principles involved. The primary goal is to dehydrate the produce while preserving its flavor, color, and nutritional value. This can be achieved through various methods, including oven-baking, air-frying, and dehydration using a food dehydrator.
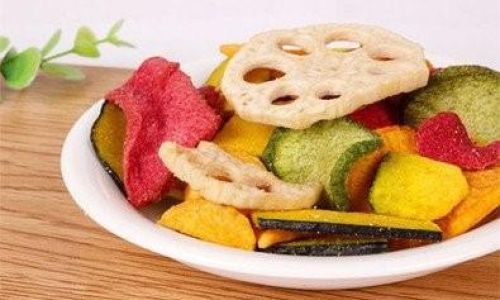
1 Choosing the Right Produce
The success of your crisps largely depends on the type of fruit or vegetable you choose. Some varieties are naturally better suited for dehydration due to their high water content, firm texture, and natural sweetness or tartness.
- Fruits: Apples, bananas, mangoes, pineapples, pears, and berries are popular choices. Avoid fruits with high water content and soft textures, like watermelon, as they may not crisp well.
- Vegetables: Carrots, sweet potatoes, zucchini, bell peppers, beets, and kale are excellent options. Root vegetables tend to hold their shape better during dehydration.
2 Preparation Techniques
Proper preparation is key to achieving the desired texture and flavor. Here are some general guidelines:
- Cleaning: Thoroughly wash your produce under running water. For vegetables, you may need to scrub the surfaces gently to remove dirt and residue.
- Peeling and Slicing: Peel the skin if desired (though some people prefer to keep it on for added fiber and nutrients). Slice the fruit or vegetable into thin, uniform pieces. Thinner slices will crisp faster and more evenly.
- Blanching (Optional): For some vegetables, blanching in boiling water for a brief period (usually 1-2 minutes) followed by an ice water bath can help retain color and texture.
- Patting Dry: Use paper towels or a clean kitchen towel to remove excess moisture from the slices. This will speed up the dehydration process and prevent clumping.
Section 2: Oven-Baking Method
Oven-baking is one of the most accessible methods for making fruit and vegetable crisps. It requires minimal equipment and can be done in any standard oven.
1 Preheating the Oven
Preheat your oven to a low temperature, typically between 200°F (93°C) and 250°F (121°C). Lower temperatures ensure that the produce dries out slowly, preventing it from burning or becoming overly browned.
2 Arranging the Slices
Spread the fruit or vegetable slices in a single layer on baking sheets lined with parchment paper or silicone baking mats. Ensure they are not overlapping to allow for even drying.
3 Baking Time
Baking time can vary greatly depending on the type of produce, thickness of the slices, and your oven’s efficiency. As a general guideline:
- Thin slices of apples, pears, and bananas: 1.5 to 2.5 hours
- Sweet potatoes, carrots, and zucchini: 2 to 3 hours
- Berries and thinner fruits: 1 to 1.5 hours
Keep an eye on the crisps, rotating the baking sheets halfway through to ensure even drying. They should be golden brown and crisp to the touch when done.
4 Cooling and Storing
Once baked, allow the crisps to cool completely on the baking sheets. This will help them firm up and become even crispier. Store them in an airtight container at room temperature for up to a week. For longer storage, keep them in an airtight container in the refrigerator for up to a month or freeze them for up to six months.
Section 3: Air-Fryer Method
Air fryers have become popular kitchen appliances due to their ability to cook food with minimal oil. They can also be used to make delicious fruit and vegetable crisps.
1 Preparing the Air Fryer
Preheat your air fryer to a temperature between 300°F (149°C) and 350°F (177°C). This higher temperature range is acceptable because air fryers circulate hot air more efficiently, reducing the risk of burning.
2 Arranging the Slices
Place the fruit or vegetable slices in a single layer in the air fryer basket, ensuring they are not overcrowded. You may need to work in batches depending on the size of your air fryer.
3 Cooking Time
Cooking time in an air fryer is generally shorter than in an oven. Here are some approximate cooking times:
- Thin slices of apples, pears, and bananas: 10 to 15 minutes
- Sweet potatoes, carrots, and zucchini: 12 to 20 minutes
- Berries and thinner fruits: 8 to 12 minutes
Shake the basket occasionally to ensure even cooking. The crisps should be golden brown and crisp when done.
4 Cooling and Storing
Allow the crisps to cool on a wire rack or in a single layer on a plate to prevent them from becoming soggy. Store them in an airtight container as described in the oven-baking method.
Section 4: Food Dehydrator Method
A food dehydrator is a specialized appliance designed for dehydration, offering precise temperature and airflow control. It’s an excellent choice for making large batches of fruit and vegetable crisps.
1 Setting Up the Dehydrator
Set your food dehydrator to a temperature between 115°F (46°C) and 135°F (57°C). This range ensures slow, even dehydration without compromising the nutritional value or flavor of the produce.
2 Arranging the Slices
Place the fruit or vegetable slices on the dehydrator trays in a single layer. Use parchment paper or mesh sheets to prevent sticking, if necessary.
3 Dehydration Time
Dehydration time can vary depending on the type and thickness of the produce. Here are some approximate times:
- Thin slices of apples, pears, and bananas: 8 to 12 hours
- Sweet potatoes, carrots, and zucchini: 10 to 16 hours
- Berries and thinner fruits: 6 to 8 hours
Check the crisps periodically, flipping them if necessary to ensure even drying. They should be dry, crisp, and slightly translucent when done.
4 Cooling and Storing
Allow the crisps to cool completely before storing them in an airtight container. They can be kept at room temperature for up to two weeks, in the refrigerator for up to a month, or frozen for longer storage.
Section 5: Adding Flavor and Creativity
To elevate your fruit and vegetable crisps, consider adding spices, herbs, or sweeteners to enhance their flavor. Here are some ideas:
- Cinnamon, nutmeg, and ginger: Perfect for apple and pear crisps.
- Sea salt, black pepper, and garlic powder: Ideal for vegetable crisps.
- Honey, maple syrup, or agave nectar: Add a touch of sweetness to fruit crisps.
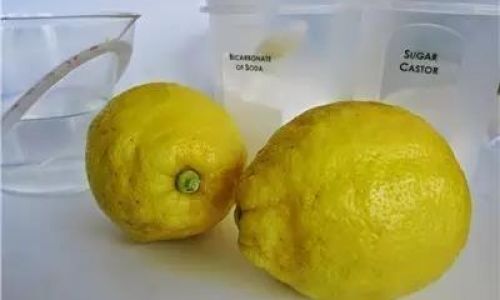
- Citrus zest or juice: Brighten up the flavor of both fruits and vegetables.
Sprinkle the seasonings evenly over the slices before dehydration. For a more complex flavor profile, consider making a marinade or dipping the slices in a light mixture of your favorite spices and a small amount of oil.
Conclusion
Making fruit and vegetable crisps at home is a rewarding endeavor that not only provides delicious, healthy snacks but also allows you to experiment with different ingredients and flavors. By following the guidelines outlined in this guide, you can achieve perfect results using various methods—oven-baking, air-frying, or food dehydration.
Remember, the key to successful crisps is patience and attention to detail. Monitor the dehydration process closely, and don’t be afraid to adjust temperatures and times based on your specific equipment and the type of produce you’re using. With practice, you’ll develop a sense of when your crisps are ready, ensuring they are crispy, flavorful, and nutritious.
Enjoy the process of creating your own fruit and vegetable crisps, and share your creations with friends and family. They’re sure to be a hit, offering a healthy alternative to traditional

0 comments