Introduction

Dried shrimp, often referred to as dried sea shrimp or simply dried shrimps, are a staple in many cuisines worldwide. They add a unique flavor and texture to dishes, making them a versatile ingredient in both traditional and modern recipes. From Asian stir-fries and soups to European pasta dishes and salads, dried shrimp can elevate the taste profile of almost any meal. However, making your own dried shrimp at home can be a daunting task if you’re unfamiliar with the process. This comprehensive guide aims to demystify the art of drying shrimp, providing you with step-by-step instructions, tips, and tricks to ensure you end up with perfectly dried shrimp that retain their flavor, texture, and nutritional value.
Section 1: Understanding the Basics
Before diving into the specifics of how to make dried shrimp, it’s crucial to understand the basics of the process. Drying shrimp involves removing moisture from the shrimp to prevent spoilage and concentrate flavors. This can be achieved through various methods, including sun-drying, oven-drying, and dehydration using specialized equipment. Each method has its own set of pros and cons, and the choice of method often depends on factors such as availability of equipment, climate, and personal preference.
1 Sun-Drying
Sun-drying is a traditional method that relies on natural sunlight to evaporate moisture from the shrimp. It’s cost-effective and eco-friendly but can be unpredictable due to weather changes. Sun-dried shrimp tend to have a more intense flavor and aroma because they are exposed to the elements for an extended period.
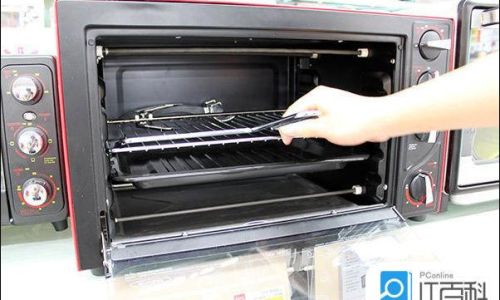
2 Oven-Drying
Oven-drying is a more controlled method that allows for precise temperature regulation. It’s faster than sun-drying and less affected by weather conditions. However, it requires constant monitoring to prevent overcooking and loss of flavor.
3 Dehydration Using Specialized Equipment
Dehydrators are designed specifically for drying food items, providing consistent heat and air circulation to ensure even drying. They are ideal for large batches and offer more control over the drying process. However, they can be costly and require some initial investment.
Section 2: Preparing the Shrimp
The quality of your dried shrimp starts with the quality of the fresh shrimp you use. Here are some key steps to prepare the shrimp before drying:
1 Selecting the Right Shrimp
Choose fresh, high-quality shrimp with firm flesh and a mild, sweet aroma. Avoid shrimp that have a strong fishy odor or appear slimy, as these are signs of freshness. The size of the shrimp can vary, but smaller shrimp tend to dry more quickly and evenly.
2 Cleaning the Shrimp
Thoroughly rinse the shrimp under cold running water to remove any dirt, sand, or impurities. Use a small brush or your fingers to gently scrub the exterior if necessary. Pat the shrimp dry with paper towels to remove excess moisture.
3 Peeling and Deveining
Peel the shrimp by gently pulling off the shell. If you prefer, you can leave the tails on for added presentation. Deveining is optional but recommended to remove the digestive tract, which can contain sand and grit. Use a sharp knife to make a shallow cut along the back of the shrimp and pull out the dark vein with the tip of the knife or a toothpick.
4 Marinating (Optional)
Marinating the shrimp before drying can add extra flavor and moisture. Use a simple marinade made from salt, sugar, and a touch of vinegar or lemon juice. Let the shrimp sit in the marinade for about 30 minutes to an hour, then pat them dry again before proceeding with the drying process.

Section 3: Drying Methods in Detail
Now that your shrimp are prepared, let’s dive into the specific steps for each drying method.
1 Sun-Drying Method
Step 1: Preparation
Lay the shrimp out on clean, dry mesh screens or trays. Make sure they are not overcrowded to allow for even drying.
Step 2: Placement
Position the trays in a sunny, well-ventilated area. Avoid direct exposure to intense midday sun, as this can cause the shrimp to cook rather than dry.
Step 3: Monitoring
Check the shrimp regularly, turning them over occasionally to ensure even drying. Depending on the climate and the size of the shrimp, this process can take several days.
Step 4: Completion
When the shrimp are dry and slightly translucent, with a firm texture, they are ready. Store them in an airtight container in a cool, dark place.
2 Oven-Drying Method
Step 1: Preheat the Oven
Preheat your oven to a low temperature, between 150°F (65°C) and 200°F (93°C). Lower temperatures are safer to prevent overcooking.
Step 2: Layout the Shrimp
Place the shrimp in a single layer on baking sheets lined with parchment paper or silicone baking mats. Ensure they are not touching each other.
Step 3: Drying
Put the baking sheets in the preheated oven and leave them to dry. This can take several hours, depending on the oven’s temperature and the size of the shrimp. Check every hour, turning the shrimp over halfway through.
Step 4: Completion

Once the shrimp are dry and slightly translucent, remove them from the oven and let them cool completely. Store them in an airtight container in a cool, dark place.
3 Dehydrator Method
Step 1: Setting Up
Follow the manufacturer’s instructions for setting up your dehydrator. Preheat it to the recommended temperature for drying seafood, usually around 135°F (57°C).
Step 2: Layout the Shrimp
Place the shrimp in a single layer on the dehydrator trays. Use mesh sheets if your dehydrator comes with them to prevent sticking.
Step 3: Drying
Set the timer according to the manufacturer’s guidelines, usually between 6 and 12 hours. Check the shrimp every few hours, turning them over if necessary for even drying.
Step 4: Completion
When the shrimp are dry and slightly translucent, with a firm texture, they are ready. Let them cool completely before storing them in an airtight container in a cool, dark place.
Section 4: Storage and Usage
Proper storage is crucial to maintain the quality and flavor of your dried shrimp. Here are some tips for storing and using your dried shrimp:
1 Storage
Store dried shrimp in an airtight container in a cool, dark place. Avoid exposure to moisture, heat, and direct sunlight, which can cause spoilage. Dried shrimp can be stored for several months if properly sealed and kept in optimal conditions.
2 Usage
Dried shrimp can be used in a variety of dishes, from soups and stir-fries to pasta and salads. They add a rich, savory flavor and can be rehydrated before use by soaking them in water or broth for a few minutes. Grind them into a powder for use as a seasoning, or chop them into smaller pieces for easier incorporation into recipes.
Conclusion
Making your own dried shrimp at home can be a rewarding experience that allows you to control the quality and flavor of the final product. By following the steps outlined in this guide, you can achieve perfectly dried shrimp that are not only delicious but also nutritious and versatile. Whether you choose to sun-dry, oven-dry, or use a dehydrator, the key to success is patience, attention to detail, and a love for the culinary process. Enjoy experimenting with your dried shrimp in various recipes and discovering new ways to elevate your dishes with this unique ingredient.


0 comments