Introduction
Mulberries, known scientifically as Morus species, are fruits that have been cherished for their sweet and tangy taste, as well as their numerous health benefits. Native to China, mulberries have since spread across Asia, Europe, and parts of North America, becoming a beloved addition to various cuisines and traditional medicines. One popular way to enjoy mulberries is by drying them and then using the dried fruit to make mulberry wine. This process not only preserves the fruit but also enhances its flavor, creating a rich, full-bodied wine that is perfect for sipping on its own or pairing with a meal.
In this comprehensive guide, we will walk you through the entire process of making dried mulberry wine, from selecting the right mulberries to bottling your final product. Whether you are a seasoned winemaker or a beginner looking to dip your toes into the world of homemade beverages, this guide will provide you with all the necessary information and tips to ensure a successful batch of mulberry wine.
Chapter 1: Selecting and Preparing the Mulberries
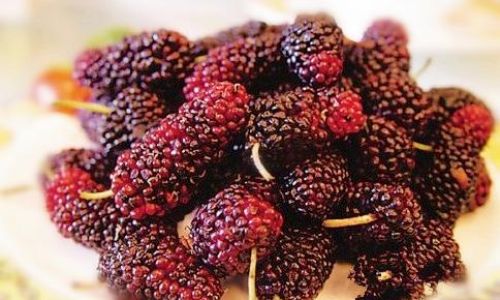
1 Choosing the Right Mulberries
The first step in making dried mulberry wine is to select the right mulberries. Ideally, you should use fresh, ripe mulberries that are free from pests, mold, and other imperfections. The color of the mulberries can vary depending on the species, but they should generally be a deep purple, red, or black when ripe.
If you have access to mulberry trees, you can pick the fruits yourself. Make sure to harvest them on a dry day to minimize the risk of mold and rot. Alternatively, you can purchase fresh mulberries from a local farmer’s market or grocery store. Just be sure to inspect them carefully before purchasing to ensure they are of good quality.
2 Cleaning the Mulberries
Once you have your mulberries, the next step is to clean them. This is crucial as any dirt, pesticides, or other contaminants can affect the taste and quality of your wine.
To clean the mulberries, place them in a colander and rinse them under cold running water. Gently rub the fruit to remove any dirt or debris. Avoid soaking the mulberries in water for too long, as this can cause them to absorb too much moisture and become soft. Once cleaned, pat the mulberries dry with a clean towel or paper towels.
3 Drying the Mulberries
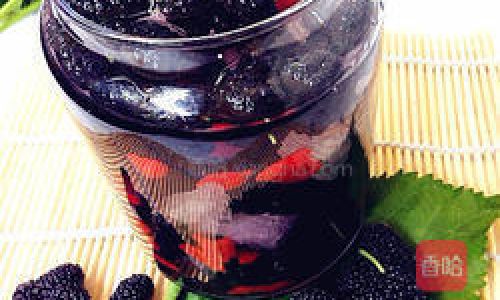
Before you can make mulberry wine, you need to dry the mulberries. Drying concentrates their flavor and makes them easier to handle during the fermentation process.
There are several methods you can use to dry mulberries, including:
-
Sun-drying: Spread the mulberries out on a clean, dry surface such as a baking sheet or tray. Place the tray in a sunny, well-ventilated area and let the mulberries dry for several days, stirring them occasionally to ensure even drying. This method is free but can take several days to a week depending on the weather.
-
Dehydrator: A food dehydrator is a faster and more controlled way to dry mulberries. Spread the fruit out on the dehydrator trays and set the temperature to around 135°F (57°C). Dehydrate the mulberries for several hours, or until they are completely dry and slightly leathery in texture. Check the mulberries periodically to ensure they are not over-dried.
-
Oven: If you don’t have a dehydrator, you can use your oven to dry the mulberries. Preheat the oven to its lowest setting, usually around 150°F (65°C). Spread the mulberries out on a baking sheet and place them in the oven. Prop the oven door open slightly with a wooden spoon or towel to allow moisture to escape. Dry the mulberries for several hours, stirring them occasionally. Keep in mind that oven temperatures can vary, so you may need to adjust the drying time accordingly.
Once the mulberries are dry, store them in an airtight container in a cool, dark place until you are ready to make your wine.
Chapter 2: Preparing the Wine-Making Equipment
Before you begin the wine-making process, it is important to prepare your equipment. Cleanliness is crucial in wine-making, as any contaminants can ruin your batch.
Here is a list of the equipment you will need:
- Large, clean glass or stainless steel pot: This will be used for mixing the mulberries, sugar, and water.
- Fermentation vessel: A large, food-grade plastic or glass container with a tight-fitting lid. This will be the primary fermentation vessel.
- Airlock and stopper: These will be used to seal the fermentation vessel and allow carbon dioxide to escape while preventing oxygen and contaminants from entering.
- Siphon tube: This will be used to transfer the wine from one container to another without disturbing the sediment.
- Fine-mesh strainer or cheesecloth: This will be used to remove the mulberries from the wine.
- Bottles and corks: These will be used to store your finished wine.
- Clean cloths and towels: These will be used for wiping down surfaces and handling equipment.
Make sure to clean all of your equipment thoroughly before use. Use hot, soapy water and a clean cloth to scrub the surfaces. Rinse well and allow the equipment to air-dry completely. Avoid using any detergents or cleaning products that could leave a residue on the equipment.
Chapter 3: Making the Mulberry Wine
1 Preparing the Must
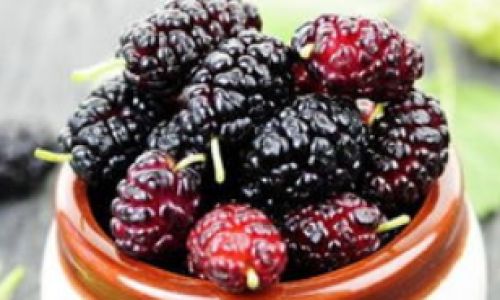
The must is the mixture of mulberries, sugar, water, and yeast that will be fermented into wine. Here’s how to prepare it:
-
Measuring Ingredients: Start by measuring out your ingredients. You will need approximately 3 pounds (1.36 kilograms) of dried mulberries, 2 pounds (0.91 kilograms) of sugar, and 1 gallon (3.79 liters) of water. The exact amounts may vary depending on your personal taste preferences and the sweetness of the mulberries.
-
Mixing Ingredients: Place the dried mulberries and sugar in your large, clean pot. Pour in the water and stir well to combine. Heat the mixture over medium heat, stirring occasionally, until the sugar is completely dissolved and the mixture comes to a simmer. Do not allow the mixture to boil, as this can damage the mulberries and affect the flavor of the wine.
-
Cooling the Must: Once the sugar is dissolved, remove the pot from the heat and let the mixture cool to room temperature. This can take several hours, so be patient. You can speed up the cooling process by placing the pot in a sink filled with ice water, but be sure to stir the mixture occasionally to prevent it from cooling unevenly.
2 Adding Yeast
Once the must has cooled to room temperature, it is time to add the yeast. Yeast is a crucial ingredient in wine-making, as it converts the sugars in the must into alcohol and carbon dioxide during fermentation.
There are several types of yeast you can use, including wine yeast, champagne yeast, and fruit yeast. Wine yeast is a good choice for making mulberry wine, as it is specifically designed for wine-making and can handle the high sugar content of the must.
Before adding the yeast, make sure to activate it. This can be done by sprinkling the yeast over a small amount of warm water (around 100°F or 38°C) and letting it sit for about 10 minutes, or until it becomes frothy and bubbly. This indicates that the yeast is active and ready to use.
Once the yeast is activated, add it to the must and stir well to combine. Cover the pot with a clean cloth or towel to prevent contaminants from entering, but do not seal it tightly, as the yeast will need oxygen to reproduce initially.
3 Primary Fermentation
Now it’s time to start the fermentation process. Transfer the must to your fermentation vessel, using the siphon tube to avoid disturbing the sediment at the bottom of the pot. Fill the vessel to within about an inch of the top to allow for expansion during fermentation.
Attach the airlock and stopper to the fermentation vessel. The airlock will allow carbon dioxide to escape during fermentation while preventing oxygen and contaminants from entering. Fill the airlock with water to the indicated level.
Place the fermentation vessel in a cool, dark place, such as a basement or closet. The ideal temperature for fermentation is between 65°F and 75°F (18°C and 24°C). Too high or too low temperatures can slow down or stop fermentation, affecting the quality of the wine.
During primary fermentation, the yeast will consume the sugars in the must and produce alcohol and carbon dioxide. You will be able to see bubbles rising through the airlock, indicating that fermentation is taking place. This process can take several days to a week, depending on the temperature and the activity of the yeast.
4 Racking and Secondary Fermentation
Once primary fermentation has slowed down and the bubbles in the airlock have decreased significantly, it is time to rack the wine. Racking involves transferring the wine from the primary fermentation vessel to a clean, secondary fermentation vessel, leaving the sediment behind.

0 comments