Table of content
Introduction
Dried fruits are a delightful and nutritious snack option that can be enjoyed year-round. They are浓缩versions of their fresh counterparts, packed with essential vitamins, minerals, and antioxidants. The process of drying fruits not only preserves them for extended periods but also intensifies their flavors, making them an excellent addition to trail mixes, baked goods, and even breakfast cereals. In this comprehensive guide, we will explore various methods for how to make dried fruits at home, from traditional sun-drying to modern dehydrator techniques. We’ll also discuss the benefits of dried fruits, tips for successful drying, and troubleshooting common issues. By the end, you’ll be equipped with the knowledge and skills to create your own delicious, homemade dried fruits.

Understanding the Drying Process
Before diving into the specifics of how to dry fruits, it’s crucial to understand the fundamental principles behind the process. Drying fruits involves removing moisture content to prevent microbial growth and extend shelf life. The ideal moisture content for dried fruits typically ranges between 15% to 20%. This level ensures that the fruits are stable enough to prevent mold and bacterial growth while still retaining some moisture for a pleasant texture and flavor.
There are several factors that influence the drying process:
- Temperature: Higher temperatures accelerate moisture removal but can also cause discoloration and nutrient loss if too high.
- Humidity: High humidity slows down the drying process, as the air is already saturated with moisture.
- Air Circulation: Good air circulation helps in faster and more uniform drying.
- Fruit Type: Different fruits have varying sugar, acid, and pectin contents, which affect their drying rates and final texture.
- Method Used: Sun-drying, oven-drying, and dehydrator use different techniques and require varying levels of attention and control.
Benefits of Dried Fruits
Before we get into the how-to, let’s explore some of the benefits of consuming dried fruits:
- Nutrient-Dense: Dried fruits are concentrated sources of vitamins and minerals, including potassium, iron, and fiber.
- Portable and Convenient: They are easy to pack and carry, making them perfect for on-the-go snacks.
- Versatile: Dried fruits can be used in a variety of recipes, from baking to smoothies.
- Long Shelf Life: Properly dried and stored, they can last for several months to a year.
- Natural Sweeteners: Their natural sweetness makes them a healthier alternative to refined sugars.
Choosing the Right Fruits
Not all fruits are suitable for drying. Some fruits, like bananas and apples, dry well and retain their flavor, while others, like berries, can be more challenging due to their high water content and delicate texture. Here are some popular fruits that are ideal for drying:
- Apples: Choose firm, crisp varieties like Granny Smith or Honeycrisp.
- Apricots: Look for firm, fully ripe apricots with a bright orange color.
- Bananas: Use ripe but not overly soft bananas.
- Berries: Strawberries, blueberries, and cranberries can be dried, but they may require special handling to maintain their shape.
- Cherries: Sweet or tart cherries can be dried, with tart cherries often being preferred for their intense flavor.
- Dates: Deglet Noor and Medjool are popular varieties for drying.
- Figs: Choose firm, ripe figs with a slightly wrinkled skin.
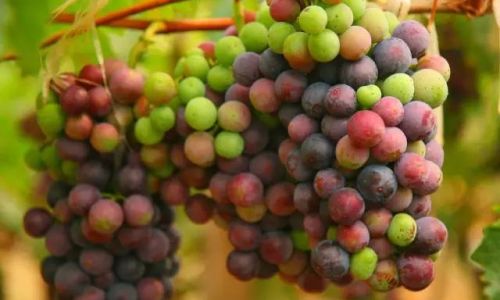
- Grapes: Seedless grapes like Concord or Thompson are excellent choices.
- Mangoes: Use ripe mangoes with a sweet flavor.
- Peaches and Nectarines: Look for firm, ripe fruits with good flavor.
- Pears: Choose firm, ripe pears with a slightly grainy texture.
- Pineapples: Use ripe pineapples with a sweet, aromatic flavor.
- Plums: Prunes are dried plums, and any plum variety can be used.
Preparation Techniques
Before drying, fruits often require some preparation to enhance their drying process and final quality:
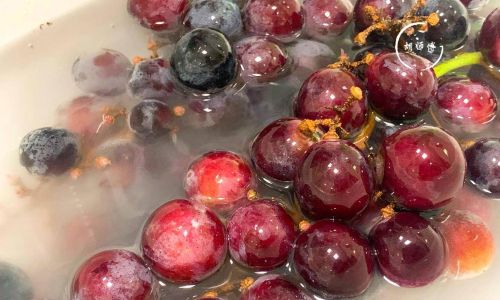
- Cleaning: Thoroughly wash and dry the fruits. Remove any stems, leaves, or pits.
- Peeling and Slicing: Peeling is optional but can improve drying efficiency and final appearance. Slice fruits uniformly to ensure even drying. Thickness can vary depending on the fruit and desired texture, but generally, thinner slices dry faster.
- Treating to Prevent Browning: Some fruits, like apples and pears, may need to be treated with ascorbic acid (Vitamin C), lemon juice, or a commercial anti-browning agent to prevent discoloration.
- Blanching: Blanching certain fruits, like berries, in boiling water for a brief period and then plunging them into ice water can help them retain shape and color during drying.
- Sugaring: For a sweet, sticky coating, some fruits can be dipped or rolled in sugar before drying. This is particularly popular with cranberries and apples.
Drying Methods
Now, let’s delve into the various methods for drying fruits:

Sun-Drying
Sun-drying is the oldest and most natural method of drying fruits. It requires minimal equipment but is weather-dependent and can take several days.
- Preparation: Prepare fruits as described above.
- Laying Out: Spread fruits in a single layer on clean, mesh trays or cheesecloth. Ensure there is good air circulation between the fruits.
- Positioning: Place trays in direct sunlight, preferably on a rack or angle to maximize sun exposure.
- Covering at Night: To prevent dew from re-wetting the fruits, cover them loosely with a cheesecloth or fine-mesh net during the night.
- Monitoring and Turning: Check the fruits daily and turn them over to ensure even drying. Depending on the fruit and weather conditions, sun-drying can take 2-5 days.
- Storing: Once dried, store in airtight containers in a cool, dark place.
Oven-Drying
Oven-drying is a faster method but requires closer monitoring to prevent overcooking.
- Preheat Oven: Preheat your oven to its lowest setting, typically around 150°F (65°C). Some ovens have a specific “dehydrate” setting.
- Preparation: Prepare fruits as described above.
- Arranging: Spread fruits in a single layer on baking sheets lined with parchment paper or silicone mats.
- Drying: Place in the oven and prop the door open slightly with a wooden spoon to allow moisture to escape. This is crucial for even drying.
- Monitoring: Check every 2-3 hours, turning fruits over as needed. Drying time can range from 4-12 hours depending on the fruit and oven temperature.
- Cooling and Storing: Once done, let the fruits cool completely before storing in airtight containers.
Dehydrator Use
Dehydrators are specifically designed for drying fruits and offer the most consistent results. They are electric appliances with adjustable temperature settings and fan-assisted air circulation.
- Preparation: Prepare fruits as described above.
- Loading: Arrange fruits in a single layer on the dehydrator trays.
- Setting Temperature: Set the dehydrator to a temperature between 125°F to 135°F (52°C to 57°C).
- Drying Time: Drying time varies by fruit but generally ranges from 6-24 hours. Check the fruits periodically and rotate trays if necessary for even drying.
- Testing for Doneness: Fruits should be pliable but not tacky. They should snap when bent in half, indicating the correct moisture content.
- Cooling and Storing: Once dried, let the fruits cool completely before storing in airtight containers with desiccant packets to absorb any remaining moisture.
Troubleshooting Common Issues
- Discoloration: Use anti-browning agents or blanching to prevent discoloration.
- Mold: Ensure fruits are fully dried to the correct moisture content and stored in airtight containers.
- Tough Texture: Over-drying can lead to a tough texture. Check fruits frequently and remove them from the drying process when they reach the desired pliability.
- Uneven Drying: Rotate trays and turn fruits over periodically to ensure even drying.
Conclusion
Making your own dried fruits is a rewarding endeavor that allows you to control the quality, flavor, and nutritional content of your snacks. Whether you choose sun-drying, oven-drying, or using a dehydrator, each method offers unique benefits and can produce delicious, healthy dried fruits. By following the guidelines and tips outlined in this guide, you’ll be able to create a variety of dried fruits that are perfect for snacking, cooking, and gift-giving. Enjoy the process and the delicious results!


0 comments