Making loquat wine at home is a delightful way to preserve the sweet and tangy flavor of this seasonal fruit while enjoying a homemade alcoholic beverage. Loquats, known for their golden orange hue and unique taste, can be transformed into a rich, aromatic wine that pairs well with various dishes or enjoyed on its own. This guide will walk you through the entire process of crafting your own loquat wine, from selecting the perfect fruit to bottling the finished product. With careful attention to detail and a bit of patience, you’ll soon be sipping on a bottle of your very own loquat wine.
Choosing the Right Loquats
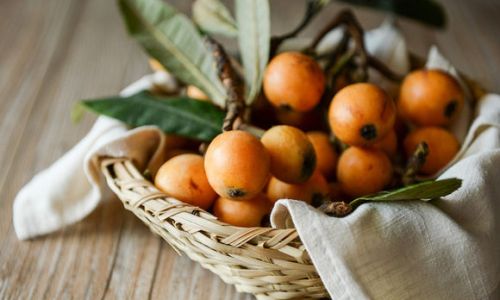
The first step in making loquat wine is selecting high-quality loquats. Look for firm, ripe fruits with a vibrant orange-yellow color and a slightly soft texture. Avoid overripe or bruised loquats as they can introduce unwanted flavors and bacteria into your wine. Ideally, use loquats that are freshly picked or purchased from a reputable source to ensure they are free from pesticides and other contaminants.
Preparing the Loquats
Once you have your loquats, it’s time to prepare them for fermentation. Begin by rinsing the fruits thoroughly under cold running water to remove any dirt or debris. Pat them dry using a clean kitchen towel or let them air-dry. Next, remove the stems and any leaves attached to the loquats. You can leave the skin on for added texture and color, but if you prefer a smoother wine, peel the loquats carefully.
Extracting the Juice
There are several methods to extract juice from loquats, each yielding slightly different results. For a chunkier wine, you can simply crush the loquats by hand or use a potato masher. Alternatively, for a clearer wine, you can puree the loquats in a blender or food processor and then strain out the pulp through a cheesecloth or fine-mesh sieve. If you prefer a sweeter wine, you can add a small amount of sugar to the juice at this stage, but be mindful that the natural sugars in loquats will also contribute to fermentation.
Adding Yeast and Nutrients
Yeast is crucial for initiating fermentation, converting the sugars in the loquat juice into alcohol and carbon dioxide. You can use a specific wine yeast strain, such as Saccharomyces cerevisiae, which is available at most homebrewing supply stores. Before adding the yeast, it’s important to check the juice’s pH level and adjust it if necessary to ensure optimal yeast growth. A pH between 3.0 and 3.5 is generally ideal for wine fermentation.
In addition to yeast, consider adding yeast nutrients such as diammonium phosphate (DAP) or fermaid-K, which provide essential minerals and vitamins that support healthy yeast growth and reproduction. This can lead to more complete fermentation and better-tasting wine.
Fermentation
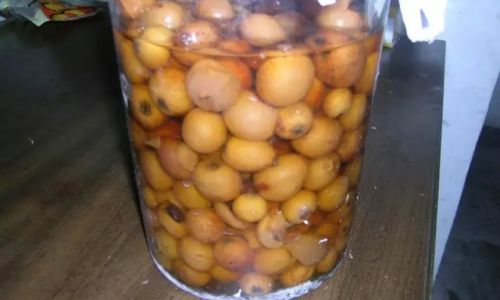
Transfer the loquat juice, yeast, and nutrients to a clean, sanitized fermentation vessel. A glass carboy or food-grade plastic bucket works well for this purpose. Ensure there is enough headspace to accommodate the foam that will form during fermentation. Cover the vessel with a loose-fitting lid or airlock to allow carbon dioxide to escape while preventing contaminants from entering.
Fermentation typically begins within 24 to 48 hours and can last anywhere from one to two weeks, depending on the temperature and yeast strain used. Maintain a consistent temperature between 65°F and 75°F (18°C to 24°C) for optimal yeast activity. Stir the must (the mixture of juice, yeast, and nutrients) daily during the first few days of fermentation to distribute nutrients evenly and prevent the formation of a stuck fermentation.
Racking and Aging
Once fermentation has slowed significantly and the specific gravity has reached a stable level, it’s time to rack the wine. Racking involves transferring the wine from the fermentation vessel to a clean, sanitized secondary container, leaving behind the sediment that has settled at the bottom. This process can be repeated several times over several months to further clarify the wine.
During aging, the wine will develop more complex flavors and aromas. Age your loquat wine in a cool, dark place for at least six months to a year. Oak barrels can add a layer of tannins and vanilla flavors, while stainless steel or glass carboys will preserve the wine’s original characteristics.

Bottling and Enjoying
When the wine has reached your desired flavor profile, it’s ready to bottle. First, stabilize the wine by adding potassium sorbate to prevent further fermentation in the bottle and potassium metabisulfite to protect against oxidation. Allow the wine to sit for a few days after adding these chemicals to ensure they have fully dissolved and worked.
Then, siphon the wine into clean, sanitized bottles, leaving some headspace to allow for the formation of carbon dioxide (if any residual sugar is present) and to prevent the corks from being pushed out. Use corks, screw caps, or other suitable closures to seal the bottles tightly.
Label the bottles with the date, type of wine, and any other relevant information. Store the bottles in a cool, dark place, and allow them to rest for at least a few weeks before enjoying to allow the flavors to meld together.
Conclusion
Making loquat wine is a rewarding endeavor that allows you to capture the essence of this delightful fruit and create a unique, homemade beverage. By following these steps carefully and paying attention to detail, you’ll be able to craft a bottle of loquat wine that you can proudly share with friends and family. Enjoy the process and savor the fruits of your labor!


0 comments