Table of content
Introduction
Coconut jelly, also known as coconut pudding or coconut aspic, is a refreshing and delicious dessert that is perfect for hot summer days. Its creamy texture and subtle sweetness make it a favorite among people of all ages. While you can easily find coconut jelly in many Asian markets and grocery stores, making it at home allows you to customize the taste and texture to your liking. In this article, we will provide a comprehensive guide on how to make coconut jelly from scratch, ensuring that you can enjoy this tropical treat anytime you want.
Before we dive into the recipe, let’s take a brief look at the history and cultural significance of coconut jelly. Coconut jelly is a traditional dessert in many tropical countries, including Southeast Asia, the Pacific Islands, and parts of Latin America. It is often served as a light snack or dessert, paired with fresh fruit, syrup, or ice cream. The versatility of coconut jelly makes it a popular choice for various occasions, from casual gatherings to formal dinners.
Now, let’s get started on making your own coconut jelly. We’ll break down the process into simple steps, ensuring that even beginners can follow along easily.

Ingredients and Equipment
Before you begin, you’ll need to gather all the necessary ingredients and equipment. Here’s a list of what you’ll need:
Ingredients:
- Fresh coconut water or coconut milk: 4 cups (1 liter)
- Granulated sugar: 1/2 cup (100 grams)
- Gelatin powder: 3 tablespoons (22.5 grams)
- Vanilla extract: 1 teaspoon (optional)
- Fresh coconut meat (for garnish, optional): 1/2 cup (grated)
- Fresh fruit or syrup (for serving, optional)
Equipment:
- Blender or food processor
- Large mixing bowl
- Small saucepan
- Whisk or spoon
- Measuring cups and spoons
- Rubber spatula
- Jelly mold or small serving dishes
- Refrigerator
Note: If you prefer a firmer jelly consistency, you can use coconut milk instead of coconut water. Coconut milk will result in a richer, creamier jelly.
Step-by-Step Guide
Step 1: Prepare the Coconut Water or Milk
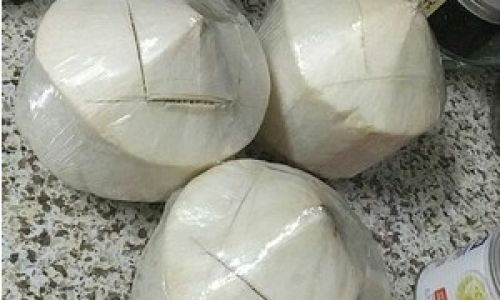
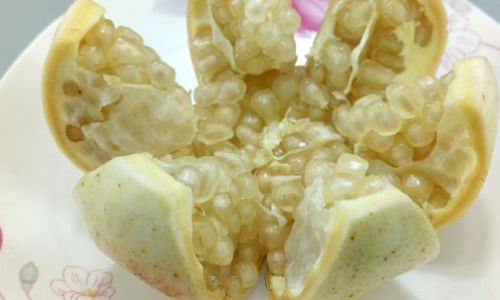
If you’re using fresh coconut water, you’ll need to open the coconuts and pour the water into a blender or mixing bowl. If you prefer using coconut milk, you can either make your own by blending fresh coconut meat with water and straining it, or you can buy canned coconut milk from the store.
For fresh coconut milk:
- Open the coconuts and scoop out the meat.
- Place the coconut meat in a blender with 1 cup of water.
- Blend until smooth.
- Strain the mixture through a cheesecloth or fine-mesh sieve to remove any pulp or fiber.
- Measure out 4 cups of coconut milk and set it aside.
Step 2: Dissolve the Sugar and Gelatin
In a small saucepan, combine the granulated sugar and 1/4 cup of coconut water or milk. Heat over medium-low heat, stirring constantly, until the sugar is completely dissolved. Remove the saucepan from the heat and let it cool slightly.
Next, sprinkle the gelatin powder over the warm sugar mixture. Stir gently until the gelatin is completely dissolved. Be careful not to let the mixture boil, as this can cause the gelatin to lose its effectiveness.

Step 3: Combine Ingredients
Pour the dissolved gelatin mixture into the remaining coconut water or milk. Add the vanilla extract, if using, and stir well to combine. Continue stirring until all the ingredients are evenly distributed.
Step 4: Pour into Mold or Dishes
Pour the coconut jelly mixture into your chosen mold or serving dishes. If you’re using a jelly mold, make sure to grease it lightly with cooking spray or coconut oil to prevent the jelly from sticking.
Step 5: Refrigerate
Place the mold or dishes in the refrigerator and let the jelly set for at least 4 hours, or until it is firm to the touch. The setting time may vary depending on the temperature of your refrigerator and the type of coconut milk or water you used.
Step 6: Garnish and Serve
Once the jelly has set, you can garnish it with grated coconut meat, fresh fruit, or a drizzle of syrup. If you’re using a jelly mold, run a knife around the edges to loosen the jelly before inverting it onto a serving plate.
Serve the coconut jelly chilled, with a scoop of ice cream, a dollop of whipped cream, or a splash of fresh fruit juice for an added touch of sweetness and flavor.
Troubleshooting Tips
Making coconut jelly can sometimes be a bit tricky, especially if you’re not familiar with the process. Here are some troubleshooting tips to help you avoid common pitfalls:

- Jelly is too soft: If your jelly doesn’t set properly, it may be because the gelatin was not fully dissolved or the mixture was not chilled enough. Make sure to stir the gelatin until it is completely dissolved and refrigerate the jelly for at least 4 hours.
- Jelly has a grainy texture: This can happen if the coconut milk or water was not strained properly. Make sure to strain the coconut milk through a cheesecloth or fine-mesh sieve to remove any pulp or fiber.
- Jelly is too sweet: If you prefer a less sweet jelly, you can reduce the amount of sugar in the recipe. Start with 1/4 cup of sugar and adjust to taste.
- Jelly has a strong coconut flavor: If you prefer a subtler coconut flavor, you can use a combination of coconut water and regular milk or water. This will dilute the coconut flavor while still retaining the creamy texture.
Customizing Your Coconut Jelly
Coconut jelly is a versatile dessert that can be customized to suit your taste preferences. Here are some ideas for customizing your jelly:
- Flavors: Add a splash of rum, coconut liqueur, or vanilla extract to the jelly mixture for added flavor. You can also infuse the coconut water or milk with fresh herbs like pandan leaves or lemongrass for a unique twist.
- Colors: Use natural food coloring to add a pop of color to your jelly. Beet juice, blueberry juice, and turmeric powder are great options for natural food coloring.
- Textures: Incorporate other ingredients like chia seeds, diced mango, or toasted coconut flakes for added texture and flavor.
- Toppings: Serve your jelly with a variety of toppings, such as fresh fruit, nuts, seeds, or a drizzle of honey or maple syrup.
Storage and Shelf Life
Coconut jelly can be stored in the refrigerator for up to 5 days. Make sure to store it in an airtight container to prevent it from drying out or absorbing odors from other foods.
If you want to store your jelly for longer, you can freeze it. Place the set jelly in an airtight container and freeze for up to 3 months. To thaw, place the container in the refrigerator overnight or on the countertop for a few hours until it is fully thawed.
Conclusion
Making coconut jelly at home is a fun and rewarding experience. With just a few simple ingredients and a bit of patience, you can enjoy this delicious tropical dessert anytime you want. Whether you’re serving it at a summer barbecue, a holiday gathering, or just enjoying it on a lazy afternoon, coconut jelly is sure to be a hit.
Now that you know how to make coconut jelly, you can experiment with different flavors, textures, and toppings to create your own unique version. And who knows? You might even start a new tradition in your family, passing down this delicious recipe from generation to generation.
So, what are you waiting for? Gather your ingredients and equipment, and start making your own coconut jelly today. Enjoy the process and the delicious results!

Remember, the key to making perfect coconut jelly is to follow the recipe closely, pay attention to detail, and don’t be afraid to experiment. With a bit of practice, you’ll be able to create the perfect jelly that suits your taste preferences and impresses your friends and family.
Happy cooking, and enjoy your delicious coconut jelly!

0 comments