Introduction
Cherry jam is a delightful and versatile condiment that can elevate the taste of various dishes, from toast and scones to yogurt and ice cream. Its rich, sweet-tart flavor and vibrant color make it a favorite among food enthusiasts. While store-bought cherry jam can be convenient, making your own cherry jam at home offers a sense of accomplishment and allows you to control the ingredients, ensuring it’s fresh, preservative-free, and tailored to your taste preferences.
In this comprehensive guide, we’ll walk you through the step-by-step process of making cherry jam, focusing on using fresh or canned cherries, selecting the right ingredients, mastering cooking techniques, and ensuring a perfect set. Whether you’re a seasoned home cook or a beginner in the kitchen, this guide will provide you with all the necessary information and tips to create delicious, homemade cherry jam.
Section 1: Choosing the Right Cherries
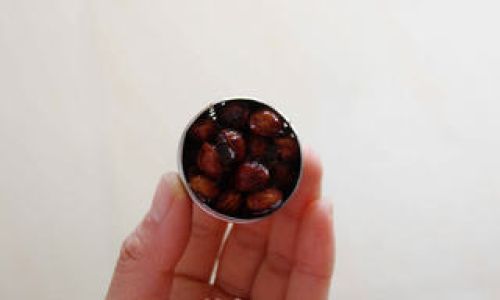
The quality of your cherries will significantly impact the final taste and texture of your jam. Here are some key considerations when selecting cherries for making jam:
1 Fresh vs. Canned Cherries
-
Fresh Cherries: Fresh cherries offer the best flavor and color, but they can be more expensive and seasonal. When choosing fresh cherries, look for firm, plump fruits with a bright, glossy skin. Avoid cherries with soft spots, bruises, or mold.
-
Canned Cherries: Canned cherries are a convenient and cost-effective alternative, especially if fresh cherries are not available. Look for cans that are free of dents, rust, or bulging, and check the expiration date to ensure freshness. Canned cherries may have added syrup, so adjust your recipe accordingly to avoid over-sweetening.
2 Types of Cherries
-
Sweet Cherries: These are typically used for eating fresh or baking. They have a higher sugar content and a mild, sweet flavor, making them ideal for jam if you prefer a sweeter taste.
-
Tart Cherries: Tart cherries are often used in cooking and baking due to their tangy, sour flavor. They provide a nice balance to the sweetness in jam and are perfect if you like a more complex, tart-sweet profile.
3 Preparation
-
Pitting: Remove the pits from fresh cherries using a cherry pitter or a small, sharp knife. This can be a time-consuming process, but it’s essential for a smooth jam texture.
-
Chopping: Depending on your preference, you can chop the cherries into halves, quarters, or leave them whole (if using small cherries). Smaller pieces will result in a smoother jam, while larger pieces will give it a chunkier texture.
Section 2: Gathering Ingredients and Equipment
Before you begin making the jam, ensure you have all the necessary ingredients and equipment ready.
1 Ingredients
- Cherries: 4 cups (about 2 pounds) of fresh or canned, pitted, and chopped cherries
- Sugar: 2 to 3 cups, depending on your taste preference and the tartness of the cherries
- Lemon Juice: 2 to 3 tablespoons, for brightness and to help with preservation
- Pectin: Optional, but helpful for achieving a good set. Follow package instructions for the amount needed.
- Vanilla Extract: 1 teaspoon, for added flavor (optional)
- A Pinch of Salt: To enhance the flavors
2 Equipment
- Large Pot: For cooking the jam
- Wooden Spoon or Silicone Spatula: For stirring
- Potato Masher or Immersion Blender: For mashing the cherries if you prefer a smoother jam
- Jar Funnel: For easy pouring into jars
- Clean Jars: With tight-fitting lids, sterilized by boiling them in water for 10 minutes and then drying them
- Candy Thermometer: Optional, but helpful for precise temperature control
- Ladle: For transferring the jam into jars
- Clean Kitchen Towels: For wiping down jars and handling hot items
- Labels and Ribbon: For gift-giving or organizing your pantry
Section 3: Making the Cherry Jam
Now that you have all your ingredients and equipment ready, let’s dive into the cooking process.
1 Preparing the Cherries
- If using fresh cherries, wash them thoroughly under cold running water and pat them dry with paper towels. Pit and chop them as desired.
- If using canned cherries, drain and rinse them to remove excess syrup. Pat them dry and chop if necessary.
2 Combining Ingredients
- In a large pot, combine the prepared cherries, sugar, lemon juice, and a pinch of salt. Stir well to combine.
- If using pectin, add it according to the package instructions. Pectin helps the jam to set by creating a gel-like structure when cooked.
3 Cooking the Jam
- Place the pot over medium-high heat and stir occasionally until the sugar dissolves and the mixture begins to bubble.
- Once the mixture reaches a rolling boil (a boil that doesn’t stop when stirred), set a timer for 1 to 2 minutes, depending on your preferred jam consistency. Stir constantly to prevent sticking and burning.
- If using a candy thermometer, cook the jam until it reaches 220°F (104°C) for a firmer set or 215°F (102°C) for a softer set.
4 Testing for a Set
- To test if the jam has reached the desired set, spoon a small amount onto a cold plate and let it cool for a minute. Run your finger through the jam on the plate. If it wrinkles and holds its shape, it’s ready. If it’s too runny, continue cooking for another minute or two and test again.
5 Adding Optional Flavors
- If you’re adding vanilla extract, stir it in during the last minute of cooking to avoid burning.
- You can also add other flavors like almond extract, cinnamon, or a handful of chopped nuts for added texture and taste.
Section 4: Jarring and Storing the Jam
Once the jam has reached the perfect consistency, it’s time to jar and store it.
1 Skimming the Foam
- Before pouring the jam into jars, skim off any foam that has formed on the surface using a spoon. This foam can cause the jam to look less appealing and can affect its texture.
2 Pouring the Jam
- Use a jar funnel to pour the hot jam into the prepared, sterilized jars, leaving about a half-inch of headspace at the top to allow for expansion during cooling.
- Wipe the rims of the jars clean with a kitchen towel to remove any jam residue that could prevent the lids from sealing properly.
3 Sealing and Processing
- Place the lids on the jars and screw them on tightly.
- If you want to ensure a longer shelf life, you can process the jars in a water bath canner. Fill a large pot with enough water to cover the jars by at least 1 inch. Bring the water to a boil, carefully lower the jars into the pot using a jar lifter, and boil for 10 minutes.
- Remove the jars from the pot using the jar lifter and place them on a kitchen towel to cool. As they cool, you should hear the lids pop, indicating they have sealed.
4 Storing
- Once the jars have cooled completely, check the lids to ensure they are sealed. If any jars have not sealed, store them in the refrigerator and use them within a few weeks.
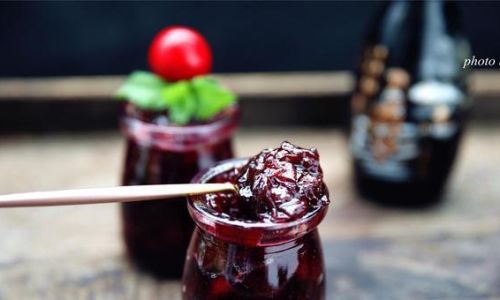
- Properly sealed jars can be stored in a cool, dark place for up to a year. Once opened, store the jam in the refrigerator and use it within a few months.
Section 5: Serving and Enjoying Your Cherry Jam
Your homemade cherry jam is now ready to enjoy! Here are some delicious ways to use it:
- On Toast or Scones: Spread a generous layer of cherry jam on freshly toasted bread or scones for a sweet breakfast treat.
- With Yogurt or Ice Cream: Add a spoonful of cherry jam to your favorite yogurt or ice cream for a flavorful twist.
- In Baking: Use cherry jam as a filling for cookies, cakes, or pastries.
- Over Pancakes or Waffles: Drizzle cherry jam over pancakes or waffles for an extra burst of flavor.
- Gift-Giving: Package your cherry jam in attractive jars with labels and ribbon for a thoughtful homemade gift.
Conclusion
Making cherry jam at home is a rewarding experience that allows you to create a delicious, preservative-free condiment tailored to your taste preferences. By following this comprehensive guide, you’ll learn how to choose the right cherries, gather the necessary ingredients and equipment, cook the jam to perfection, and store it properly for long-term enjoyment. Whether you’re making cherry jam for yourself
0 comments