Introduction
In the realm of traditional Chinese cuisine, pork skin jelly, also known as Rou Pi Dong (肉皮冻), stands as a testament to the art of transforming simple ingredients into a delightful and visually appealing dish. This jelly, characterized by its translucent appearance and smooth texture, is not only a delight to the eyes but also a treat for the palate. It is often served as a cold appetizer, pairing perfectly with soy sauce, vinegar, or a sprinkle of garlic and green onions.
Making crystal-clear pork skin jelly requires patience, precision, and an understanding of the culinary processes involved. From meticulously cleaning the pork skin to carefully simmering and chilling the mixture, each step is crucial in achieving the desired result. In this guide, we will walk you through the entire process, ensuring that you can create a masterpiece right in your own kitchen.
Section 1: Preparing the Ingredients
Before diving into the cooking process, it’s essential to gather all the necessary ingredients and tools. Here’s what you’ll need:
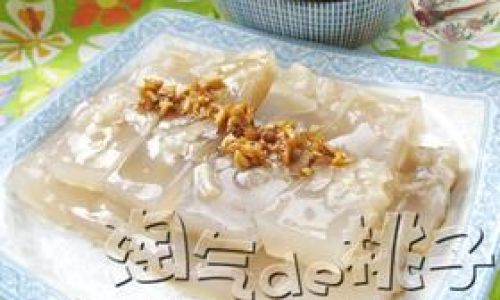
- Pork Skin: The star ingredient. Look for fresh, high-quality pork skin with minimal fat. Approximately 1 kilogram (2.2 pounds) is ideal for a standard batch.
- Water: Clean, filtered water is best. You’ll need enough to cover the pork skin during boiling and simmering.
- Seasonings: A few key seasonings enhance the flavor without overpowering the dish. These include ginger (a few slices), green onions (tied into a knot), and a pinch of salt.
- Vinegar: A tablespoon of vinegar helps to remove impurities and improve the clarity of the jelly.
- Optional Flavorings: For added depth, you can include a few star anise, cloves, or a cinnamon stick.
- Tools: A large pot, a fine-mesh skimmer, a sharp knife, a cutting board, a mixing bowl, and a suitable container for chilling the jelly.
Step-by-Step Preparation
-
Cleaning the Pork Skin:
- Begin by rinsing the pork skin thoroughly under cold running water to remove any surface dirt or debris.
- Place the skin on a cutting board and, using a sharp knife, scrape off any remaining fat, hair, or scales. This step is crucial for achieving a clear jelly.
- Once cleaned, soak the skin in a bowl of cold water for about 30 minutes to soften it further and draw out any remaining impurities.
-
Boiling the Pork Skin:
- Fill a large pot with water and bring it to a rolling boil.
- Add the cleaned pork skin, ginger slices, green onions, and a pinch of salt.
- Boil the skin for about 10 minutes. This initial boiling helps to tighten the skin and makes it easier to remove any remaining fat.
- Remove the pot from heat and, using tongs, transfer the skin to a clean bowl of cold water. Let it cool slightly.
-
Removing Residual Fat:
- Once cooled, inspect the skin closely and use a sharp knife or your fingers to peel off any remaining fat layers. Be meticulous; even small amounts of fat can cloud the jelly.
- If necessary, repeat the boiling and cooling process until the skin is completely free of fat.
-
Simmering the Skin:
- After removing all fat, cut the skin into thin strips, about 1/4 inch wide. This helps the gelatin to release more evenly during simmering.
- Return the skin strips to the cleaned pot, filling it with fresh water. The water level should be at least 2 inches above the skin.
- Add the vinegar and any optional flavorings (star anise, cloves, cinnamon stick).
- Bring the mixture to a gentle simmer over medium-low heat. Skim off any foam or impurities that rise to the surface using a fine-mesh skimmer.
-
Simmering Until Tender:
- Simmer the skin gently for about 2-3 hours, or until the skin is very tender and the liquid has reduced slightly. The longer you simmer, the more gelatin will be extracted, but be careful not to let the liquid boil vigorously, as this can cause the jelly to be cloudy.
- Check the pot occasionally, skimming off any foam and adding more water if necessary to keep the skin submerged.
-
Straining and Seasoning:
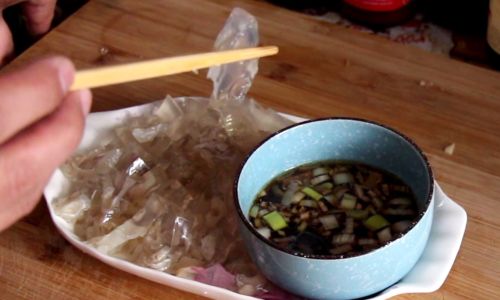
- Once the skin is tender, turn off the heat and let the mixture cool slightly.
- Line a colander with cheesecloth or a fine-mesh sieve and place it over a large mixing bowl. Carefully pour the contents of the pot through the lined colander, allowing the liquid to drain while retaining any solid pieces.
- Discard the solid pieces and let the liquid sit undisturbed for a few minutes to allow any remaining impurities to settle at the bottom.
- Gently pour the clear liquid into a clean pot, avoiding the sediment at the bottom. Taste and adjust the seasoning if necessary, adding a pinch of salt if desired.
Section 2: Setting the Jelly
-
Pouring into Containers:
- Choose containers that are suitable for chilling and serving the jelly. Glass dishes or molds work well, as they allow you to see the beautiful clarity of the jelly.
- Pour the strained liquid into the chosen containers, filling them to the desired level.
-
Chilling the Jelly:
- Place the containers in the refrigerator and let them chill for at least 4-6 hours, or until the jelly is fully set. For best results, overnight chilling is recommended.
- Avoid moving or disturbing the containers while the jelly is setting, as this can cause imperfections.
Section 3: Serving the Crystal-Clear Pork Skin Jelly
-
Unmolding the Jelly:
- Once the jelly is fully set, carefully remove it from the refrigerator.
- Run a knife around the edges of the container to loosen the jelly. Invert the container onto a serving plate and gently tap the bottom to release the jelly.
-
Slicing and Presenting:
- Use a sharp knife to slice the jelly into thin, even pieces. The clearer the jelly, the more impressive the presentation.
- Arrange the slices on a serving plate, overlapping them slightly for a visually appealing effect.
-
Garnishing and Serving:
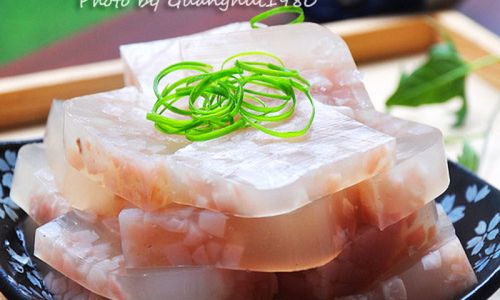
- Garnish the jelly with chopped green onions, a sprinkle of sesame seeds, or a drizzle of soy sauce and vinegar.
- Serve the jelly chilled as a standalone appetizer or as part of a larger meal. It pairs well with rice wine, beer, or a light white wine.
Conclusion
Making crystal-clear pork skin jelly is a labor of love that rewards the cook with a beautiful, delicious dish. By following the steps outlined in this guide, you can transform simple pork skin into a culinary masterpiece that is sure to impress your friends and family. Remember, patience and attention to detail are key to achieving the perfect clarity and texture. Enjoy the process and savor the fruits of your labor with every bite.
Troubleshooting Tips
- Cloudy Jelly: If your jelly turns out cloudy, it may be due to residual fat, impurities, or vigorous boiling. Ensure you meticulously remove all fat, skim off foam during simmering, and avoid vigorous boiling.
- Weak Gelatin: If the jelly doesn’t set properly, it may be because not enough gelatin was extracted. Try simmering the skin for a longer period or using a higher ratio of skin to water.
- Strong Pork Odor: If the jelly has a strong pork odor, it may be due to not simmering the skin long enough to cook off the impurities. Ensure you simmer the skin gently for at least 2-3 hours.
Creative Variations
- Infused Flavors: Experiment with different herbs and spices, such as rosemary, thyme, or bay leaves, to infuse the jelly with unique flavors.
- Layered Jelly: Create layered jelly by adding different ingredients, such as shredded vegetables or fruits, to each layer before chilling.
- Savory Additions: For a savory twist, incorporate diced ham, shrimp, or mushrooms into the jelly before setting.
With these tips and variations, you can elevate your pork skin jelly from a traditional dish to a culinary art form. Enjoy the journey of discovery and creation in the kitchen, and let your crystal-clear pork skin jelly be a testament to your culinary prowess.
0 comments