Introduction
Persimmons, with their vibrant orange hue and sweet, tangy flavor, are a delightful fruit enjoyed across various cultures. While many are familiar with the soft, pulpy texture of ripe persimmons, a lesser-known treat is the crispy persimmon—a delightful snack that combines the natural sweetness of the fruit with a crunchy, delightful texture. Making crispy persimmons at home is not only a fun and rewarding culinary project but also a way to preserve the harvest and enjoy persimmons year-round.
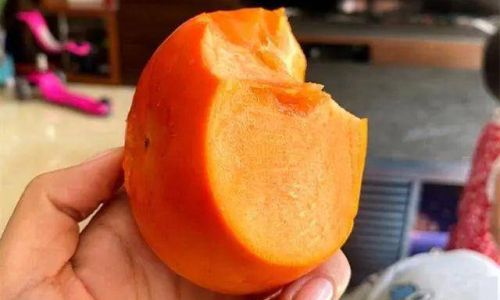
In this comprehensive guide, we’ll walk you through the process of making crispy persimmons, from selecting the right fruit to achieving the perfect crunch. Whether you’re a seasoned chef or a home cook eager to try something new, this guide will provide you with all the necessary information and tips to succeed.
Chapter 1: Understanding Persimmons
Before diving into the recipe, it’s essential to understand the basics of persimmons. There are two main types of persimmons: astringent and non-astringent. Astringent persimmons, such as the Hachiya variety, are tart and tannic when unripe and require full ripening to become edible. Non-astringent persimmons, like the Fuyu variety, are sweet and non-tannic even when unripe, making them ideal for eating fresh or cooking.
For making crispy persimmons, non-astringent varieties are preferred because they are less likely to develop an unpleasant taste during the drying process. However, with the right technique, you can still work with astringent varieties, ensuring they are fully ripe before starting the preparation.
Chapter 2: Selecting the Right Persimmons
Choosing the right persimmons is crucial for making successful crispy persimmons. Here are some tips to help you select the best fruit:
-
Ripeness: Ensure the persimmons are fully ripe. They should be soft to the touch but not overly mushy. For non-astringent varieties, they can be slightly firm when ripe.
-
Color: Look for persimmons with a vibrant orange or red hue. While some varieties may have different colors, they should be evenly colored with no green patches.
-
Shape and Size: Choose persimmons that are relatively uniform in shape and size. This will make slicing and drying more consistent.
-
Texture: Avoid persimmons with bruises, cracks, or soft spots. These imperfections can affect the final texture and taste of your crispy persimmons.
-
Freshness: Buy persimmons as close to your preparation date as possible. Fresh fruit will yield the best results.
Chapter 3: Preparing the Persimmons
Once you have selected the perfect persimmons, it’s time to prepare them for the drying process. Here’s how to do it:
-
Washing: Rinse the persimmons under cold running water to remove any dirt or debris. Pat them dry using a clean kitchen towel or paper towels.
-
Peeling: Peel the persimmons using a sharp knife or vegetable peeler. Be careful to remove all the skin and any tough spots or blemishes.
-
Slicing: Slice the peeled persimmons into thin, uniform pieces. The thickness of the slices will affect the drying time, so aim for slices that are about 1/8 to 1/4 inch thick. You can use a mandoline or a sharp knife to achieve consistent slicing.
-
Seeding: If the persimmons have seeds, remove them carefully. Some varieties are seedless, so this step may not be necessary.
-
Soaking (Optional): Some recipes recommend soaking the sliced persimmons in a lemon water solution to prevent browning. While this is optional, it can help maintain the vibrant color of your crispy persimmons. Mix 1 tablespoon of lemon juice with 1 cup of water and soak the slices for about 10 minutes, then pat them dry.
Chapter 4: Drying the Persimmons
There are several methods to dry persimmons for making crispy treats. Each method has its own set of pros and cons, so choose the one that best suits your needs and equipment.
Method 1: Sun-Drying
Sun-drying is a traditional method that uses natural sunlight to dry the fruit. Here’s how to do it:
-
Preparation: Lay the sliced persimmons on clean, dry baking sheets or drying racks. Ensure they are not overlapping to allow for even drying.
-
Positioning: Place the baking sheets or racks in a sunny, well-ventilated area. Avoid direct sunlight for extended periods, as this can overheat the fruit.
-
Covering: If you live in an area with high humidity or unpredictable weather, consider covering the drying fruit with cheesecloth or a fine mesh net to protect it from insects and debris while still allowing airflow.
-
Duration: Sun-drying can take several days to a week, depending on the weather and the thickness of the slices. Check the persimmons daily and flip them over to ensure even drying.
Method 2: Oven-Drying
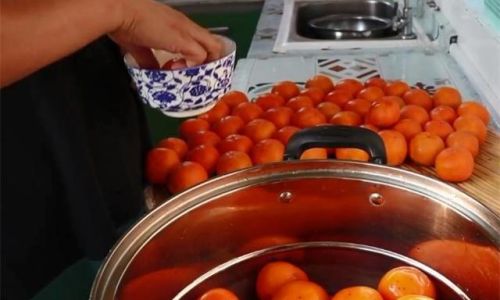
Oven-drying is a faster method that uses your oven’s low heat setting to dry the fruit. Here’s how to do it:
-
Preheat: Preheat your oven to its lowest setting, usually around 150°F (65°C). Some ovens have a specific “dehydrate” setting that works well for this purpose.
-
Preparation: Line baking sheets with parchment paper or silicone baking mats. Arrange the sliced persimmons in a single layer, ensuring they are not touching.
-
Drying: Place the baking sheets in the oven and let the persimmons dry for several hours, usually between 4 to 8 hours, depending on the thickness and your oven’s efficiency. Check the persimmons periodically and rotate the baking sheets for even drying.
-
Finishing: Once the persimmons are dry and slightly translucent, remove them from the oven and let them cool completely on the baking sheets.
Method 3: Food Dehydrator
Using a food dehydrator is the most efficient and controlled method for drying persimmons. Here’s how to do it:
-
Preparation: Arrange the sliced persimmons on the dehydrator trays in a single layer, ensuring they are not overlapping.
-
Setting: Set your food dehydrator to a temperature between 125°F to 135°F (52°C to 57°C). This temperature range is ideal for drying fruits without cooking them.
-
Drying: Dry the persimmons for about 8 to 12 hours, depending on the thickness and the model of your dehydrator. Check the fruit periodically and rotate the trays for even drying.
-
Finishing: Once the persimmons are dry and slightly translucent, remove them from the dehydrator and let them cool completely.
Chapter 5: Storing Your Crispy Persimmons
Proper storage is key to maintaining the crunchy texture and fresh flavor of your crispy persimmons. Here are some tips for storing them:
-
Airtight Container: Store the dried persimmons in an airtight container, such as a glass jar or airtight plastic container. This will prevent moisture from entering and causing the fruit to soften.
-
Cool, Dark Place: Place the container in a cool, dark place, such as a pantry or cupboard. Avoid storing them in direct sunlight or areas with high humidity.
-
Refrigeration (Optional): For longer storage, you can place the airtight container in the refrigerator. This will help maintain the crispiness for several months.
-
Consumption: Crispy persimmons are best enjoyed within a few months of drying. Over time, they may lose some of their crunchiness, so try to consume them as soon as possible.
Chapter 6: Serving and Enjoying Crispy Persimmons
Crispy persimmons are a versatile snack that can be enjoyed in various ways. Here are some ideas to inspire you:
-
Plain Eating: Enjoy them as a healthy, crunchy snack on their own.
-
Salads: Add them to salads for a sweet and crunchy contrast.
-
Yogurt Parfait: Layer them with yogurt and granola for a nutritious breakfast or dessert.
-
Trail Mix: Incorporate them into trail mix for a hiking or camping trip.
-
Baking: Use them as a topping for baked goods, such as cookies or muffins, for a unique twist.
-
Gift Giving: Package them in attractive jars or bags and give them as gifts to friends and family.
Conclusion
Making crispy persimmons at home is a rewarding culinary project that allows you to enjoy the natural sweetness and crunchy texture of this delightful fruit year-round. By following the steps outlined in this guide


0 comments