Introduction
Okra, also known as lady’s fingers or gumbo, is a versatile vegetable that can be enjoyed in numerous culinary preparations. Its tender pods are packed with nutrients, including vitamins, minerals, and dietary fiber, making it a healthy addition to any meal. One particularly delightful way to enjoy okra is by frying it until it’s crispy and golden brown. Fried okra offers a delightful crunch combined with a slightly slimy texture that is uniquely satisfying.
In this comprehensive guide, we’ll walk you through the process of making crispy fried okra from scratch. We’ll cover everything from selecting the perfect okra pods to achieving the ideal frying temperature. By following these steps, you’ll be able to create a delicious and satisfying dish that’s sure to impress your friends and family.
Section 1: Selecting and Preparing the Okra
1 Choosing Fresh Okra
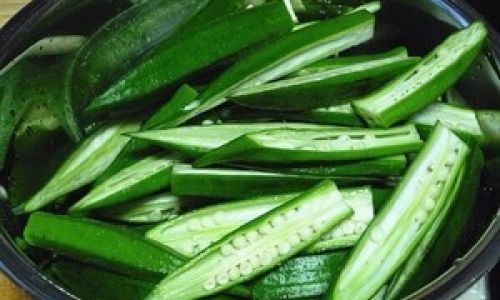
The first step in making fried okra is selecting fresh, high-quality okra pods. Look for pods that are firm, bright green, and free of blemishes or spots. Avoid pods that are wilted, yellowing, or have soft spots, as these indicators suggest that the okra is past its prime.
When purchasing okra, it’s essential to check the freshness of the pods. The best way to do this is by gently squeezing the pod. It should feel firm and slightly springy. If it feels soft or mushy, it’s likely not fresh and should be avoided.
2 Preparing the Okra
Once you’ve selected your okra, it’s time to prepare it for frying. Begin by rinsing the pods under cold running water to remove any dirt or debris. Pat them dry using a clean kitchen towel or paper towels.
Next, trim the stems and tips of the okra pods. This not only removes the tough, fibrous ends but also ensures a more uniform appearance when frying. You can do this using a sharp knife or kitchen scissors.
3 Optional: Removing the Slime
Okra has a natural, slightly slimy texture when cooked. While some people enjoy this characteristic, others prefer to remove it. If you’re one of the latter, there are a few methods you can use to reduce the slime.
One common method is to soak the okra in vinegar for about 15-30 minutes before frying. The acidity of the vinegar helps to break down the slimy substance. Another option is to blanch the okra in boiling water for a minute or two before frying. This method also helps to soften the pods slightly, making them easier to cook through.
However, it’s worth noting that removing the slime can affect the texture and flavor of the final dish. Some people find that the okra becomes less tender and less flavorful when the slime is removed. Ultimately, it’s a matter of personal preference, so experiment to see what you like best.
Section 2: Preparing the Frying Batter
1 Choosing the Right Ingredients
The batter is crucial to achieving crispy fried okra. It should be thick enough to coat the pods evenly but not too thick that it becomes heavy or greasy. Here are the ingredients you’ll need:
- All-purpose flour or cornmeal: Provides structure and crispiness.
- Cornstarch: Helps to create a lighter, crispier coating.
- Baking powder: Adds a bit of lift to the batter, making it airier.
- Salt and pepper: For seasoning.
- Water or milk: To thin the batter to the desired consistency.
You can also add other ingredients to the batter for extra flavor, such as garlic powder, onion powder, paprika, or cayenne pepper.
2 Mixing the Batter
In a large mixing bowl, combine the flour, cornstarch, baking powder, salt, and pepper. Stir well to ensure that all the dry ingredients are evenly distributed.
Next, gradually add water or milk, a little at a time, until the batter reaches a thick, pancake-batter consistency. You want the batter to be thick enough to coat the okra but not too thick that it becomes difficult to spread.
If you’re using cornmeal instead of flour, you may need to adjust the amount of liquid slightly. Cornmeal tends to absorb more liquid than flour, so you may need to add a bit more water or milk to achieve the desired consistency.
Section 3: Frying the Okra
1 Heating the Oil
Before you begin frying, it’s essential to heat the oil to the correct temperature. The ideal frying temperature for okra is between 350°F and 375°F (175°C and 190°C). This temperature range ensures that the okra cooks evenly and becomes crispy without burning.
You can use a deep fryer or a large, heavy-bottomed pot for frying. Fill the pot with enough oil to fully submerge the okra pods. Use a neutral oil with a high smoke point, such as peanut oil, canola oil, or vegetable oil.
To check the oil temperature, use a deep-frying thermometer. Insert the thermometer into the oil, making sure that it’s not touching the bottom or sides of the pot. Adjust the heat as needed to maintain the correct temperature.
2 Dredging the Okra

Once the oil is heated to the correct temperature, it’s time to dredge the okra in the batter. Working with a few pods at a time, dip each one into the batter, ensuring that it’s evenly coated. Shake off any excess batter before placing the pod into the hot oil.
Avoid overcrowding the pot, as this will lower the oil temperature and cause the okra to steam rather than fry. Fry a few pods at a time, depending on the size of your pot.
3 Frying the Okra
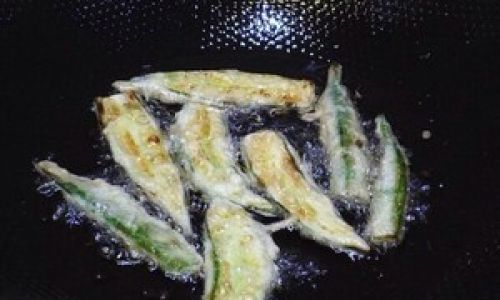
Fry the okra for about 2-3 minutes, or until it’s golden brown and crispy. Use a slotted spoon or frying basket to remove the pods from the oil and place them on a plate lined with paper towels to drain excess oil.
Be careful not to overcook the okra, as it will continue to cook slightly on the plate. If you’re not sure if the okra is done, you can cut one pod open to check the inside. It should be tender and cooked through but not mushy.
4 Serving the Fried Okra
Once all the okra is fried, it’s ready to serve. You can enjoy it as a side dish, appetizer, or even a snack. Sprinkle with additional salt, pepper, or your favorite herbs and spices for extra flavor.
Fried okra is best enjoyed immediately while it’s still hot and crispy. However, if you have leftovers, you can store them in an airtight container in the refrigerator for up to a few days. Reheat them in a 350°F (175°C) oven for about 5-10 minutes, or until they’re heated through and crispy again.
Section 4: Tips and Tricks for Perfect Fried Okra
1 Using a Deep Fryer
If you have a deep fryer, it can make the process of frying okra much easier and more consistent. Deep fryers maintain a constant temperature, which ensures that the okra cooks evenly and becomes crispy without burning.
2 Double-Frying Technique

For even crispier okra, try the double-frying technique. After the initial frying, let the okra cool for a few minutes. Then, increase the oil temperature to 375°F (190°C) and fry the okra for an additional 30-60 seconds. This second frying helps to remove any excess moisture and makes the coating even crispier.
3 Seasoning Variations
Feel free to experiment with different seasoning combinations to find your favorite flavor. Try adding a pinch of cayenne pepper for a bit of heat, or some garlic powder and parsley for a savory twist.
4 Serving Suggestions
Fried okra pairs well with a variety of dishes. Serve it as a side dish to complement grilled meats, seafood, or vegetables. It also makes a great appetizer or snack, especially when served with a dipping sauce like ranch dressing, honey mustard, or spicy mayo.
Conclusion
Making crispy fried okra at home is a rewarding culinary experience that’s well worth the effort. By following the steps outlined in this guide, you’ll be able to create a delicious and satisfying dish that’s sure to impress your friends and family. From selecting fresh okra pods to achieving the perfect frying temperature, every detail counts in making the best fried okra possible.
Remember to experiment with different seasoning combinations and serving suggestions to find your favorite way to enjoy this delicious vegetable. With a bit of practice, you’ll soon be able to make fried okra that’s as good as or even better than what you can find in your favorite restaurants.
Happy frying!

0 comments