Introduction
Fish floss, also known as fish flossing or fish肉松 (a term borrowed from Asian cuisine where meat is shredded into a fluffy texture), is a delightful and nutritious snack that combines the delicate flavor of fish with a light and airy texture. Among the various types of fish used to make fish floss, cod stands out due to its mild taste, firm flesh, and high nutritional value. Cod fish floss is perfect as a standalone snack, a topping for salads, or an ingredient in various dishes.
In this comprehensive guide, we will walk you through the process of making cod fish floss from scratch. We’ll cover everything from selecting the right cod, to preparing the fish, cooking it, shredding it, and finally seasoning it to perfection. By the end of this article, you’ll be equipped with the knowledge and skills to create your own homemade cod fish floss that rivals any store-bought variety.
Section 1: Understanding Cod and Its Nutritional Benefits
Before diving into the recipe, let’s take a closer look at cod and its nutritional benefits. Cod is a type of whitefish that is widely available and enjoyed around the world. It is known for its firm, flaky texture and mild, slightly sweet flavor. Cod is an excellent source of high-quality protein, providing essential amino acids that are crucial for muscle repair and growth.
Moreover, cod is rich in omega-3 fatty acids, which are beneficial for heart health, brain function, and reducing inflammation. It also contains vitamins such as B12, D, and niacin, as well as minerals like selenium, phosphorus, and potassium. Incorporating cod into your diet can help improve overall health and well-being.
When making cod fish floss, you’ll be able to retain many of these nutrients while creating a delicious and versatile snack.
Section 2: Selecting the Right Cod
The first step in making cod fish floss is selecting the right cod. Here are some tips to help you choose the best cod for your recipe:
-
Freshness: Always opt for fresh, high-quality cod. Look for fish that has a firm texture, a clean scent, and bright, moist flesh. Avoid cod that has a slimy texture, an off odor, or discolored flesh.
-
Size: Smaller cod fillets are generally easier to work with when making fish floss. They tend to cook more evenly and are easier to shred into fine strands.
-
Skin and Bones: If possible, choose cod fillets that have been skinned and deboned. This will make the preparation process much simpler and faster.
-
Sustainability: Consider the environmental impact of your choice. Opt for sustainably caught cod to ensure that you’re contributing to the preservation of marine ecosystems.
Section 3: Preparing the Cod
Once you’ve selected your cod, it’s time to prepare it for cooking. Here’s how to do it:
-
Rinse the Cod: Place the cod fillets under cold running water to rinse off any excess blood or impurities. Pat them dry with paper towels to remove any excess moisture.
-
Season the Cod: Lightly season the cod fillets with salt and pepper. You can also add other spices or herbs if you prefer, such as garlic powder, paprika, or dill. However, keep in mind that the final seasoning will be applied after shredding, so don’t go overboard with the initial seasoning.
-
Cut the Cod into Strips: For easier shredding, cut the cod fillets into thin strips, about 1/4 to 1/2 inch wide. This will make it easier to handle during the cooking and shredding processes.
Section 4: Cooking the Cod
Now it’s time to cook the cod. There are several methods you can use, including steaming, boiling, or baking. For this recipe, we’ll focus on steaming, as it tends to produce the best texture for fish floss.
-
Set Up a Steamer: Fill a large pot with water and bring it to a boil. Place a steamer basket inside the pot, making sure it doesn’t touch the boiling water.
-
Steam the Cod: Arrange the cod strips in a single layer in the steamer basket. Cover the pot and steam the cod for about 10-15 minutes, or until it is cooked through and flakes easily with a fork. Be careful not to overcook the cod, as this can make it mushy and difficult to shred.
-
Cool the Cod: Once the cod is cooked, remove it from the steamer and let it cool slightly. This will make it easier to handle during the shredding process.
Section 5: Shredding the Cod
Shredding the cod into fine strands is the key to creating a light and airy fish floss. Here are a few methods you can use:
-
Using Forks: Place a fork in each hand and hold a piece of cooked cod between them. Gently pull the forks apart in opposite directions to shred the cod into fine strands. Repeat this process with the remaining cod strips.
-
Using a Food Processor: Alternatively, you can use a food processor with the shredding attachment to shred the cod. However, be careful not to over-process the fish, as this can result in a paste-like consistency. Pulse the food processor a few times until the cod reaches the desired texture.
-
Using a Cheese Grater: Another option is to use a cheese grater to shred the cod. Hold the cod strips firmly against the grater and gently pull them across the blades to create fine strands.
Regardless of which method you choose, be patient and work in small batches to ensure that the cod is shredded evenly and consistently.
Section 6: Seasoning the Cod Fish Floss
Now that the cod is shredded, it’s time to add some flavor. Here are a few seasoning options to consider:
-
Basic Seasoning: Start with a simple mix of salt, pepper, and a touch of sugar or honey to balance the flavor. This will create a classic, savory fish floss that pairs well with a variety of dishes.
-
Asian-Inspired Seasoning: For a more adventurous flavor, try adding soy sauce, sesame oil, garlic powder, and a pinch of red pepper flakes. This will give your cod fish floss a delicious, tangy, and slightly spicy kick.
-
Herbed Seasoning: If you prefer a more subtle flavor, mix in some fresh or dried herbs such as parsley, dill, or chives. You can also add a squeeze of lemon juice for a bright, refreshing taste.
To apply the seasoning, place the shredded cod in a large bowl and toss it with the desired seasonings until evenly coated. Taste and adjust the seasoning as needed until you reach the perfect flavor balance.
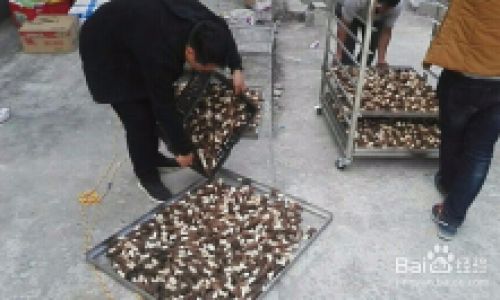
Section 7: Drying the Cod Fish Floss
The final step in making cod fish floss is drying it to remove any excess moisture and create a light, fluffy texture. Here are a few methods you can use:
-
Air-Drying: Spread the seasoned cod floss in a single layer on a baking sheet lined with parchment paper. Place the baking sheet in a well-ventilated area and let the fish floss air-dry for several hours, or until it reaches the desired texture. This method is slow but effective and doesn’t require any additional equipment.
-
Using a Dehydrator: If you have a food dehydrator, you can use it to dry the cod fish floss. Spread the fish floss in a single layer on the dehydrator trays and set the temperature to around 135°F (57°C). Dehydrate for several hours, or until the fish floss is dry and fluffy. This method is faster and more consistent than air-drying.
-
Using an Oven: Alternatively, you can use your oven’s lowest setting (usually around 150-170°F or 65-75°C) to dry the cod fish floss. Spread the fish floss in a single layer on a baking sheet lined with parchment paper and place it in the oven. Prop the oven door open slightly with a wooden spoon to allow moisture to escape. Dry for several hours, or until the fish floss is dry and fluffy. Be careful not to over-dry the fish floss, as this can make it brittle and difficult to eat.
Once the cod fish floss is dry, it’s ready to enjoy. Store it in an airtight container in a cool, dry place for up to a week. You can also freeze it for longer storage.
Section 8: Serving and Enjoying Cod Fish Floss
Cod fish floss is incredibly versatile and can be enjoyed in a variety of ways. Here are a few serving suggestions to inspire you:
-
As a Snack: Enjoy cod fish floss on its own as a light and healthy snack. It’s perfect for satisfying your munchies without the guilt.
-
On Salads: Add a handful of cod fish floss to your favorite salad for a protein-packed and flavorful boost. It pairs well with greens, vegetables, and a light vinaigrette.


0 comments