Introduction
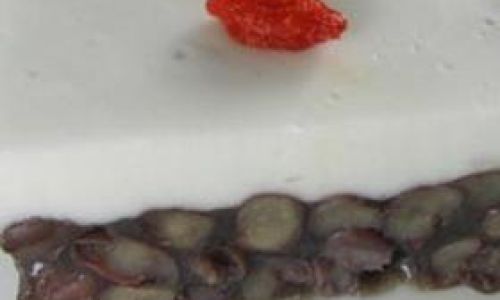
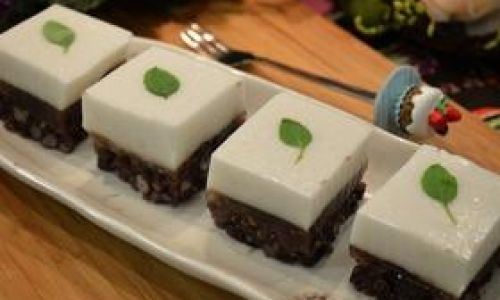
Coconut Red Bean Cake, a delightful dessert that combines the creamy richness of coconut milk with the sweet, earthy flavor of red beans, is a treat enjoyed by many. Whether you’re hosting a gathering, looking for a sweet snack, or simply wanting to indulge in a homemade dessert, this cake offers a perfect blend of textures and flavors. In this comprehensive guide, we’ll walk you through the process of making Coconut Red Bean Cake from scratch, ensuring you achieve a delicious and visually appealing result.
Understanding the Ingredients
Before diving into the recipe, let’s familiarize ourselves with the key ingredients and their roles:
-
Red Beans (Adzuki Beans): These small, dark red beans are a staple in Asian cuisine. They have a slightly sweet flavor and a tender texture when cooked. Red beans are not only nutritious but also add a beautiful color and texture to the cake.
-
Coconut Milk: Full-fat coconut milk provides the creamy, tropical flavor that defines this dessert. It’s essential for achieving the rich, smooth texture of the cake.
-
Sugar: To balance out the natural sweetness of the red beans and enhance the overall flavor of the cake.
-
Gelatin: Acts as a binding agent, helping the cake set properly and hold its shape.
-
Pandan Leaves (Optional): These fragrant leaves add an aromatic, slightly floral flavor that complements the coconut and red beans. They’re often used in Southeast Asian desserts.
-
Rice Flour or Tapioca Starch: These starches help thicken the mixture and ensure a tender, moist cake texture.
-
Water: Used for cooking the red beans and diluting the coconut milk mixture.
Preparing the Red Beans
The first step in making Coconut Red Bean Cake is to prepare the red beans. This involves soaking, cooking, and sweetening them to perfection.
-
Soaking the Beans:
- Rinse the red beans thoroughly under cold running water to remove any dirt or debris.
- Place the beans in a large bowl and cover them with at least 2 inches of water. Soak them overnight or for at least 6-8 hours. Soaking helps soften the beans and reduce cooking time.
-
Cooking the Beans:
- Drain the soaked beans and rinse them again.
- Place the beans in a large pot and cover them with fresh water, about 2 inches above the bean level.
- Bring the water to a boil over medium-high heat, then reduce the heat to low and simmer, uncovered, for about 1-1.5 hours or until the beans are tender. Skim off any foam that rises to the surface during cooking.
- Once the beans are tender, drain them, reserving the cooking liquid if needed.
-
Sweetening the Beans:
- Return the cooked beans to the pot.
- Add sugar to taste (typically around 1/2 to 3/4 cup depending on your preference for sweetness).
- Stir gently to combine and let the beans sit in the sugar syrup for a few minutes to absorb the sweetness.
- If you prefer a thicker bean paste, you can mash the beans lightly with a fork or potato masher. Alternatively, you can blend them to a smooth paste using an immersion blender or food processor.
Making the Coconut Milk Layer
With the red beans prepared, it’s time to focus on the coconut milk layer. This will form the creamy base and topping of the cake.
-
Combining Ingredients:
- In a medium saucepan, combine coconut milk, sugar, and a pinch of salt. Stir well to ensure the sugar is evenly distributed.
- If using pandan leaves, tie them into a knot and add them to the coconut milk mixture. The leaves will infuse the coconut milk with their fragrant aroma.
-
Heating the Mixture:
Place the saucepan over medium heat and cook, stirring occasionally, until the sugar is fully dissolved and the mixture begins to simmer gently. Do not let it boil rapidly as this can cause the coconut milk to separate.
-
Thickening the Mixture:
- In a small bowl, mix a tablespoon of rice flour or tapioca starch with a few tablespoons of cold water to form a slurry.
- Gradually stir the slurry into the simmering coconut milk mixture, stirring constantly to prevent lumps. Continue to cook for another 2-3 minutes, stirring constantly, until the mixture has thickened slightly.
-
Adding Gelatin:
- Remove the saucepan from heat.
- Sprinkle gelatin powder (about 1-2 tablespoons, depending on the package instructions) over the coconut milk mixture and stir gently until the gelatin is fully dissolved. If the mixture is too hot, let it cool slightly before adding the gelatin to prevent it from seizing.
Assembling the Cake
Now that both the red bean and coconut milk components are ready, it’s time to assemble the cake.
-
Preparing the Mold:
- Choose a mold or container for your cake. A square or rectangular pan works well, but you can also use individual molds for bite-sized cakes.
- Lightly grease the mold with cooking oil or line it with parchment paper to ensure easy release.
-
Layering the Cake:
- Spread a thin layer of the sweetened red beans at the bottom of the mold. This will be the first layer of the cake.
- Pour half of the coconut milk mixture over the red bean layer, spreading it gently with a spatula to create an even layer.
- Add another layer of sweetened red beans, followed by the remaining coconut milk mixture.
- Use a chopstick or toothpick to gently swirl the layers together, creating a marbled effect if desired.
-
Setting the Cake:
Allow the cake to cool to room temperature. Once cool, cover the mold with plastic wrap or transfer it to the refrigerator to set for at least 4 hours or overnight. The gelatin in the coconut milk mixture will firm up, creating a sliceable cake.
Serving the Coconut Red Bean Cake
When you’re ready to serve the cake, follow these steps:
-
Unmolding the Cake:
- Run a knife around the edges of the mold to loosen the cake.
- Invert the mold onto a serving plate and gently lift it off. If you used parchment paper, simply lift the paper out along with the cake.
-
Garnishing (Optional):
To enhance the presentation, you can garnish the cake with toasted coconut flakes, shredded coconut, or even a drizzle of honey or caramel sauce.
-
Cutting and Serving:
- Use a sharp knife to cut the cake into slices. Wipe the knife clean between cuts to ensure clean slices.
- Serve the cake chilled, accompanied by a cup of tea or coffee for a delightful afternoon treat.
Storage Tips
- Store any leftover Coconut Red Bean Cake in an airtight container in the refrigerator for up to 3-4 days.
- The cake can also be frozen for longer storage. Wrap it tightly in plastic wrap and then in aluminum foil, and place it in a freezer-safe container. To thaw, place it in the refrigerator overnight and let it come to room temperature before serving.
Conclusion
Making Coconut Red Bean Cake may seem like a multi-step process, but with careful preparation and attention to detail, you’ll be rewarded with a stunning dessert that tastes as good as it looks. The combination of creamy coconut milk and sweet, tender red beans creates a harmonious flavor profile that’s sure to delight your taste buds. Whether you’re serving it at a party, enjoying it as a family treat, or simply indulging in a solo snack, Coconut Red Bean Cake is a delightful addition to your dessert repertoire. Happy baking!




0 comments