Introduction
In the realm of traditional Asian desserts, the coconut milk layered water chestnut cake, commonly known as “Ti Kuih” or “Ti Kway Teow” in various dialects, holds a special place. This delightful treat is characterized by its intricate layers of soft, translucent jelly infused with the rich, creamy flavor of coconut milk, interspersed with delicate layers of water chestnut starch. The result is a mouthwatering dessert that is both visually appealing and a delight to taste.
Originating from the southern provinces of China, particularly Guangdong and Fujian, Ti Kuih has become a beloved snack across Southeast Asia, where it has been adapted and perfected over generations. Whether enjoyed as a sweet end to a meal or as a refreshing afternoon treat, coconut milk layered water chestnut cake never fails to impress with its harmonious blend of textures and flavors.
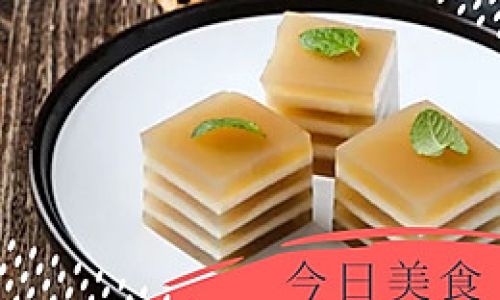
In this article, we will delve into the art of making coconut milk layered water chestnut cake from scratch. We’ll explore the ingredients, tools required, step-by-step instructions, and even share some tips and tricks to ensure your Ti Kuih turns out perfectly every time. So, let’s embark on this culinary journey together and bring this timeless dessert to life in your own kitchen.
Ingredients
Before we begin, let’s gather all the necessary ingredients. Making coconut milk layered water chestnut cake requires precision and attention to detail, but with the right ingredients, the process becomes manageable and rewarding.
-
Water Chestnut Starch (or Water Chestnut Flour): This is the key ingredient that gives the cake its translucent, jelly-like texture. It can be found in Asian grocery stores or online.
-
Coconut Milk: Full-fat coconut milk adds a rich, creamy flavor to each layer. Make sure to use unsweetened coconut milk for better control over the sweetness.
-
Water: Pure, clean water is essential for dissolving the starch and creating the perfect jelly consistency.
-
Sugar: Granulated sugar or castor sugar is used to sweeten the cake. Adjust the amount according to your taste preference.
-
Pandan Leaf (Optional): For an authentic fragrance and subtle green hue, pandan leaves can be infused into the water chestnut starch mixture. If unavailable, pandan essence can be used as a substitute.
-
Salt (Optional): A pinch of salt can enhance the sweetness and bring out the flavors of the coconut milk.
-
Food Coloring (Optional): To add a pop of color to your cake, you can use natural food coloring. However, traditional Ti Kuih is usually a plain white or light green color.
Tools and Equipment
Having the right tools can make the difference between a successful baking session and a frustrating one. Here’s what you’ll need:
-
Measuring Cups and Spoons: For accurately measuring ingredients.
-
Mixing Bowls: Large mixing bowls for combining ingredients and preparing the batter.
-
Whisk: A hand whisk or electric mixer to ensure a smooth, lump-free batter.
-
Steamer: A bamboo or metal steamer is crucial for steaming the cake. Alternatively, you can use a steaming rack placed inside a large pot with boiling water.
-
Square or Rectangular Baking Dish: A heatproof dish with at least 2-inch sides to hold the batter and allow for easy slicing.
-
Spatula: A flexible spatula for spreading the batter evenly in the dish.
-
Parchment Paper: To line the baking dish and prevent sticking.
-
Knife: A sharp knife for slicing the cake into neat squares or rectangles.
Step-by-Step Instructions
Now that we have all the ingredients and tools ready, let’s dive into the recipe.
Step 1: Prepare the Ingredients
-
Measure out all the ingredients and set them aside. This will make the process smoother and ensure you don’t miss any steps.
-
If using pandan leaves, tie them into a knot and soak them in a small bowl of water for about 10 minutes to release their fragrance. Alternatively, use pandan essence according to the package instructions.
Step 2: Make the Coconut Milk Layer
-
In a mixing bowl, combine half of the coconut milk with half of the sugar. Stir until the sugar is fully dissolved.
-
Set this mixture aside. This will be your coconut milk layer.
Step 3: Prepare the Water Chestnut Starch Mixture
-
In a large mixing bowl, combine the water chestnut starch with the remaining coconut milk, water, and sugar. Whisk thoroughly to avoid any lumps.
-
If using pandan leaves or essence, add them to the mixture now and stir well.
-
Taste the mixture and adjust the sweetness if necessary. Remember, the sweetness will intensify as the cake steams.
Step 4: Steam the Cake
-
Line your baking dish with parchment paper, leaving some overlap on the sides for easy removal later.
-
Pour a thin layer (about 1/4 inch) of the water chestnut starch mixture into the dish. Use the spatula to spread it evenly.
-
Place the dish in the steamer and steam for about 3-5 minutes, or until the layer is translucent and set.
-
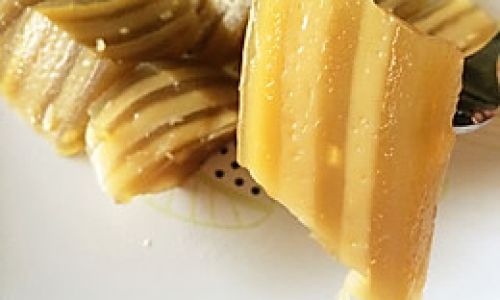
Carefully remove the dish from the steamer and pour a thin layer of the coconut milk mixture over the set layer. Return to the steamer and steam for another 3-5 minutes.
-
Repeat this process, alternating between the water chestnut starch mixture and the coconut milk mixture, until all the batter is used up. The final layer should be a layer of water chestnut starch mixture to give the cake a smooth top.
-
After adding the final layer, steam for an additional 10-15 minutes to ensure the cake is fully cooked through.
Step 5: Cool and Slice
-
Carefully remove the dish from the steamer and let it cool to room temperature. For best results, refrigerate the cake for at least 2 hours to set further and make slicing easier.
-
Once cooled, use the parchment paper to lift the cake out of the dish. Place it on a cutting board.
-
Use a sharp knife to slice the cake into squares or rectangles. Serve chilled for the best texture and flavor.
Tips and Tricks
-
Precision in Measurement: Being precise with your measurements is crucial. Too much water can make the cake too soft, while too much starch can make it tough.
-
Steaming Technique: Ensure the steamer is hot before adding the first layer. This helps the cake set quickly and prevents it from becoming too watery.
-
Layer Thickness: Keep the layers thin and even for a neat, professional look. This also ensures that each bite contains a balance of flavors and textures.
-
Cooling and Refrigeration: Allowing the cake to cool completely before slicing is essential. Refrigeration helps firm up the cake, making it easier to handle and slice.
-
Storage: Store any leftover cake in an airtight container in the refrigerator. It can be enjoyed for up to 3 days.
Conclusion
Making coconut milk layered water chestnut cake may seem like a daunting task, but with the right ingredients, tools, and instructions, it becomes a rewarding culinary adventure. This dessert is not only a treat for the taste buds but also a visual delight, perfect for impressing guests or enjoying as a family treat.
By following the steps outlined in this article, you’ll be able to create a beautiful, delicious coconut milk layered water chestnut cake that brings together the rich flavors of coconut milk and the delicate texture of water chestnut starch. So, why wait? Gather your ingredients, roll up your sleeves, and start making your own Ti Kuih today. Enjoy the process and savor the sweet rewards!
0 comments