Table of content
Cherry blossoms, with their delicate pink petals and fleeting beauty, symbolize new beginnings and the ephemeral nature of life. Capturing this ethereal charm in a culinary creation is a delightful way to preserve the spirit of spring. One such delightful culinary art is making cherry blossom jelly, a visually stunning and delicately flavored dessert that brings the beauty of cherry blossoms to your table. In this article, we’ll walk you through the process of making cherry blossom jelly from scratch, ensuring you create a visually appealing and tastefully delightful treat.
Ingredients:
- Fresh or dried cherry blossoms: Ensure they are edible and free from pesticides. Fresh blossoms are preferable for their vibrant color and fresh aroma, but dried blossoms can also be used if fresh ones are unavailable.
- Water: Purified or distilled water is recommended to avoid any impurities.
- Granulated sugar: To balance the subtle floral taste and add sweetness.
- Gelatin powder: Unflavored gelatin is essential for setting the jelly. Vegetarian or vegan gelatin alternatives are available if preferred.
- Lemon juice: A touch of lemon juice enhances the flavor and helps preserve the jelly’s color.
- Edible food coloring (optional): If using dried blossoms, you might want to add a touch of pink food coloring to boost the jelly’s color.
- Fresh fruit or mint leaves (for garnish): To add a final touch of elegance and freshness.
Equipment:
- Saucepan: For heating the water and sugar mixture.
- Strainer: To remove the blossoms after steeping.
- Measuring cups and spoons: For accurate ingredient measurement.
- Whisk: To ensure the gelatin is fully dissolved.
- Jelly molds or a shallow baking dish: To set the jelly.
- Refrigerator: For chilling the jelly until it sets.
Instructions:
Step 1: Preparation of Cherry Blossoms
-
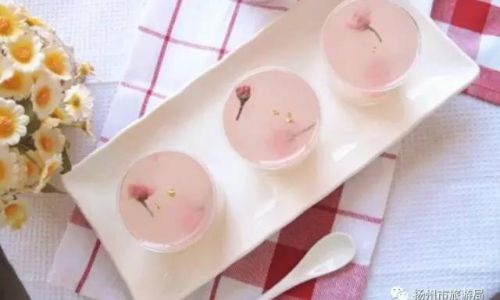
Cleaning the Blossoms: If using fresh blossoms, gently rinse them under cold running water to remove any dirt or debris. Pat them dry using a clean kitchen towel or paper towels. Avoid soaking them as this may cause the petals to lose their color and fragrance.
-
Removing the Stems and Calyx: Carefully remove the stems and calyx (the green part at the base of the blossom) using tweezers or your fingers. This ensures a smoother jelly texture and prevents bitter flavors from the calyx.
Step 2: Making the Jelly Base
-
Measuring Water and Sugar: In a medium saucepan, combine 2 cups of water with 1/2 cup of granulated sugar. Adjust the sweetness to your preference by increasing or decreasing the sugar amount.
-
Heating the Mixture: Place the saucepan over medium heat and stir occasionally until the sugar completely dissolves. Avoid boiling the mixture vigorously as this can cause evaporation and alter the final jelly consistency.
-
Adding the Blossoms: Once the sugar is dissolved, reduce the heat to low and gently add the prepared cherry blossoms. Allow them to steep in the hot syrup for about 10-15 minutes, stirring occasionally. This allows the blossoms to release their fragrance and color into the syrup.

Step 3: Incorporating Gelatin
-
Preparing the Gelatin: While the blossom syrup is still warm, measure out 2 tablespoons of unflavored gelatin powder. Sprinkle the gelatin over 1/4 cup of cold water in a small bowl. Let it sit for a couple of minutes to soften.
-
Dissolving the Gelatin: Once the gelatin has absorbed the water, gently whisk it into the warm blossom syrup. Continue whisking until the gelatin is fully dissolved and the mixture is smooth.
-
Adding Lemon Juice: Stir in 1 teaspoon of fresh lemon juice to enhance the flavor and help preserve the jelly’s color.
Step 4: Filtering and Pouring
-
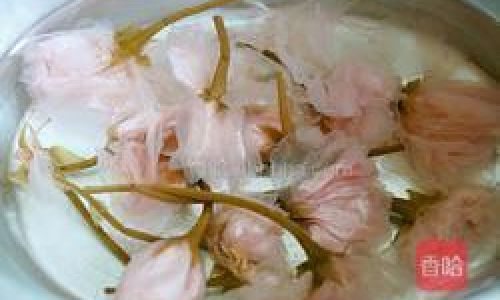
Removing the Blossoms: Strain the mixture through a fine-mesh strainer to remove the blossoms. Press gently on the blossoms with the back of a spoon to extract as much flavor and color as possible, but avoid forcing any bits of petal into the jelly.
-
Adding Food Coloring (if needed): If using dried blossoms and the jelly lacks a vibrant pink hue, add a few drops of edible pink food coloring and stir to combine.
-
Pouring into Molds: Pour the jelly mixture into prepared jelly molds or a shallow baking dish. If using molds, ensure they are clean and slightly greased to ease removal later.
Step 5: Setting and Serving
-
Chilling: Place the molds or dish in the refrigerator and allow the jelly to set for at least 4 hours or overnight. The jelly should be firm to the touch when fully set.
-
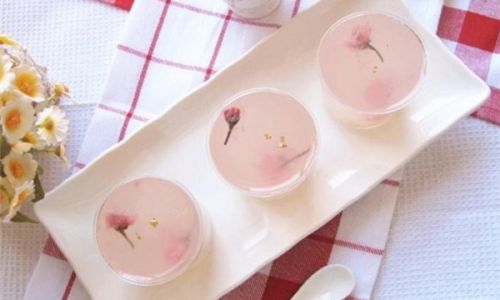
Unmolding (if using molds): Once set, gently run a knife around the edges of the molds to loosen the jelly. Invert the molds onto a serving plate and gently tap to release the jelly.
-
Garnishing: Decorate the jelly with fresh fruit slices, mint leaves, or additional edible cherry blossoms for an elegant presentation.
Tips for Perfect Cherry Blossom Jelly
- Quality Ingredients: Use high-quality, edible cherry blossoms for the best flavor and color.
- Gentle Heating: Avoid boiling the blossom syrup vigorously to prevent the blossoms from losing their delicate aroma and color.
- Chill Thoroughly: Ensure the jelly is fully chilled to set properly. Overnight chilling is recommended for best results.
- Creative Garnishes: Experiment with different garnishes to enhance the jelly’s visual appeal and taste.
By following these steps, you can create a stunning and delicious cherry blossom jelly that captures the essence of spring. Whether served as a dessert or a beautiful centerpiece at a spring gathering, this jelly is sure to impress and delight your guests. Enjoy the process and the beauty of this seasonal treat!
0 comments