Introduction
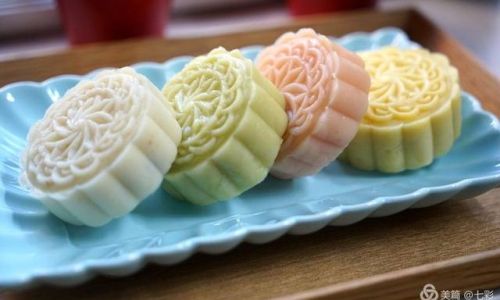
The Mid-Autumn Festival, a time of family reunion and thanksgiving celebrated across China and in Chinese communities worldwide, is incomplete without the traditional mooncakes. While the classic baked mooncakes filled with lotus seed paste or salted egg yolk are a staple, innovative flavors and preparations have emerged in recent years, catering to diverse tastes. Among these modern twists, cheese snow skin mooncakes stand out for their unique combination of Western and Eastern ingredients, as well as their delicate, non-baked exterior. Snow skin mooncakes, also known as ice skin mooncakes, are characterized by their soft, translucent dough that wraps around a variety of fillings. In this article, we will delve into the step-by-step process of making cheese snow skin mooncakes, ensuring that even baking novices can create these delightful treats at home.
Ingredients
Before diving into the recipe, let’s list down the essential ingredients you’ll need:
-
Snow Skin Dough:
- 200g glutinous rice flour
- 100g cornstarch
- 50g powdered sugar
- 240ml boiling water
- 20ml vegetable oil (such as canola or grapeseed oil)
- A few drops of food coloring (optional, for color variation)
-
Cheese Filling:
- 250g cream cheese, softened
- 50g powdered sugar
- 100g mascarpone cheese
- 1 egg yolk
- 1 tbsp cornstarch
- A pinch of salt
-
Additional Tools and Equipment:
- Mixing bowls
- Spatula or wooden spoon
- Steamer
- Steamer tray lined with parchment paper
- Mooncake mold (preferably with patterns suitable for snow skin mooncakes)
- Plastic wrap or cling film
- Measuring cups and spoons
- Scale for accurate measurements
- Cooling rack
Step-by-Step Guide
Prepare the Snow Skin Dough
Begin by preparing the snow skin dough, which forms the base of your mooncakes. In a large mixing bowl, whisk together the glutinous rice flour, cornstarch, and powdered sugar until well combined. Make a well in the center and pour in the boiling water, mixing quickly with a spatula or wooden spoon to avoid lumps. Once the mixture starts to come together, add the vegetable oil and continue mixing until a smooth dough forms. If the dough feels too sticky, you can add a bit more cornstarch. If it’s too dry, add a teaspoon of water.
Optionally, divide the dough into portions and add a few drops of food coloring to each to create vibrant, colorful mooncakes. Knead the dough until the color is evenly distributed. Cover the dough with plastic wrap to prevent it from drying out and set it aside.
Prepare the Cheese Filling
While the dough is resting, let’s move on to the cheese filling. In a separate bowl, beat the softened cream cheese and powdered sugar until smooth and creamy. Add the mascarpone cheese, egg yolk, cornstarch, and a pinch of salt. Continue mixing until the mixture is well combined and free of lumps. You can use an electric mixer for this step to ensure a smooth texture.
Transfer the filling to a parchment-lined tray and spread it into a thin, even layer. This helps in quick cooling and firming up once chilled. Place the tray in the refrigerator for at least an hour or until the filling is firm enough to handle.
Assemble the Mooncakes
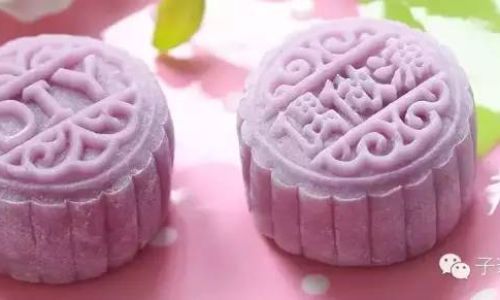
Once the dough and filling are ready, it’s time to assemble the mooncakes. Begin by dividing the dough into small portions, typically around 20-25g each, depending on the size of your mooncake mold. Roll each portion into a smooth ball. Do the same with the chilled cheese filling, aiming for portions slightly smaller than the dough balls to ensure they can be fully enclosed.
To wrap the filling, flatten a dough ball in your palm and place a filling ball in the center. Gently pull the edges of the dough up around the filling, using your other hand to help seal and shape it into a smooth ball without any cracks or gaps. Lightly dust your hands with cornstarch if the dough becomes too sticky.
Shape the Mooncakes
Lightly dust the mooncake mold with cornstarch to prevent sticking. Place a wrapped dough ball into the mold, pressing gently but firmly to ensure the dough fills all corners of the mold. Carefully tap the mold on your work surface to release the mooncake. Repeat this process with the remaining dough and filling portions.
Steam the Mooncakes
Arrange the shaped mooncakes on the steamer tray lined with parchment paper, ensuring they are not too crowded to allow for steam circulation. Cover the steamer and bring the water to a boil. Once boiling, reduce the heat to medium-low and steam the mooncakes for about 15-20 minutes. The exact timing may vary depending on the size of your mooncakes, so keep an eye on them to avoid overcooking.
Cool and Serve
Once steamed, remove the mooncakes from the steamer and let them cool on a cooling rack. As they cool, the dough will firm up and develop a slightly translucent appearance. You can dust them lightly with powdered sugar for an extra touch of elegance.
Storage and Serving
Cheese snow skin mooncakes are best enjoyed at room temperature or slightly chilled. Store them in an airtight container in the refrigerator for up to 3 days. Before serving, let them sit at room temperature for about 10-15 minutes to soften slightly.
Conclusion
Making cheese snow skin mooncakes may seem like a daunting task at first, but with this detailed guide, you’ll find it’s a rewarding and enjoyable process. These mooncakes not only bring a delightful fusion of flavors to your Mid-Autumn Festival celebrations but also offer a beautiful, visually appealing presentation. Whether you’re hosting a family gathering or looking to impress friends with your baking skills, cheese snow skin mooncakes are a perfect choice. So, gather your ingredients, roll up your sleeves, and start creating these delightful treats that are sure to become a new family favorite. Happy baking and a blessed Mid-Autumn Festival!





0 comments