Table of content
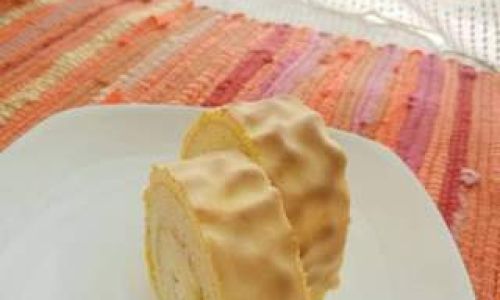
Creating a tiger skin cake roll is an artistic endeavor that combines culinary skills with a keen eye for detail. This dessert, characterized by its striking orange and black stripes reminiscent of a tiger’s coat, is not only visually stunning but also delightfully delicious. Whether you’re a seasoned baker or a novice in the kitchen, this guide will walk you through the process of making a tiger skin cake roll from scratch. By the end, you’ll have a masterpiece that’s sure to impress your friends and family.
Introduction: The Art and Science of Baking a Tiger Skin Cake Roll
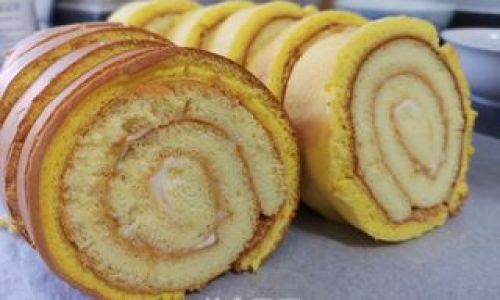
Baking a tiger skin cake roll requires precision, patience, and a bit of creativity. The key to achieving the perfect tiger skin effect lies in the meticulous application of cocoa butter or chocolate ganache to create the illusion of stripes. The cake itself should be moist, fluffy, and easy to roll without cracking. This tutorial will cover everything from preparing the cake batter to rolling and decorating the final product.
Ingredients and Equipment
Before diving into the recipe, ensure you have all the necessary ingredients and equipment ready.

Ingredients:
-
For the Cake:
- 3 large eggs, separated
- 60g granulated sugar (for the egg yolks)
- 30g granulated sugar (for the egg whites)
- 50g cake flour, sifted
- 1/4 tsp cream of tartar (optional, for stabilizing egg whites)
- A pinch of salt
- 2 tbsp vegetable oil or corn oil
- 2 tbsp milk
- 1/2 tsp vanilla extract
-
For the Tiger Skin Stripes:
- 100g dark chocolate, melted
- 50g unsalted butter, softened
- 100g powdered sugar
- A few drops of orange food coloring
- Cocoa powder for dusting
-
For the Filling:
- 200g whipped cream cheese, softened
- 50g powdered sugar
- 1 tsp vanilla extract
- Optional: fresh strawberries or other fruits for extra flavor
Equipment:
- Mixing bowls
- Electric mixer or whisk
- Baking parchment or silicone mat
- Offset spatula
- Rolling pin (optional, for handling the cake once baked)
- Piping bag and small round tip (for the stripes)
- Cooling rack
- Knife for slicing
Step-by-Step Instructions
Preparing the Cake Batter
-
Preheat the Oven: Set your oven to 350°F (175°C) and line a baking tray with parchment paper, ensuring it covers the bottom and sides to make it easier to lift the cake later.
-
Mix the Yolks and Sugar: In a medium bowl, whisk together the egg yolks and 60g of granulated sugar until the mixture is pale yellow and thickened. This should take about 2-3 minutes using an electric mixer.
-
Combine Dry Ingredients: Gradually add the sifted cake flour to the yolk mixture, mixing gently to avoid creating too many air bubbles. Add the vegetable oil, milk, and vanilla extract, and mix until just combined.
-
Whip the Egg Whites: In a clean bowl, whip the egg whites with a pinch of salt and the cream of tartar (if using) until soft peaks form. Gradually add the remaining 30g of granulated sugar, a little at a time, whipping until stiff peaks are achieved.
-
Combine Batters: Gently fold the whipped egg whites into the yolk mixture in three additions, being careful not to deflate the batter.

-
Pour and Bake: Pour the batter onto the prepared baking tray and spread it evenly with an offset spatula. Bake in the preheated oven for about 10-12 minutes, or until the cake is golden brown and springs back to the touch.
Cooling and Preparing the Cake for Rolling
-
Cool the Cake: Remove the cake from the oven and let it cool on the baking tray for a few minutes. Then, transfer it to a cooling rack with the parchment paper still attached. Lightly cover it with a clean kitchen towel to prevent it from drying out.
-
Prepare the Filling: While the cake is cooling, mix the whipped cream cheese, powdered sugar, and vanilla extract until smooth and creamy. Set aside.
Creating the Tiger Skin Stripes
-
Melt the Chocolate: In a microwave-safe bowl or over a double boiler, melt the dark chocolate until smooth. Let it cool slightly.
-
Make the Ganache: In a separate bowl, cream together the softened butter and powdered sugar until light and fluffy. Gradually add the melted chocolate, mixing until well combined. If the mixture is too thick, you can add a tiny bit of milk to reach a spreadable consistency.
-
Color the Ganache: Divide the ganache into two portions. Leave one portion as is for the black stripes. Add a few drops of orange food coloring to the other portion until you achieve a vibrant orange hue.
-
Apply the Stripes: Using a piping bag fitted with a small round tip, pipe thin, alternating black and orange stripes onto the cooled cake. For a more authentic tiger skin effect, vary the thickness and spacing of the stripes.
Rolling the Cake
-
Flip the Cake: Carefully flip the cake over so that the striped side is facing down. Peel off the parchment paper from the bottom.

-
Spread the Filling: Evenly spread the prepared cream cheese filling over the cake, leaving a small border around the edges to prevent it from squeezing out when rolling.
-
Roll the Cake: Starting from one of the short ends, gently roll the cake up using the parchment paper as a guide. Use a rolling pin (if needed) to support the cake as you roll it tightly.
-
Chill the Cake Roll: Wrap the rolled cake tightly in plastic wrap and refrigerate it for at least 30 minutes to set the filling and stripes.
Serving and Decorating
-
Unwrap and Slice: Once chilled, unwrap the cake roll and place it on a serving plate. Using a sharp knife, slice it into desired portions.
-
Final Touches: Dust the top of each slice with a little cocoa powder for added visual appeal. Optionally, garnish with fresh fruit slices or a drizzle of chocolate sauce for an extra touch of elegance.
Conclusion: A Labor of Love
Making a tiger skin cake roll is a labor of love that requires attention to detail and a passion for baking. The result, however, is well worth the effort. This dessert is not only a feast for the eyes but also a treat for the taste buds. Share your creation with loved ones and enjoy the admiration and delight it brings. Happy baking!


0 comments