Introduction
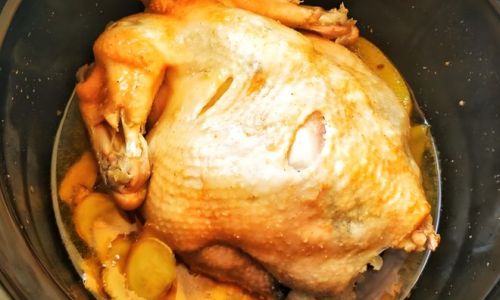
Roast chicken is a timeless dish that has been enjoyed by families and chefs alike for centuries. Its appeal lies in its simplicity, versatility, and the ability to bring out the natural flavors of the chicken. Whether you’re hosting a dinner party, preparing a weeknight meal, or just craving a comforting homestyle dish, a well-made roast chicken can be the highlight of any meal. In this comprehensive guide, we’ll walk you through every step of making a delicious roast chicken, from selecting the perfect bird to achieving that golden, crispy skin and juicy, flavorful meat.

Section 1: Choosing the Right Chicken
The first step in making a great roast chicken is selecting the right bird. Here are some key factors to consider:
-
Size and Type: For most roast chicken recipes, a whole chicken that weighs between 3.5 and 4.5 pounds (1.6 to 2 kilograms) is ideal. This size ensures that the chicken cooks evenly and remains moist. You can choose between free-range, organic, or conventional chickens based on your preferences and budget. Free-range chickens often have a richer flavor due to their diet and exercise.
-
Freshness: Always check the sell-by date and ensure the chicken is fresh. A fresh chicken will have firm, elastic skin and a clean, slightly sweet smell. Avoid chickens with slimy skin, discoloration, or a strong, unpleasant odor.
-
Preparation: Decide whether you want a chicken with the giblets (heart, liver, and gizzard) or without. If you prefer to remove them yourself, make sure the cavity is clean and free of any debris.
Section 2: Preparing the Chicken
Once you’ve selected your chicken, it’s time to prepare it for roasting. Here’s how:

-
Rinse and Pat Dry: Rinse the chicken thoroughly under cold running water to remove any dirt or debris. Pat it dry with paper towels. Drying the chicken is crucial because it helps achieve a crispy skin.
-
Truss the Chicken: Trussing, or tying the legs and wings close to the body, helps the chicken cook more evenly and gives it a neat, professional appearance. Use kitchen twine to tie the legs together and tuck the wingtips under the body.
-
Seasoning: Season the chicken generously with salt and pepper. You can also use a blend of herbs and spices like rosemary, thyme, garlic powder, and paprika for added flavor. Make sure to season both inside and out, including under the skin if possible.
-
Stuffing (Optional): If you plan to stuff the chicken, do so loosely with ingredients like aromatics (onions, carrots, celery), herbs, and breadcrumbs. Avoid overstuffing, as it can make the chicken cook unevenly.
Section 3: Preparing the Oven and Roasting Pan
Before you start roasting, make sure your oven and roasting pan are ready:
-
Preheat the Oven: Preheat your oven to 375°F (190°C). This temperature is ideal for roasting chicken, as it ensures the chicken cooks through without drying out.

-
Choose the Right Pan: Use a roasting pan with a rack if possible. This allows the chicken to cook more evenly, with the breast meat staying moist while the skin crisps up. If you don’t have a rack, you can use a roasting pan lined with parchment paper or aluminum foil for easier cleanup.
Section 4: The Roasting Process
Now it’s time to put your chicken in the oven. Follow these steps for perfect results:
-
Roasting Time: Place the seasoned chicken in the preheated oven. For a 3.5 to 4.5-pound chicken, it will generally take around 1 to 1.5 hours to roast. Use a meat thermometer to check the internal temperature; it should reach 165°F (75°C) in the thickest part of the breast, thigh, and wing joint.
-
Basting (Optional): Basting the chicken during roasting can help keep it moist, but it’s not essential. If you do choose to baste, use melted butter, olive oil, or a mixture of broth and herbs. Baste every 20-30 minutes, being careful not to burn yourself.
-
Check for Doneness: About halfway through roasting, check the chicken’s progress. If the skin is browning too quickly, you can cover it loosely with aluminum foil or parchment paper. Continue roasting until the internal temperature reaches the desired level.
-
Resting: Once the chicken is done, remove it from the oven and let it rest for 15-20 minutes. This allows the juices to redistribute, ensuring that the meat is juicy and flavorful when carved.

Section 5: Serving Your Roast Chicken
After resting, it’s time to carve and serve your delicious roast chicken:
-
Carving: Use a sharp knife to carve the chicken. Start with the legs and thighs, then move to the wings. Finally, slice the breast meat into thin, even pieces. If you stuffed the chicken, remove and serve the stuffing separately.
-
Accompaniments: Roast chicken pairs well with a variety of sides. Consider serving it with roasted vegetables, mashed potatoes, or a fresh green salad. Gravy made from the chicken’s drippings can also elevate the dish.
-
Storage: If you have leftovers, store them in an airtight container in the refrigerator for up to 3-4 days. You can also freeze cooked chicken for longer storage.
Section 6: Tips and Tricks for Perfect Roast Chicken
Here are some additional tips to help you perfect your roast chicken:

-
Brining: For extra juicy chicken, consider brining it overnight in a saltwater solution. This helps to retain moisture during roasting.
-
Airflow: Ensuring good airflow around the chicken helps achieve an even roast. If using a roasting rack, elevate the chicken to allow hot air to circulate underneath.
-
Temperature Control: Use a meat thermometer to avoid overcooking. Overcooked chicken can be dry and flavorless.
-
Experiment with Flavors: Don’t be afraid to experiment with different herbs, spices, and glazes to find your perfect roast chicken recipe.
Conclusion
Making a delicious roast chicken may seem like a daunting task, but with the right techniques and ingredients, it can be a rewarding and enjoyable experience. By following this step-by-step guide, you’ll be able to produce a roast chicken that is sure to impress your family and friends. From selecting the perfect chicken to achieving that crispy skin and juicy meat, every detail counts. So, gather your ingredients, preheat your oven, and get ready to enjoy a timeless classic that never goes out of style. Happy roasting!


0 comments