Introduction
Taro (Colocasia esculenta), often referred to as taro root or dasheen, is a starchy tuberous vegetable native to tropical and subtropical regions of Asia and Oceania. Its versatility in culinary applications makes it a popular ingredient in various dishes worldwide, ranging from savory stews and stir-fries to sweet desserts. However, cooking taro can sometimes pose a challenge, particularly for those unfamiliar with its unique texture and cooking process. One of the most crucial aspects of preparing taro is ensuring it is fully cooked, as raw or partially cooked taro can be difficult to digest and may cause discomfort. This article aims to provide comprehensive guidance on how to determine if taro roots are fully cooked, ensuring a delightful and safe culinary experience.
Understanding Taro’s Texture and Cooking Characteristics
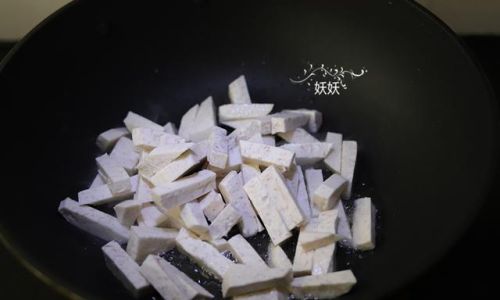
Before diving into the specifics of checking for doneness, it’s essential to understand taro’s unique texture and how it changes during cooking. Fresh taro roots have a firm, almost woody exterior with a creamy, starchy interior. When cooked, the exterior softens, and the interior becomes tender and fluffy, with a slight sweetness that enhances its flavor.
Taro’s starch content is high, which means it can take longer to cook compared to other vegetables. The cooking time varies depending on the size and variety of the taro, as well as the cooking method chosen (boiling, steaming, baking, or roasting). Therefore, it’s crucial to monitor taro closely during the cooking process to avoid overcooking, which can turn the flesh mushy, or undercooking, which can leave it tough and starchy.
Visual Indicators of Doneness
-
Color Change:
One of the most straightforward visual cues is a change in color. Raw taro has a light brown or beige exterior with a pale interior. As it cooks, the exterior may darken slightly, and the interior will take on a more uniform, creamy white appearance. While color change alone isn’t definitive proof of doneness, it’s a good starting point. -
Texture Transformation:
The most reliable visual indicator is the texture. When pierced with a fork or a sharp knife, fully cooked taro should offer little resistance and glide in smoothly. If the utensil meets with any firmness or resistance, the taro likely needs more cooking time.
Tactile Indicators of Doneness
-
Fork or Knife Test:
The classic fork or knife test is particularly effective for taro. Insert a fork or sharp knife into the thickest part of the taro. If it glides in easily and the flesh feels soft and fluffy, the taro is likely cooked. Conversely, if the utensil meets with resistance or the flesh feels grainy, continue cooking. -
Pressure Test:
Another tactile method is to gently press on the cooked taro with your fingers (after allowing it to cool slightly to avoid burns). Fully cooked taro should yield easily to gentle pressure without feeling firm or springy.
Thermal Indicators of Doneness
- Internal Temperature:
While not commonly used for vegetables, checking the internal temperature of taro can be helpful, especially when baking or roasting. Use a food thermometer to insert into the center of the largest piece. Fully cooked taro should reach an internal temperature of around 200-210°F (93-99°C). However, note that this method is less reliable for steaming or boiling, as the water’s temperature affects the reading.
Cooking Methods and Their Impact on Doneness
-
Boiling:
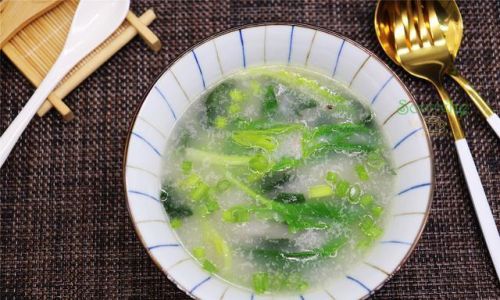
Boiling is one of the simplest methods for cooking taro. Peel the taro first (wearing gloves to avoid skin irritation) and cut into uniform pieces to ensure even cooking. Place in boiling water and cook until tender, usually around 15-20 minutes depending on size. Test for doneness by piercing with a fork. -
Steaming:
Steaming preserves more of taro’s nutrients and flavor. Place whole or peeled and sliced taro in a steamer basket over boiling water. Cover and steam until tender, typically 20-30 minutes. Use the fork test to check for doneness. -
Baking:
Baking taro offers a caramelized exterior and fluffy interior. Wrap whole taro in foil or place peeled and sliced pieces on a baking sheet. Bake at 400°F (200°C) for about 45-60 minutes, depending on size. Use a thermometer to check internal temperature or the fork test for doneness. -
Roasting:
Roasting brings out taro’s natural sweetness and creates a delightful crust. Peel and cut taro into chunks, toss with oil, salt, and pepper, and roast at 400°F (200°C) for 25-35 minutes, stirring occasionally. Test for doneness with a fork.
Safety Considerations
Raw taro contains calcium oxalate crystals, which can irritate the skin and mouth. Always wear gloves when handling raw taro and avoid eating it raw. Cooking breaks down these crystals, making taro safe to consume.
Conclusion
Determining if taro roots are fully cooked involves a combination of visual, tactile, and thermal indicators. By paying attention to color changes, texture transformations, and using the fork or knife test, you can confidently assess doneness. Additionally, understanding the cooking characteristics of different methods (boiling, steaming, baking, roasting) helps ensure even cooking and optimal flavor. Remember, safety is paramount; always cook taro thoroughly to avoid any discomfort. With these guidelines, you can enjoy taro in its most delightful and digestible form, enhancing your culinary repertoire with this versatile and nutritious tuber.
In summary, mastering the art of cooking taro involves attention to detail and an understanding of its unique properties. By carefully monitoring cooking times, using appropriate methods, and employing a variety of doneness checks, you can transform raw taro into a tender, flavorful dish that delights your taste buds and nourishes your body. Happy cooking!
0 comments