Table of content
Introduction
Thorny mulberry wine, a delicate elixir steeped in tradition, offers a unique blend of earthy sweetness and subtle tartness. Derived from the Morus alba species, these berries—often overlooked in favor of their seedless counterparts—carry a distinct flavor profile that intensifies when fermented. This guide will walk you through the art of transforming fresh, ripe thorny mulberries into a luxurious homemade wine. From selecting the finest ingredients to mastering the fermentation process, we’ll explore every step to ensure your creation rivals commercial varieties. Whether you’re a seasoned winemaker or a curious novice, this journey promises to deepen your appreciation for nature’s bounty.
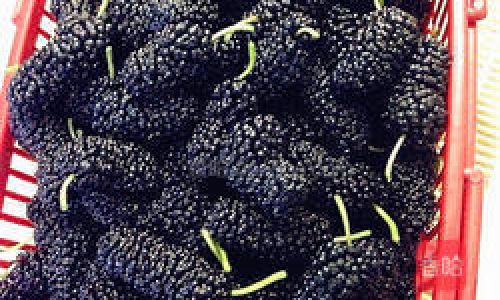
Chapter 1: Understanding Thorny Mulberries
Thorny mulberries, unlike their thornless relatives, grow on shrubs or small trees adorned with sharp spines. Their fruit, though smaller, boasts a concentrated sweetness with hints of floral and herbal undertones. Rich in antioxidants, vitamins, and iron, these berries have been used in traditional medicine and culinary practices for centuries. When fermented, their complexity shines, making them an ideal candidate for winemaking.
Key Characteristics of Thorny Mulberries:
- Flavor Profile: Sweet with a mild tang, reminiscent of blackberry and fig.
- Texture: Juicy with tiny edible seeds that add a slight crunch.
- Ripeness: Opt for fully ripe berries (dark purple to black) for maximum sugar content.
Chapter 2: Gathering Your Ingredients and Tools
Before diving into the winemaking process, assemble the following:
Ingredients
- Fresh Thorny Mulberries: 4 lbs (1.8 kg) for a 1-gallon (3.8 L) batch.
- Granulated Sugar: 2.2 lbs (1 kg) to balance tartness and aid fermentation.
- Wine Yeast: 1 packet (5g) of Lalvin EC-1118 or D47 for reliable fermentation.
- Water: 1 gallon (3.8 L), preferably filtered to avoid chlorine.
- Citric Acid: 1 tsp (5g) to enhance acidity (optional but recommended).
- Pectic Enzyme: ½ tsp (2.5mL) to clarify the wine (optional).
Tools
- Fermentation Vessel: A 2-gallon (7.6 L) glass carboy or food-grade plastic bucket.
- Airlock and Bung: To prevent contamination while allowing gas to escape.
- Straining Bag or Cheesecloth: For separating pulp from juice.
- Hydrometer: To measure sugar levels (specific gravity).
- Siphon Hose: For transferring wine without disturbing sediment.
- Bottles and Corks: 6–8 standard 750mL bottles with corks or screw caps.
Chapter 3: Preparing the Mulberries
Step 1: Harvesting and Cleaning
- Pick Ripe Berries: Choose berries that are plump, dark, and slightly soft. Avoid moldy or shriveled fruit.
- Rinse Gently: Place mulberries in a colander and rinse under cool water. Handle them delicately to avoid bruising.
- Remove Stems and Debris: Pick out any leaves, twigs, or unripe berries.
Step 2: Crushing the Fruit
- Mash Manually: Use a sterile potato masher or your hands to crush the berries in the fermentation vessel. Aim to release juice without breaking the seeds, which can impart bitterness.
- Add Pectic Enzyme: If using, sprinkle it over the mash and stir. This helps break down pectin, leading to a clearer wine.
Chapter 4: Initiating Fermentation
Primary Fermentation (7–10 Days)
-
Prepare the Must:
- In a large pot, combine 1 gallon of water and 1.5 lbs (680g) of sugar. Heat gently until sugar dissolves, then cool to room temperature.
- Pour the sugar water over the crushed mulberries. Add citric acid if desired.
-
Pitch the Yeast:
- Rehydrate the wine yeast in 1/4 cup (60mL) of warm water (104°F/40°C) for 10 minutes.
- Stir the yeast mixture into the must.
-
Cover and Stir:
- Secure a breathable cloth (e.g., cheesecloth) over the vessel to keep pests out while allowing oxygen flow.
- Stir daily with a sanitized spoon to prevent mold and aerate the mixture.
Monitoring Progress:
- Use a hydrometer to track specific gravity. Aim for a starting gravity between 1.090–1.100 (indicating high sugar content).
Chapter 5: Straining and Secondary Fermentation
After 7–10 Days:
-
Strain the Must:
- Line a colander with cheesecloth and pour the mixture through it, separating the liquid (now called “must”) from the pulp.
- Gently squeeze the pulp to extract remaining juice without forcing solids through the cloth.
-
Transfer to Secondary Vessel:
- Pour the strained must into a sanitized carboy, leaving 2–3 inches of headspace to prevent overflow during fermentation.
- Insert an airlock filled with sanitizer solution (e.g., vodka or star san).
Secondary Fermentation (4–6 Weeks):
- Store the carboy in a cool, dark place (60–70°F/15–21°C).
- Fermentation will slow as yeast converts sugar to alcohol. Racking (siphoning) the wine off sediment (lees) every 2–3 weeks clarifies it.
Chapter 6: Aging and Clarification
Aging (3–12 Months):
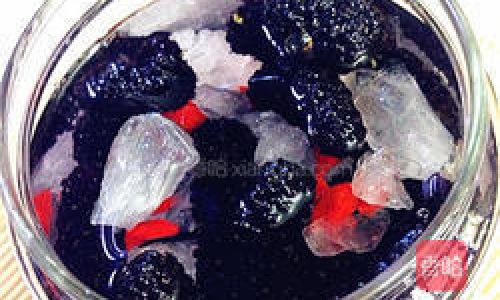
- The longer you age thorny mulberry wine, the smoother its flavor becomes. Taste periodically to gauge readiness.
- For enhanced clarity, add bentonite (a wine fining agent) following the manufacturer’s instructions.
Bottling:
- When the wine is clear and the hydrometer reads below 1.000 (indicating dryness), it’s time to bottle.
- Use a siphon hose to transfer the wine into sterilized bottles, avoiding sediment.
- Cork bottles tightly and store them horizontally in a cool, dark place.
Chapter 7: Serving and Pairing Suggestions
Serving Temperature:
- Serve chilled (55–60°F/13–16°C) to highlight the wine’s delicate flavors.
Food Pairings:
- Cheese: Soft varieties like brie or goat cheese.
- Desserts: Dark chocolate, fruit tarts, or almond-based pastries.
- Savory Dishes: Roasted duck, grilled pork, or herb-crusted salmon.
Chapter 8: Troubleshooting Common Issues
-
Stuck Fermentation:
If fermentation halts prematurely, add a pinch of yeast nutrient and rehydrate fresh yeast.
-
Cloudy Wine:
Ensure proper racking and use fining agents like isinglass or gelatin.
-
Off Flavors:
- Vinegar Notes: Exposure to oxygen or acetobacter bacteria. Sanitize equipment thoroughly.
- Sulfur Smells: Aerate the wine by pouring it between containers.
-
Excessive Sweetness:
Extend fermentation time or blend with a drier wine.
Chapter 9: Exploring Variations
Customize your thorny mulberry wine with these creative twists:
- Spiced Infusion: Add cinnamon sticks, cloves, or star anise during secondary fermentation.
- Fortified Wine: Blend with brandy or vodka for a higher-alcohol dessert wine.
- Fruit Fusion: Combine with blackberries, raspberries, or apples for layered complexity.
Conclusion
Crafting thorny mulberry wine is a labor of love that rewards patience and precision. Each bottle encapsulates the essence of late-summer harvests, offering a taste of terroir with every sip. Whether shared at a gathering or savored solo, this homemade elixir bridges tradition and innovation. As you embark on your winemaking journey, remember that perfection lies not in flawless execution but in the joy of creation. Cheers to preserving nature’s sweetness, one batch at a time!
Final Tips:
- Label bottles with the date and ingredients for future reference.
- Join online winemaking communities to exchange tips and troubleshoot.
- Experiment responsibly—alcohol content typically ranges from 12–14% ABV.
With dedication and curiosity, your thorny mulberry wine will evolve into a cherished staple of your cellar. Here’s to the alchemy of fruit, time, and artistry! 🍇✨




0 comments