Introduction
Cooking rice porridge, also known as congee or jook in various cultures, is a timeless culinary art that transcends borders and cuisines. From the creamy, thick porridges of East Asia to the hearty, comforting congees of Southeast Asia, this dish embodies warmth, nourishment, and simplicity. While traditional methods often involve stovetop cooking with constant stirring and vigilance, modern technology has introduced a more convenient alternative: using an electric rice cooker.
An electric rice cooker, with its automated functions and consistent heat distribution, simplifies the process of making rice porridge. Whether you’re a seasoned chef or a kitchen novice, mastering the art of cooking porridge in an electric rice cooker can elevate your culinary repertoire and provide a nutritious, satisfying meal any time of the day. This guide will walk you through the step-by-step process, offering tips and tricks to ensure your porridge is both delicious and perfectly cooked.

Understanding Your Electric Rice Cooker
Before diving into the recipe, it’s crucial to familiarize yourself with the basic functions of your electric rice cooker. While models may vary, most electric rice cookers share common features:
- Inner Pot: This is where the rice and water (or other ingredients) are placed. It’s typically made of non-stick material for easy cleaning.
- Lid: The lid seals in heat and moisture, ensuring even cooking. Some lids have a steam vent to release excess steam.
- Control Panel: This area includes buttons or dials for selecting cooking modes, adjusting settings, and indicating when the cooking process is complete.
- Heating Element: Located at the bottom, this component generates the heat needed to cook the rice.
- Warming Function: Once cooking is done, many rice cookers automatically switch to a warming mode to keep the food at a safe, edible temperature.
Choosing the Right Ingredients
The quality of your porridge largely depends on the ingredients you use. Here are some key considerations:
- Rice: Short-grain rice, such as Japanese or Korean rice, is ideal for porridge because it produces a creamy, sticky texture. However, medium-grain or even some long-grain varieties can also be used, though the consistency may differ.
- Water: Purified or filtered water is recommended to avoid impurities that can affect the taste. The ratio of water to rice can vary based on personal preference, but a common starting point is 1 cup of rice to 6-8 cups of water for a thinner porridge, and less water for a thicker consistency.
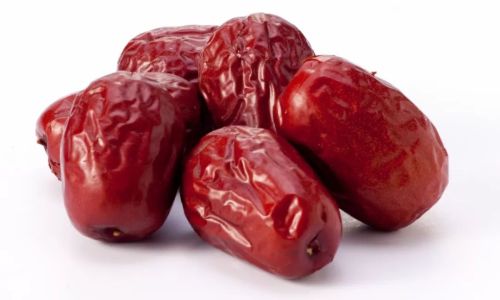
- Seasonings: Salt is a basic seasoning, but you can also add ginger, garlic, or onions for flavor. For a sweeter porridge, consider adding dried fruits, honey, or brown sugar.
- Additional Ingredients: Feel free to incorporate other ingredients like meat, vegetables, or beans to make your porridge more nutritious and flavorful.
Step-by-Step Guide to Cooking Rice Porridge in an Electric Rice Cooker
Step 1: Preparation
- Measure Ingredients: Begin by measuring out your rice and water according to your desired consistency. For a basic porridge, use 1 cup of rice and approximately 6-8 cups of water.
- Rinse the Rice: Place the rice in a fine-mesh strainer and rinse it under cold running water until the water runs clear. This removes excess starch and can help prevent the porridge from becoming too thick or gluey.
- Soak the Rice (Optional): Soaking the rice for 30 minutes to an hour before cooking can help it cook more evenly and quickly. However, this step is optional and depends on your preference and time constraints.
Step 2: Setting Up the Rice Cooker
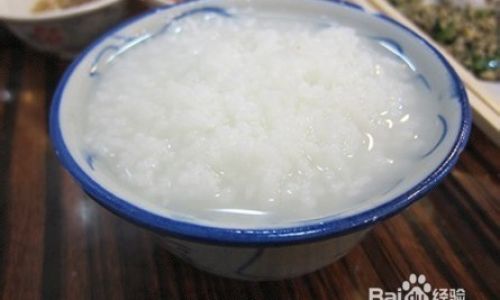
- Add Ingredients to the Inner Pot: Place the rinsed and (optionally soaked) rice into the inner pot of your electric rice cooker. Pour in the measured water.
- Seasoning: Add a pinch of salt or other desired seasonings directly into the pot. If using additional ingredients like ginger or garlic, you can either slice them thinly and add them directly or create a flavor infusion by simmering them in a small amount of water and then pouring the infused liquid into the pot.
- Close the Lid: Securely close the lid of your rice cooker, ensuring it’s properly sealed to prevent steam from escaping.
Step 3: Cooking the Porridge
- Select the Cooking Mode: Depending on your rice cooker’s model, you may have multiple cooking modes to choose from. For porridge, select the “White Rice” or “Normal” setting, as it provides a balanced cooking time and temperature. Some advanced models may even have a specific “Porridge” or “Congee” setting.
- Start Cooking: Press the start button, and your rice cooker will begin the cooking process. The exact cooking time will depend on your rice cooker’s model and the amount of rice and water used, but it typically ranges from 45 minutes to an hour and a half.
- Monitor and Stir (If Needed): While most electric rice cookers are designed to cook rice without stirring, you may need to stir the porridge occasionally, especially if you’re aiming for a thicker consistency. Be cautious of steam when opening the lid.
Step 4: Finishing Touches
- Check Consistency: Once the rice cooker indicates that cooking is complete, open the lid carefully and check the consistency of your porridge. If it’s too thick, you can add more water and let it cook for a few more minutes. If it’s too thin, you can let it simmer with the lid slightly ajar to reduce some of the liquid.
- Flavor Adjustment: Taste your porridge and adjust the seasoning as needed. Add more salt, pepper, or other spices to taste.
- Serving: Ladle the porridge into bowls and serve hot. Garnish with toppings like chopped green onions, sesame seeds, or a drizzle of soy sauce, depending on your preference.
Tips and Tricks for Perfect Porridge
- Experiment with Ingredients: Don’t be afraid to experiment with different types of rice, water ratios, and additional ingredients to find your perfect porridge recipe.
- Use a Timer: Many electric rice cookers have a timer function. You can set it to start cooking at a specific time, making it perfect for busy schedules or meal prep.
- Keep Warm: If you’re not ready to eat immediately, the warming function will keep your porridge at a pleasant temperature until you are.
- Storage: Leftover porridge can be stored in an airtight container in the refrigerator for up to a few days. Reheat gently on the stovetop or in the microwave.
- Clean-Up: Most electric rice cooker inner pots are dishwasher safe, making clean-up a breeze.
Conclusion
Cooking rice porridge in an electric rice cooker is a simple, efficient way to enjoy this timeless dish. By understanding your rice cooker’s functions, choosing quality ingredients, and following the step-by-step guide provided, you can create a nutritious, flavorful porridge that’s perfect for breakfast, lunch, or dinner. Whether you’re looking for a comforting meal after a long day or a hearty breakfast to start your day, an electric rice cooker makes it easy to whip up a batch of delicious porridge anytime you want. Happy cooking!


0 comments