Introduction
Cooking porridge, a simple yet nutritious meal, has been a staple in many cultures for centuries. Whether you call it porridge, oatmeal, or congee, this dish is known for its soothing texture and ability to be paired with a variety of toppings and flavors. While traditional methods of cooking porridge involve stovetops and constant stirring, modern technology has made it easier with the advent of electric rice cookers. These appliances not only simplify the process but also ensure consistent results, making it an ideal choice for busy individuals or those looking to streamline their kitchen routines.
In this comprehensive guide, we will explore how to cook porridge using an electric rice cooker, from selecting the right ingredients to achieving the perfect consistency. We’ll cover various types of porridge, tips for customization, and troubleshooting common issues. By the end, you’ll be equipped with the knowledge to create delicious, homemade porridge effortlessly.
Understanding Your Electric Rice Cooker
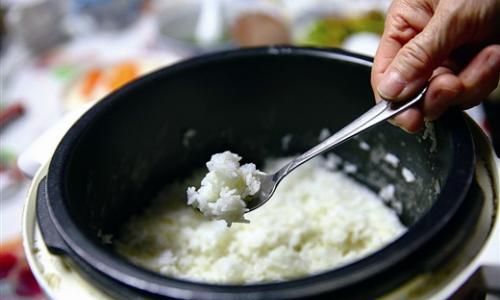
Before diving into the recipe, it’s essential to familiarize yourself with your electric rice cooker. While most models share basic functionalities, there may be slight variations depending on the brand and model. Here are some key features to note:
-
Inner Pot: This is where the rice or porridge ingredients are placed. It’s typically made of non-stick material for easy cleaning.
-
Control Panel: Modern rice cookers often come with digital control panels that allow you to set cooking times, choose different cooking modes, and even keep the food warm after cooking.
-
Steam Vent: This allows steam to escape during the cooking process. Some models have adjustable steam vents or automatic steam release mechanisms.
-
Measuring Cup and Spoon: These are usually included with the rice cooker and are designed to ensure accurate portioning of rice or porridge ingredients.
-
Keep Warm Function: This feature maintains the cooked food at a warm temperature, ideal for when you’re not ready to eat immediately.
-
Lid: The lid locks in place during cooking to prevent steam from escaping prematurely.
Choosing Your Porridge Ingredients
The beauty of porridge lies in its versatility. You can use a variety of grains, liquids, and add-ins to create different flavors and textures. Here are some popular choices:
-
Grains: The most common base for porridge is rice, but you can also use oats, barley, quinoa, or a mix of grains for added nutrition and flavor.
-
Liquids: Water is the simplest and most straightforward choice, but you can also use milk (dairy or non-dairy), broth, or a combination for richer flavor.
-
Add-Ins: Sweeteners like sugar, honey, or maple syrup; spices such as cinnamon, nutmeg, or ginger; fruits like apples, berries, or bananas; and nuts or seeds for added texture and protein.
Basic Steps to Cook Porridge in an Electric Rice Cooker
Now that you have your ingredients and understand your rice cooker, let’s walk through the basic steps to cook porridge.
-
Prepare Your Ingredients: Measure out your grains and liquid according to the desired consistency. A general ratio is 1 part grain to 2-3 parts liquid, but this can be adjusted based on personal preference.
-
Rinse the Grains: If using rice or other grains that may contain excess starch or dirt, rinse them under cold running water until the water runs clear. This helps to prevent the porridge from becoming too thick or gluey.
-
Combine Ingredients in the Inner Pot: Place the rinsed grains and measured liquid into the inner pot of your rice cooker. Add any desired spices or sweeteners at this point.
-
Close the Lid and Select the Setting: Secure the lid and ensure it is properly latched. On your rice cooker’s control panel, select the appropriate setting for cooking porridge or rice. If your rice cooker doesn’t have a specific porridge setting, the ‘white rice’ or ‘normal’ setting usually works well.
-
Start Cooking: Press the start button, and your rice cooker will begin the cooking process. Depending on the model and the amount of porridge, this can take anywhere from 20 to 45 minutes.
-
Check for Consistency: Once the rice cooker switches to the ‘keep warm’ setting, indicating that the cooking cycle is complete, open the lid carefully to avoid steam burns. Check the consistency of the porridge. If it’s too thick, you can add a bit more liquid and let it sit on the ‘keep warm’ setting for a few more minutes. If it’s too thin, you can let it sit uncovered for a bit to thicken up.
-
Serve and Enjoy: Transfer the porridge to bowls and add your favorite toppings such as fruit, nuts, seeds, or a drizzle of cream. Serve hot and enjoy!
Customizing Your Porridge
The possibilities for customizing your porridge are endless. Here are some ideas to inspire your creativity:
-
Savory Versions: For a savory twist, use vegetable or chicken broth instead of water. Add diced vegetables, herbs, and a pinch of salt and pepper. Top with shredded cheese, crispy bacon, or a poached egg.
-
Fruit and Nut Combinations: For a sweet and nutritious breakfast, mix in dried fruits, fresh berries, chopped nuts, and a drizzle of honey or maple syrup.
-
Spicy Kick: Add a pinch of chili flakes, cumin, or curry powder for a spicy and flavorful porridge.
-
Dairy-Free Options: Use almond milk, coconut milk, or oat milk for a dairy-free version. Add chia seeds, flaxseeds, or a scoop of protein powder for added nutrition.
-
Overnight Porridge: For a meal-prep friendly option, make your porridge the night before. Store it in the refrigerator and reheat it in the morning. Adding a bit of milk or cream when reheating can help to restore its creamy texture.
Troubleshooting Common Issues
Even with the convenience of an electric rice cooker, there may be times when your porridge doesn’t turn out quite as expected. Here are some troubleshooting tips:
-
Porridge is Too Thick: If your porridge is too thick, simply add a bit more liquid (water, milk, or broth) and let it sit on the ‘keep warm’ setting for a few minutes until it reaches the desired consistency.
-
Porridge is Too Thin: If your porridge is too thin, you can let it sit uncovered on the ‘keep warm’ setting for a bit longer to allow some of the liquid to evaporate. Alternatively, you can cook it for an additional cycle if your rice cooker allows.
-
Burnt Bottom: This can happen if the porridge is cooked for too long or if there isn’t enough liquid. Make sure to follow the recommended grain-to-liquid ratio and avoid overcooking. If your rice cooker has a ‘quick cook’ or ‘less time’ setting, use it with caution as it may result in burnt porridge.
-
Sticky Inner Pot: To prevent the inner pot from becoming sticky, make sure to use a non-stick model and follow the manufacturer’s instructions for cleaning and maintenance. Soaking the pot in warm, soapy water for a few minutes before scrubbing can also help to loosen any stuck-on food.
Conclusion
Cooking porridge in an electric rice cooker is a simple, efficient, and delicious way to enjoy this nutritious dish. With a few basic ingredients and a bit of creativity, you can customize your porridge to suit your taste preferences and dietary needs. By following the steps outlined in this guide, you’ll be able to achieve perfect porridge every time, whether you’re making it for breakfast, lunch, or dinner. So, why wait? Gather your ingredients, set your rice cooker, and start enjoying the comforting, hearty goodness of homemade porridge today.



0 comments