Baking a cake at home can be an incredibly rewarding experience, offering a delightful blend of creativity, culinary skill, and the satisfaction of enjoying a homemade treat. Whether you’re celebrating a special occasion, indulging in a quiet afternoon with a cup of tea, or simply wanting to impress friends and family, mastering the art of cake baking is a skill worth having. This comprehensive guide is tailored for baking beginners, walking you through the entire process from gathering ingredients to serving a perfectly baked cake. By following these steps, you’ll soon discover that baking a cake at home is not only achievable but also enjoyable.
Understanding the Basics: Ingredients and Equipment
Before diving into the recipe, it’s essential to gather all the necessary ingredients and equipment. The most common type of cake for beginners is a basic vanilla or chocolate sponge cake. Here’s a list of essential items you’ll need:
Ingredients:
- Flour: All-purpose flour is suitable for most cakes. Measure it correctly by spooning it into a dry measuring cup and leveling it off with a knife.
- Sugar: Granulated sugar provides sweetness and helps with browning.
- Butter: Unsalted butter is preferable as it allows you to control the amount of salt in your recipe.
- Eggs: Large eggs are standard. Room-temperature eggs mix more evenly into the batter.
- Milk: Whole milk or buttermilk can be used, depending on the recipe.
- Baking Powder/Soda: These leavening agents help the cake rise.
- Vanilla Extract: For flavor.
- Salt: A pinch to enhance flavors.
- Chocolate (optional): For chocolate cakes, use unsweetened cocoa powder or melted chocolate.
Equipment:
- Mixing Bowls: One large bowl for mixing and one smaller bowl for dry ingredients.
- Sifter or Fine-Mesh Strainer: For aerating flour and cocoa powder.
- Electric Mixer or Whisk: For creaming butter and sugar and mixing the batter.
- Measuring Cups and Spoons: Ensure they are dry for accurate measurements.
- Spatula: For folding in ingredients and scraping the bowl clean.
- Cake Pans: Two 9-inch round pans are typical for layer cakes. Grease and line them with parchment paper for easy release.
- Oven: Preheated to the correct temperature, usually around 350°F (175°C).
- Cooling Rack: For letting the cakes cool after baking.
- Piping Bags and Tips (optional): For frosting and decorating.
Preparing the Ingredients
Start by bringing your butter and eggs to room temperature. This ensures they mix more smoothly into the batter. Cube the butter and let it sit on the counter for about 30 minutes. Place eggs in a bowl of warm water for a few minutes if they’re refrigerated.

Mixing the Dry Ingredients
In a medium bowl, whisk together the flour, baking powder, and a pinch of salt. If making a chocolate cake, sift in the cocoa powder as well. Set this aside.
Creaming the Butter and Sugar
In a large mixing bowl, use an electric mixer to cream the butter until it’s soft and creamy. Gradually add the sugar, beating on medium speed until the mixture is light and fluffy. This process, known as creaming, incorporates air into the butter and sugar, which helps the cake rise and gives it a tender texture.
Adding the Eggs and Vanilla
One at a time, add the eggs to the butter-sugar mixture, beating well after each addition. Make sure to scrape down the sides of the bowl to ensure everything is evenly mixed. Add the vanilla extract and mix until incorporated.
Combining Wet and Dry Ingredients
With the mixer on low speed, add the dry ingredients to the wet ingredients in three parts, alternating with the milk. Start and end with the dry ingredients. Mix until just combined; avoid over-mixing, which can make the cake dense.
Pouring the Batter into the Pans
Divide the batter evenly between the prepared cake pans, spreading it out smoothly with a spatula. Tap the pans lightly on the counter to remove any air bubbles.
Baking the Cakes
Place the pans in the preheated oven, ensuring they are positioned in the center. Bake for 25-30 minutes, or until a toothpick inserted into the center comes out clean. Rotate the pans halfway through baking for even cooking.

Cooling and Removing from Pans
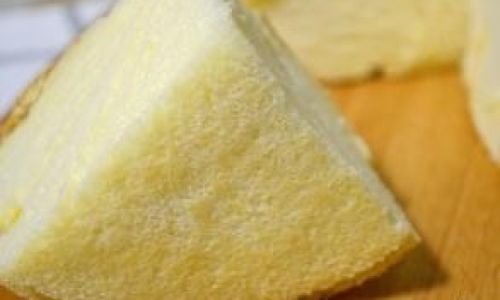
Allow the cakes to cool in the pans for about 10 minutes, then transfer them to a cooling rack to cool completely. Run a knife around the edges to loosen the cakes from the pans and carefully remove them. Peel off the parchment paper.
Frosting and Decorating
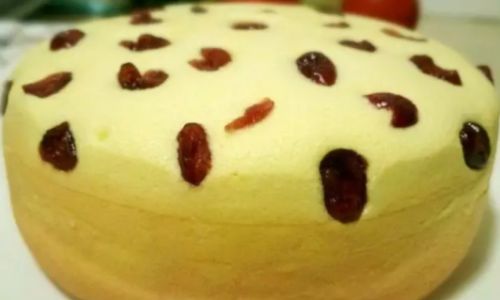
Once the cakes are completely cool, you can proceed with frosting and decorating. Simple buttercream or cream cheese frosting is a great choice for beginners. Spread a layer of frosting between the two cake layers and on top and sides of the cake. For added decoration, use piping bags to create patterns or add sprinkles, fruit, or chocolate shards.
Serving and Enjoying
Cut your homemade cake into slices and serve with your favorite beverage. The joy of sharing a cake you’ve baked yourself is unparalleled. Whether it’s for a special occasion or just a treat for yourself, the effort and love you’ve put into baking will be evident in every bite.
Conclusion
Baking a cake at home might seem daunting at first, but with the right ingredients, equipment, and step-by-step guidance, it becomes a manageable and enjoyable process. Remember, baking is an art that improves with practice. Don’t be discouraged if your first cake doesn’t look perfect; focus on the taste and texture, and over time, your skills will refine. Enjoy the process, embrace the mess, and savor the sweet rewards of your homemade creations. Happy baking!

0 comments