Table of content
Baking a cake at home is a rewarding culinary endeavor that not only satisfies your sweet tooth but also brings joy and a sense of accomplishment. Whether you’re celebrating a birthday, anniversary, or just want to indulge in a homemade treat, baking a cake from scratch allows you to customize it to your taste preferences and dietary needs. This comprehensive guide will walk you through the process, from gathering your ingredients and equipment to mixing, baking, and decorating your masterpiece. By the end, you’ll be equipped with the skills and knowledge to create delicious, professional-quality cakes right in your own kitchen.
Gathering Your Ingredients and Equipment
Before you begin, it’s essential to have all your ingredients and equipment ready. This not only ensures a smooth baking process but also prevents the risk of forgetting something crucial mid-way through.
Ingredients:
- Flour: All-purpose flour is a good starting point for most cakes. For gluten-free options, use a blend specifically designed for baking.
- Sugar: Granulated sugar is standard, but you can also use brown sugar for a richer flavor or powdered sugar for certain frostings.
- Butter or Oil: Unsalted butter adds flavor and moisture; vegetable oil is a neutral alternative.
- Eggs: They provide structure and richness. For vegan cakes, use flax or chia egg replacements.
- Milk: Whole milk, buttermilk, or a non-dairy alternative like almond milk.
- Baking Powder/Soda: These leavening agents help the cake rise.
- Salt: Enhances flavor.
- Vanilla Extract: Adds depth and aroma.
- Other Flavorings: Cocoa powder for chocolate cakes, lemon zest for citrusy notes, or espresso powder for a mocha twist.
Equipment:
- Mixing Bowls: Large and medium-sized bowls for combining ingredients.
- Sifter or Fine-Mesh Strainer: For aerating flour and other dry ingredients.
- Electric Mixer or Whisk: For creaming butter and sugar, and mixing batter.
- Measuring Cups and Spoons: Ensure accuracy in ingredient quantities.
- Rubber Spatula: For scraping the sides of bowls and folding in ingredients gently.
- Baking Pans: Round, square, or rectangular, depending on your cake design. Grease and line with parchment paper for easy release.
- Oven Mitts: To protect your hands when handling hot pans.
- Cooling Racks: For letting the cake cool after baking.
- Piping Bags and Tips: Optional, for decorating with frosting or filling.
- Offset Spatula: For smooth frosting application.
Preparing Your Ingredients
Properly preparing your ingredients is crucial for a successful cake. Measure flour correctly by spooning it into the measuring cup and leveling off with a knife. Avoid packing it down, which can result in too much flour and a dense cake. For butter, make sure it’s softened but not melted, as this ensures it creams smoothly with the sugar. Room temperature ingredients mix better and produce a more even texture.
Mixing the Batter
Creaming the Butter and Sugar:
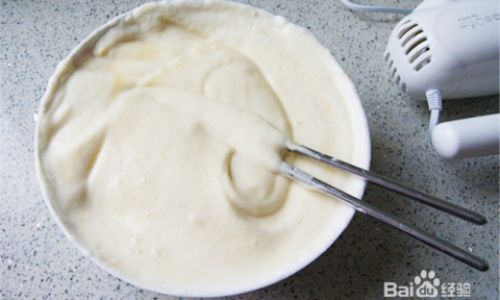
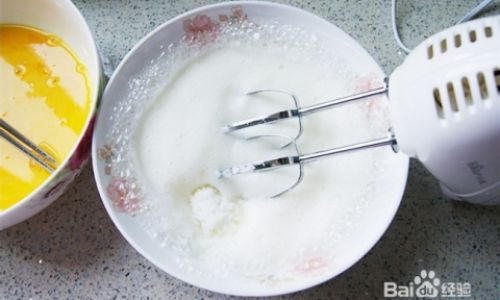
In a large mixing bowl, use an electric mixer to cream together the butter and sugar until light and fluffy. This process, known as creaming, incorporates air into the batter, contributing to the cake’s rise and tender texture. It should take about 3-5 minutes on medium speed.
Adding Eggs and Vanilla:
One at a time, add the eggs, beating well after each addition. Mix in the vanilla extract. Be careful not to over-mix at this stage, as it can cause the cake to be dense.
Combining Dry and Wet Ingredients:
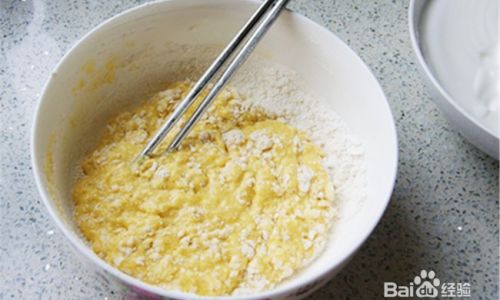
In a separate bowl, whisk together the flour, baking powder, and salt. Gradually add this dry mixture to the wet mixture, alternating with milk in three additions (start and end with dry ingredients). Mix on low speed until just combined to avoid over-mixing.
Pouring and Baking
Pour the batter into the prepared baking pan, spreading it evenly with a spatula. Tap the pan lightly on the counter to remove any air bubbles. Place it in the preheated oven (usually at 350°F or 175°C) and bake according to the recipe’s instructions. Most cakes take between 25-40 minutes, but always check for doneness with a toothpick or cake tester. It should come out clean or with just a few crumbs attached.
Cooling and Removing from the Pan
Once baked, let the cake cool in the pan for about 10-15 minutes. This allows it to set slightly, making it easier to handle. Run a knife around the edges to loosen it, then invert the pan onto a cooling rack lined with parchment paper. Peel off the parchment paper from the bottom of the cake and let it cool completely before frosting.
Frosting and Decorating
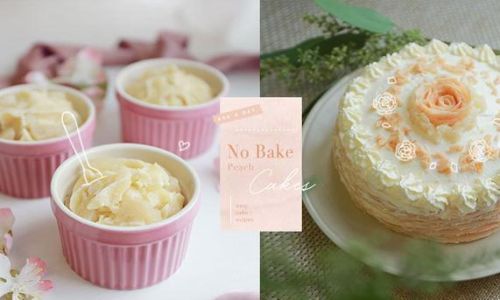
There are countless ways to frost and decorate a cake, from simple buttercream to elaborate fondant designs. Here are some basic techniques:
Buttercream Frosting:
Combine softened butter, powdered sugar, a pinch of salt, and a small amount of milk or heavy cream. Beat until smooth and fluffy, then add food coloring if desired. Spread evenly over the cooled cake using an offset spatula.
Ganache:
Heat heavy cream and pour over chopped chocolate. Let it sit for a minute, then stir until smooth. Pour over the cake and let it set.
Simple Syrup:
For a moist, glossy finish, brush a simple syrup (equal parts water and sugar, heated until dissolved) over the cake layers before frosting.
Decorating Tips:
- Use piping bags and tips for intricate designs.
- Add sprinkles, edible glitter, or fresh fruit for a colorful touch.
- Create a layered cake by stacking cooled layers with frosting in between.
Storing Your Cake
Properly stored, a homemade cake can last several days. Wrap it tightly in plastic wrap or place it in an airtight container. For longer storage, freeze slices individually wrapped in plastic wrap and then in a freezer bag. Thaw overnight in the refrigerator before serving.
Conclusion
Baking a cake at home is a delightful and fulfilling activity that brings families and friends together. With this guide, you now have the tools and knowledge to create beautiful, delicious cakes tailored to your preferences. Remember, baking is an art that improves with practice, so don’t be discouraged if your first attempt doesn’t meet all your expectations. Embrace the process, enjoy the sweet aroma filling your kitchen, and savor the joy of sharing your homemade treats with loved ones. Happy baking!

0 comments