Table of content
Pickling salted garlic, a traditional culinary practice cherished across various cultures, especially in East Asia, offers a delightful blend of tangy, savory, and slightly sweet flavors. This preservation technique not only extends the shelf life of garlic bulbs but also transforms them into a versatile condiment that can elevate the taste of numerous dishes. Authentic pickled salted garlic boasts a deep, rich flavor with a tender texture, making it a staple in many households. In this comprehensive guide, we will delve into the intricacies of how to authentically pickle salted garlic, from selecting the perfect garlic to the final storage process.
Understanding the Basics of Pickling Salted Garlic
Before diving into the recipe, it’s crucial to understand the fundamental principles behind pickling salted garlic. The process primarily involves three key components: garlic, brine (a saltwater solution), and sometimes additional flavorings like vinegar, sugar, or spices. The brine draws out moisture from the garlic while preserving it, creating an environment inhospitable to harmful bacteria. The salt acts as a natural preservative, enhancing flavor and texture.
Step-by-Step Guide to Pickling Salted Garlic
Step 1: Selecting the Right Garlic
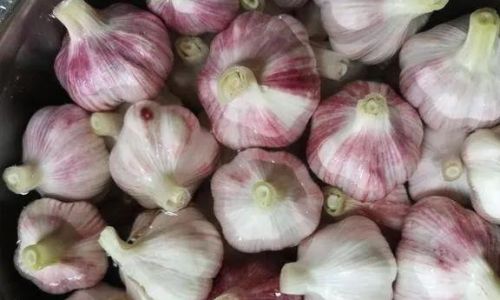
The quality of your garlic bulbs is paramount to achieving authentic pickled salted garlic. Look for firm, tightly closed bulbs with dry, clean outer skin. Avoid bulbs that have soft spots, mold, or are sprouting, as these indicators suggest they are past their prime. Fresh garlic, harvested in the summer or early fall, typically yields the best results.
Varieties such as hardneck and softneck garlic can be used, though their textures and flavors may slightly differ. Hardneck garlic, often more flavorful, is ideal for pickling due to its robust taste. Softneck garlic, which stores well and is more commonly found in supermarkets, is also suitable but may require a bit longer to develop the desired pickled flavor.
Step 2: Preparing the Garlic
-
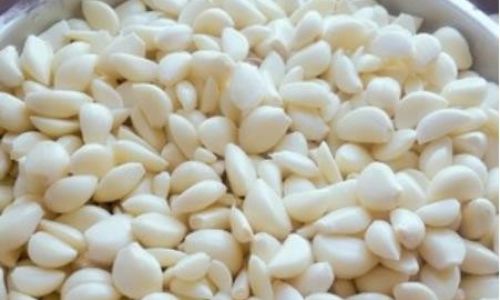
Peeling the Garlic: Begin by peeling the garlic cloves. This can be a tedious task, but soaking the bulbs in warm water for about 15 minutes can loosen the skin, making it easier to remove. Alternatively, you can use a garlic peeler tool or simply crush the bulb lightly with the side of a knife before peeling.
-
Separating and Inspecting: Once peeled, separate the individual cloves and inspect them closely. Discard any damaged or discolored cloves.
-
Trimming: For a more uniform appearance and to ensure even pickling, trim the root end of each clove slightly. This also helps the brine penetrate the garlic more effectively.
Step 3: Preparing the Brine
The brine is the lifeblood of pickled salted garlic, providing the necessary saltiness and preservation qualities. Here’s how to make it:
-
Boiling Water: Start with clean, fresh water. Boil a sufficient amount of water to fully submerge your garlic cloves once they are placed in the pickling jar.
-
Adding Salt: The amount of salt you use will depend on your taste preference and the type of garlic. Generally, a ratio of about 1/4 cup of non-iodized salt per quart of water is a good starting point. Iodized salt can discolor the garlic and alter its flavor, so it’s best to avoid it.
-
Flavor Adjustments: For added depth, you can incorporate other ingredients into your brine. A tablespoon of sugar can balance out the saltiness and add a hint of sweetness. A splash of vinegar, such as rice vinegar or apple cider vinegar, can enhance the tanginess. Spices like whole peppercorns, bay leaves, or mustard seeds can also be added for extra flavor layers.
-
Cooling the Brine: Once the salt, sugar (if using), and any spices have been dissolved in the boiling water, remove the pot from heat and let it cool completely. Hot brine can cook the garlic, resulting in a softer, less desirable texture.
Step 4: Pickling the Garlic
-
Sterilizing the Jar: Use a clean, sterile glass jar with a tight-fitting lid for pickling. You can sterilize the jar by washing it with hot, soapy water, rinsing thoroughly, and then filling it with boiling water for a few minutes before emptying and letting it air dry.
-
Packing the Garlic: Pack the peeled and trimmed garlic cloves tightly into the jar. Packing them closely together helps prevent floating and ensures all cloves are fully submerged in the brine.
-
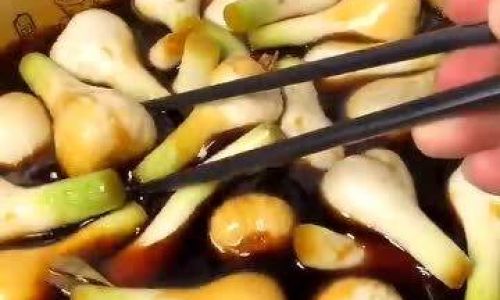
Pouring in the Brine: Carefully pour the cooled brine over the garlic cloves, ensuring they are completely covered. If necessary, use a clean, non-reactive weight (like a small glass filled with water) to keep the garlic submerged.
-
Sealing and Storing: Secure the lid tightly and label the jar with the date. Place the jar in a cool, dark place away from direct sunlight. The ideal temperature for pickling is between 50°F and 70°F (10°C to 21°C).
Step 5: Waiting and Tasting
The pickling process can take anywhere from a few weeks to several months, depending on the desired flavor intensity and texture. Here’s what to expect during this time:
-
Initial Fermentation: Within the first few days to a week, you may notice bubbles or a slight fizzy appearance. This is due to natural fermentation and is completely normal.
-
Flavor Development: Over time, the garlic will gradually absorb the flavors of the brine, becoming more salty, tangy, and, if spices were used, aromatic. The longer it sits, the stronger these flavors will develop.
-
Texture Change: The garlic will soften slightly but should remain firm enough to hold its shape. Over-pickling can result in overly soft or mushy garlic, so it’s important to taste periodically to check for doneness.
Step 6: Storing and Using Your Pickled Salted Garlic
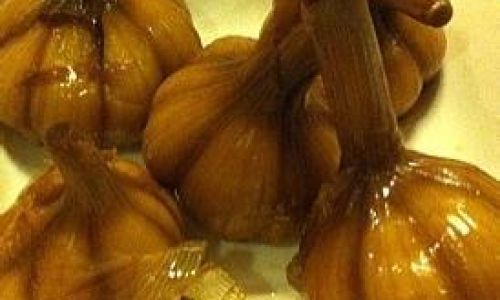
Once you’ve achieved the desired flavor and texture, your pickled salted garlic can be stored in its pickling brine in a cool, dark place for several months to a year. The brine acts as a natural preservative, keeping the garlic fresh and flavorful.
When ready to use, simply remove the desired amount of garlic cloves with a clean utensil to avoid contamination. Rinse off any excess brine if you prefer a less salty taste in your final dish. Pickled salted garlic can be used in a multitude of ways:
- As a Condiment: Serve it alongside grilled meats, roasted vegetables, or as a topping for noodles and rice dishes.
- In Cooking: Chop or mince it and add to stir-fries, marinades, or sauces for an extra burst of flavor.
- In Pickling Other Vegetables: Use it as a flavor base when pickling cucumbers, carrots, or bell peppers.
Conclusion
Authentic pickled salted garlic is a delightful culinary treasure that combines simplicity with profound flavor. By carefully selecting your garlic, preparing the brine with precision, and allowing time for the garlic to fully absorb the pickling flavors, you can create a condiment that enhances the taste of countless dishes. Whether you’re preserving a bounty from your garden or simply looking to add a unique twist to your culinary repertoire, pickling salted garlic is a rewarding endeavor that brings a touch of tradition to your kitchen. Enjoy the process and the delicious results!

0 comments