Introduction
White chocolate, with its velvety texture and buttery sweetness, has long been a beloved treat in desserts, confections, and standalone indulgences. Unlike its dark or milk chocolate counterparts, white chocolate derives its flavor and color from cocoa butter, milk solids, and sugar, offering a milder, creamier taste that appeals to a broad audience. While store-bought options are convenient, crafting white chocolate at home allows for unparalleled control over ingredients, flavors, and texture. This article dives into the art of making white chocolate from scratch, exploring the science behind its creation, essential ingredients, and creative variations to elevate your homemade treats. Whether you’re a seasoned baker or a curious novice, this guide will equip you with the knowledge to produce silky-smooth white chocolate that rivals gourmet brands.
Understanding White Chocolate: Ingredients and Science
Before diving into recipes, it’s crucial to grasp the components that define white chocolate. Unlike dark chocolate, which contains cocoa solids, white chocolate relies on cocoa butter—the fat extracted from cocoa beans—as its base. This gives it a luxurious melt-in-your-mouth quality. The remaining ingredients—sugar, milk powder, and sometimes vanilla—contribute to its sweetness and creaminess. Quality cocoa butter is non-negotiable; it should be food-grade and free from impurities. Avoid using cocoa butter intended for cosmetic purposes, as it may contain additives unsuitable for consumption.
Milk powder, another critical element, comes in various forms: whole, skim, or buttermilk. Whole milk powder lends a richer flavor, while skim milk powder reduces fat content. For a dairy-free alternative, consider using coconut milk powder, though this will alter the taste profile. Sugar acts as both a sweetener and a stabilizer, preventing the cocoa butter from separating. Opt for powdered sugar (confectioner’s sugar) for smoother results, as granulated sugar may leave a gritty texture.
Equipment and Tools
Creating white chocolate at home requires minimal specialized equipment, making it accessible to most kitchens. Here’s a list of essentials:
- Double boiler or heatproof bowl and saucepan: To melt cocoa butter gently.
- Thermometer: A digital or candy thermometer ensures precise temperature control.
- Silicone spatula: For stirring and scraping bowls.
- Food processor or blender: To blend dry ingredients into a fine powder.
- Molds: Silicone molds in various shapes (bars, truffles, or novelty designs) or a parchment-lined baking sheet for free-form chocolate.
- Microwave-safe bowl (optional): For quick, controlled melting if using a microwave.
Step-by-Step Recipe: Classic Homemade White Chocolate
Ingredients
- 200g (7 oz) food-grade cocoa butter
- 1 cup (120g) powdered sugar
- ½ cup (60g) whole milk powder
- 1 teaspoon vanilla extract (or ½ vanilla bean, scraped)
- Pinch of salt (optional, to balance sweetness)
Instructions
-
Prep Work
- Finely chop the cocoa butter into small, uniform pieces to ensure even melting.
- Sift the powdered sugar and milk powder together to eliminate lumps. This step guarantees a silky-smooth texture.
-
Melting the Cocoa Butter
- Double Boiler Method: Fill a saucepan with 2 inches of water and bring it to a simmer. Place a heatproof bowl (or the top of a double boiler) over the saucepan, ensuring the bottom doesn’t touch the water. Add the chopped cocoa butter and stir occasionally until fully melted (85–90°F/29–32°C).
- Microwave Method: Place the cocoa butter in a microwave-safe bowl and heat in 15-second intervals, stirring between each burst, until melted. Avoid overheating, as cocoa butter scorches easily.
-
Incorporating Dry Ingredients
- Once melted, remove the cocoa butter from heat. Gradually whisk in the sifted sugar-milk powder mixture until fully incorporated. The consistency should resemble thick cream.
- Add vanilla extract (or scraped vanilla seeds) and salt (if using). Stir until combined.
-
Tempering (Optional but Recommended)
Tempering ensures the chocolate sets with a glossy finish and a satisfying snap. While optional for home cooks, it elevates the final product.- Seed Method: Add 2–3 small chunks of pre-tempered white chocolate (or high-quality store-bought white chocolate) to the melted mixture. Stir until melted and the temperature drops to 82–84°F (28–29°C).
- Tabling Method: Pour ⅔ of the mixture onto a cool marble slab. Work it with a spatula until it thickens and reaches 81°F (27°C), then reincorporate into the remaining mixture.
-
Molding or Shaping
- Pour the tempered chocolate into molds, tapping gently to release air bubbles.
- Alternatively, spread it onto a parchment-lined baking sheet to form bars or use for dipping fruits or cookies.
-
Cooling and Setting
Allow the chocolate to set at room temperature (65–68°F/18–20°C) for 2–3 hours. Avoid refrigeration, as moisture can cause blooming (white streaks).
Flavor Variations and Add-Ins
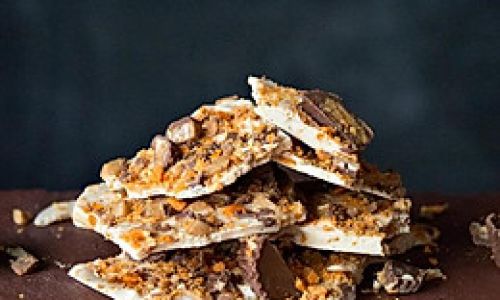
The beauty of homemade white chocolate lies in its versatility. Experiment with these ideas to customize your batches:
-
Fruity Twists:
- Freeze-dried strawberries or raspberries, ground into a powder and mixed into the melted chocolate.
- A teaspoon of citrus zest (orange, lemon) for a refreshing kick.
-
Nutty Notes:
- Toasted almonds, hazelnuts, or pistachios, finely chopped and folded in before molding.
- A splash of almond or hazelnut extract for deeper flavor.
-
Spiced Infusions:
- A pinch of cinnamon, cardamom, or a dash of chai spice blend.
- A few drops of peppermint oil for a holiday-inspired twist.
-
Boozy Additions:
A teaspoon of your favorite liqueur (e.g., Grand Marnier, Bailey’s) added post-tempering.
Troubleshooting Common Issues
-
Separation or Graininess:
This occurs when ingredients aren’t fully emulsified. Ensure the sugar and milk powder are sifted and blended thoroughly before adding to the melted cocoa butter. -
Blooming (White Streaks):
Caused by temperature fluctuations or moisture. Store chocolate in an airtight container in a cool, dry place. -
Overheating:
Cocoa butter scorches easily. Use low heat and stir continuously. If using a microwave, opt for short bursts.
-
Sticky Texture:
Under-tempering or excess moisture. Invest in a thermometer and ensure tools are completely dry.
Creative Uses for Homemade White Chocolate
Beyond snacking, homemade white chocolate serves as a versatile ingredient:
- Dipping Sauce: Melt gently and drizzle over strawberries, pretzels, or marshmallows.
- Baking: Use in cookies, brownies, or blondies for a rich, buttery flavor.
- Ganache: Combine equal parts white chocolate and heavy cream for a decadent filling.
- Gift-Giving: Package bars in decorative boxes tied with ribbon for a personalized present.
Conclusion
Crafting white chocolate at home is a rewarding endeavor that combines culinary creativity with scientific precision. By mastering the balance of cocoa butter, sugar, and milk solids, you unlock the potential to tailor flavors and textures to your liking. Whether you prefer classic simplicity or bold experimental twists, this guide empowers you to produce white chocolate that rivals artisanal brands. Embrace the process, savor the results, and share your creations with those lucky enough to taste them. Happy chocolate-making!




0 comments