Baking a rainbow cake at home is a delightful way to bring vibrant colors and cheerful flavors into your kitchen. This layered masterpiece, with its pastel hues and moist texture, is perfect for birthdays, celebrations, or simply brightening a gray day. While the process may seem intricate, this guide breaks it down into manageable steps, ensuring even novice bakers can achieve stunning results. Let’s dive into the world of buttercream, food coloring, and layered perfection.
Understanding the Basics of Rainbow Cake
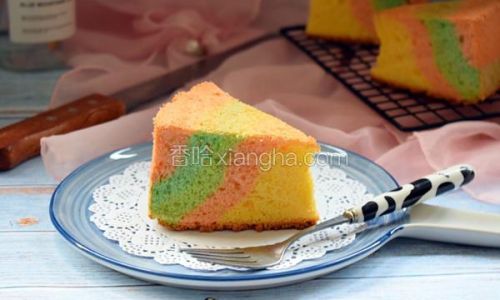
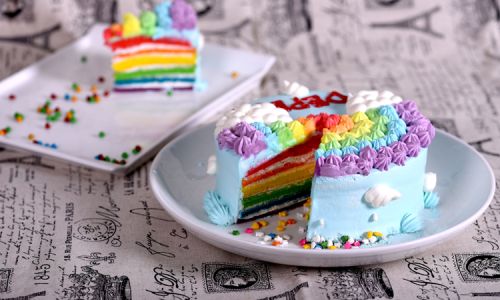
A classic rainbow cake consists of six to eight thin layers, each tinted a different shade of the rainbow spectrum: red, orange, yellow, green, blue, and purple. The layers are stacked with a generous filling of buttercream or whipped cream, creating a towering dessert that slices into a kaleidoscope of color. The key to success lies in patience, precise measurements, and a light touch when assembling the final product.
Ingredients You’ll Need
Before you begin, gather the following ingredients. Quantities are based on a six-layer cake (8-inch rounds):
For the Cake Layers:
- 3½ cups (437g) all-purpose flour
- 4 tsp baking powder
- 1 tsp salt
- 2 cups (400g) granulated sugar
- 1 cup (226g) unsalted butter, softened
- 4 large eggs, room temperature
- 2 tsp vanilla extract
- 1½ cups (360ml) whole milk
- Gel food coloring (red, orange, yellow, green, blue, purple)
For the Buttercream Frosting:
- 2 cups (454g) unsalted butter, softened
- 6 cups (750g) powdered sugar
- 2 tsp vanilla extract
- ¼ cup (60ml) heavy cream
- Pinch of salt
Tools and Equipment:
- Three 8-inch round cake pans (you’ll bake in batches)
- Parchment paper
- Mixing bowls
- Electric stand mixer or hand mixer
- Rubber spatula
- Cooling racks
- Offset spatula
- Piping bag (optional)
Step 1: Preparing the Cake Batter
- Preheat the Oven: Set your oven to 350°F (175°C). Grease three 8-inch cake pans and line them with parchment paper.
- Whisk Dry Ingredients: In a medium bowl, combine the flour, baking powder, and salt. Set aside.
- Cream Butter and Sugar: In a large mixing bowl, beat the softened butter and sugar on medium-high speed until light and fluffy (3–4 minutes). Scrape down the sides of the bowl as needed.
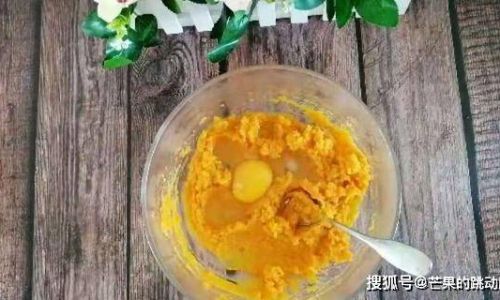
- Add Eggs and Vanilla: Mix in the eggs one at a time, ensuring each is fully incorporated before adding the next. Stir in the vanilla extract.
- Alternate Dry and Wet Ingredients: With the mixer on low speed, add the dry ingredients in three batches, alternating with the milk. Begin and end with the dry mixture. Mix until just combined—overmixing will result in a dense cake.
Step 2: Dividing and Coloring the Batter
The batter will be divided into six portions, each tinted a different rainbow color. Since most home bakers own three cake pans, you’ll bake the layers in two batches.
- Divide the Batter: Pour the plain batter into six small bowls (about 1 cup each).
- Add Food Coloring:
- Red: Use 8–10 drops of red gel coloring.
- Orange: Mix 4 drops red + 4 drops yellow.
- Yellow: Use 6–8 drops yellow.
- Green: Use 6–8 drops green.
- Blue: Use 6–8 drops blue.
- Purple: Mix 4 drops red + 4 drops blue.
Stir each bowl gently until the color is evenly distributed. Avoid overmixing.
Step 3: Baking the Layers
- First Batch: Pour the red, orange, and yellow batters into the prepared pans. Bake for 12–15 minutes, or until a toothpick inserted into the center comes out clean.
- Cool Completely: Let the layers cool in the pans for 10 minutes, then transfer to wire racks to cool fully.
- Second Batch: Repeat the process with the green, blue, and purple batters.
Pro Tip: To prevent the colors from bleeding, ensure each layer is completely cool before stacking.
Step 4: Preparing the Buttercream
A silky-smooth buttercream is essential for holding the layers together and adding a luxurious finish.
- Beat Butter: In a stand mixer fitted with a paddle attachment, beat the softened butter on medium-high speed until pale and creamy (5–6 minutes).
- Add Powdered Sugar: Gradually mix in the powdered sugar on low speed, then increase to medium-high. Scrape down the bowl frequently.
- Flavor and Texture: Mix in the vanilla, heavy cream, and salt. Beat for an additional 3–4 minutes until the frosting is light and airy.
Variation: For a lighter filling, substitute half of the buttercream with stabilized whipped cream.
Step 5: Assembling the Cake
- Level the Layers: Use a serrated knife to trim any domed tops from the cooled cake layers, creating flat surfaces.
- Layering:
- Place the purple layer on a cake board or serving plate. Spread a generous ½-cup of buttercream evenly over the surface.
- Repeat with blue, green, yellow, orange, and red layers, alternating colors.
- After each layer, press gently to ensure adhesion.
- Crumb Coat: Apply a thin layer of buttercream around the sides and top of the cake to seal in crumbs. Chill for 20 minutes.
- Final Frosting: Cover the cake with a thick, even layer of buttercream. Smooth the sides and top with an offset spatula.
Step 6: Decorating Your Rainbow Cake
The beauty of a rainbow cake lies in its simplicity, but you can elevate it with decorative touches:
- Piped Borders: Use a piping bag fitted with a star tip to create swirls around the base and top edge.
- Edible Glitter: Sprinkle shimmering dust or nonpareils for a magical touch.
- Fresh Flowers: Arrange sugar flowers or fresh blooms (ensure they’re food-safe) on top.
- Rainbow Sprinkles: Coat the sides with rainbow jimmies for a textured finish.
Troubleshooting Common Issues
- Bleeding Colors: If the colors smudge, chill the cake between layers for 10 minutes.
- Dry Cake: Overbaking is the culprit. Check doneness 2 minutes early.
- Uneven Layers: Use a kitchen scale to divide the batter equally.
- Lumpy Buttercream: Sift the powdered sugar before mixing.
Serving and Storage
- Serving: Use a sharp knife dipped in hot water for clean slices. Wipe the blade between cuts.
- Storage: Leftovers can be refrigerated for up to 3 days. Bring to room temperature before serving.
Why Gel Food Coloring?
Unlike liquid dyes, gel food coloring won’t thin the batter or alter the cake’s texture. A little goes a long way—start with small amounts and add gradually.
Customization Ideas
- Flavor Variations: Add 1 tsp of lemon zest to the yellow layer, cocoa powder to the purple layer, or almond extract to the buttercream.
- Dietary Adjustments: Substitute gluten-free flour or dairy-free butter for allergies.
- Mini Cakes: Bake the batter in a muffin tin for individual rainbow cupcakes.
The Science Behind a Moist Cake
The combination of butter, sugar, and eggs creates a tender crumb, while the milk adds moisture. Baking powder provides lift without leaving a bitter aftertaste. Avoid opening the oven door during baking to prevent collapse.
Final Thoughts
Baking a rainbow cake is as much an act of love as it is a culinary project. Each layer represents patience, creativity, and the joy of sharing something beautiful with others. Whether you’re celebrating a milestone or simply indulging in a sweet escape, this cake is a reminder that life’s simplest pleasures often shine brightest. So gather your ingredients, tie on an apron, and let the colors of happiness unfold in your kitchen.
Pro Tip: Play upbeat music while baking—it’s a scientific fact that happy tunes improve cake texture. (Okay, maybe not scientific, but it’s worth a try!)
With this guide, you’re equipped to create a rainbow cake that’s as delicious as it is dazzling. Happy baking!


0 comments