Table of content
Hedgehog buns, also known as “hedgehog rolls” or “spiky bread rolls,” are a whimsical and heartwarming addition to any breakfast table, dinner spread, or themed party. These charming pastries, shaped like tiny hedgehogs with chocolate “spikes” and cute faces, have gained popularity for their playful appearance and soft, fluffy texture. While they may look intimidating to make at first glance, this article will demystify the process, breaking it down into simple, manageable steps. By the end, you’ll master the art of creating these edible critters that are as fun to bake as they are to eat.
The Origin and Appeal of Hedgehog Buns
Hedgehog buns originated in Eastern Europe, where bakers began experimenting with creative bread shapes to engage children and add a touch of whimsy to meals. Over time, the recipe spread globally, evolving into a beloved project for home bakers. Their appeal lies in their duality: they’re both a culinary delight and a visual novelty. The spiky exterior, made from chocolate chips or cocoa-dusted dough, contrasts with the soft, sweet bread beneath, creating a texture sensation that delights both kids and adults.

Ingredients You’ll Need
Before diving into the recipe, gather your ingredients. This recipe yields approximately 12 medium-sized hedgehog buns.
For the Dough:
- 500g (4 cups) all-purpose flour (plus extra for dusting)
- 7g (2¼ tsp) active dry yeast
- 60g (¼ cup) granulated sugar
- 1 tsp salt
- 120ml (½ cup) warm milk (lukewarm, around 40°C/105°F)
- 60g (¼ cup) unsalted butter (melted and cooled)
- 2 large eggs (room temperature)
- 120ml (½ cup) warm water
For the Spikes and Decoration:
- 50g (⅓ cup) dark chocolate chips (or chopped dark chocolate)
- 24 sliced almonds (for ears)
- 24 small chocolate chips (for eyes)
- 1 tbsp cocoa powder (optional, for dusting)
Tools Required:
- Mixing bowls
- Electric mixer with dough hook attachment (or by hand)
- Baking tray lined with parchment paper
- Pastry brush
- Plastic wrap
- Small knife or scissors (for shaping)
Step-by-Step Instructions
Activating the Yeast
In a small bowl, combine the warm milk, warm water, and 1 tbsp of sugar. Sprinkle the yeast over the liquid and stir gently. Let it sit for 5–10 minutes until frothy. This step ensures the yeast is active and ready to leaven the dough.
Pro Tip: If the mixture doesn’t froth, your yeast may be expired. Start fresh to avoid dense buns.
Preparing the Dough
In a large mixing bowl, whisk together the flour, remaining sugar, and salt. Create a well in the center and pour in the activated yeast mixture, melted butter, and eggs. Mix with a wooden spoon until a shaggy dough forms.
Kneading the Dough
Transfer the dough to a lightly floured surface. Knead for 8–10 minutes until smooth and elastic. The dough is ready when it springs back when pressed. If using a stand mixer, knead on medium speed for 5–7 minutes.
Pro Tip: Kneading develops gluten, which gives the buns their soft, chewy texture. Don’t rush this step!
First Rise (Proofing)
Place the dough in a lightly greased bowl, cover with plastic wrap, and let it rise in a warm, draft-free area for 1–1.5 hours, or until doubled in size. This process, called proofing, allows the yeast to ferment and create air bubbles.
Pro Tip: Preheat your oven to its lowest setting for 2 minutes, then turn it off. Place the bowl inside to create a cozy proofing environment.
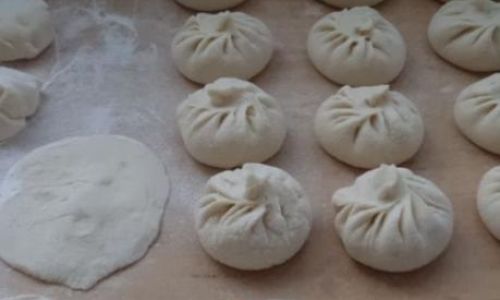
Shaping the Hedgehogs
Once the dough has doubled, punch it down to release air bubbles. Turn it onto a floured surface and divide it into 12 equal pieces (about 75g each).
Shaping Technique:
- Take one piece of dough and roll it into a smooth ball.
- Gently flatten the ball into an oval shape.
- Using a small knife or scissors, make 8–10 small cuts along one half of the oval to create “spikes.” These cuts should be angled slightly upward to mimic hedgehog quills.
- Leave the other half smooth for the face.
Adding Features
- Eyes: Press two small chocolate chips into the smooth half of the dough.
- Ears: Insert two sliced almonds near the top of the face.
- Nose: Use a toothpick to create a small indentation at the tip of the face.
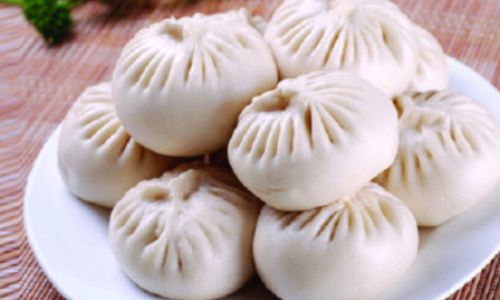
Second Rise
Transfer the shaped hedgehogs to a baking tray lined with parchment paper, spacing them 2 inches apart. Cover loosely with a clean kitchen towel and let them rise for 30–45 minutes, or until puffy.

Baking
Preheat your oven to 180°C (350°F). Bake the buns for 15–18 minutes, or until golden brown. Rotate the tray halfway through for even baking.
Pro Tip: For a shinier finish, brush the buns with an egg wash (1 egg beaten with 1 tbsp water) before baking.
Adding the Spikes
While the buns bake, melt the dark chocolate chips in a microwave-safe bowl in 20-second intervals, stirring until smooth. Once the buns are cool enough to handle, use a spoon or piping bag to drizzle melted chocolate over the “spikes” to enhance their texture.
Optional: Dust the buns lightly with cocoa powder for a more realistic hedgehog color.
Variations and Customization
Hedgehog buns are incredibly versatile. Here are some creative twists:
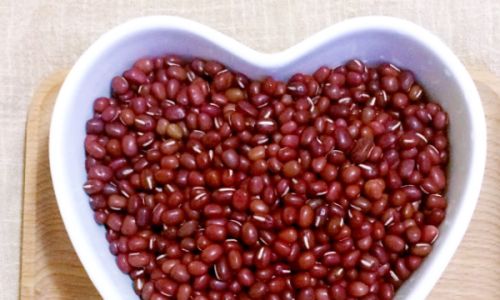
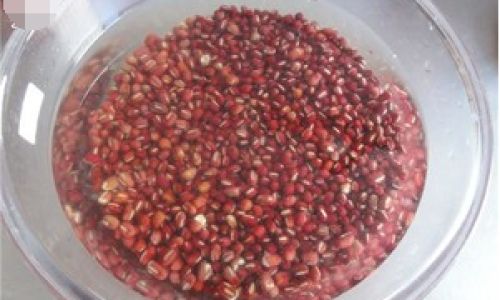
- Sweet Fillings: Stuff the dough with Nutella, red bean paste, or cinnamon sugar before shaping.
- Savory Hedgehogs: Replace sugar with herbs like rosemary or thyme, and fill with cheese or ham.
- Gluten-Free Option: Substitute all-purpose flour with a 1:1 gluten-free baking blend.
- Vegan Version: Use almond milk, coconut oil, and flax eggs (1 tbsp ground flaxseed + 3 tbsp water per egg).
Troubleshooting Common Issues
- Dense Buns: Over-kneading or expired yeast can cause this. Stick to the recommended kneading time and check yeast freshness.
- Spikes Melting: If chocolate spikes soften, chill the buns in the freezer for 10 minutes before serving.
- Uneven Shapes: Use a kitchen scale to weigh dough pieces for uniformity.
Serving and Storage
Hedgehog buns are best enjoyed warm, straight from the oven. They pair wonderfully with butter, jam, or honey. Store leftovers in an airtight container at room temperature for up to 3 days. To revive their softness, microwave for 10–15 seconds or wrap in foil and bake at 150°C (300°F) for 5 minutes.
The Joy of Baking with Creativity
Hedgehog buns are more than just a recipe—they’re an opportunity to unleash your imagination. Involve children in shaping the dough or host a themed baking party. These buns also make charming gifts when packed in a decorative box.
Conclusion
Mastering hedgehog buns is a rewarding journey that combines baking fundamentals with artistic flair. Whether you’re a novice or seasoned baker, this recipe offers endless possibilities for customization. So, preheat your oven, flour your workspace, and let your inner pastry artist shine. Before long, you’ll have a tray of adorable hedgehog buns that are as delightful to behold as they are to devour.
Final Tip: Share your creations on social media with #HedgehogBuns—you might just inspire a new generation of bakers!

0 comments